Last month I bought a set of modern ESP32 boards with four times more memory than the ones I had been using that date from ~2017:
I have a bit of functionality in my MicroPython code where I can trigger the board to update itself remotely by pulling the files down from GitHub, but unfortunately with the overhead of running MicroPython plus my code itself, I only end up with about 80KB or so of free memory after a fresh reboot and so the update-from-GitHub code frequently runs out of memory and I end up needing to update the code by plugging it directly into the computer. (Which in turns means needing to find out a damn Micro USB to USB-C adapter or cable because all my computers are USB-C now.)
I got the indoor ESP32s for the office and lounge room all set up and working fine, but when I got the ones in the back room set up, I realised that they were constantly dropping off the wifi for minutes at a time, or longer. It turns out the wifi signal strength there is very marginal, and I think the sheer compactness of the new boards meant they couldn’t pick hang on to a signal as well as the older boards.
While investigating this, I realised that with my recent upgrade to an iPhone 16 Pro I could take advantage of Ubiquiti’s WiFiman app which lets you generate a map of your wireless signal strength but it will also use the ARKit functionality in newer iPhones to pick up where the walls in your house are and actually generate a rough floor plan! I ran it twice, once for the 2.4GHz and once for the 5GHz network:
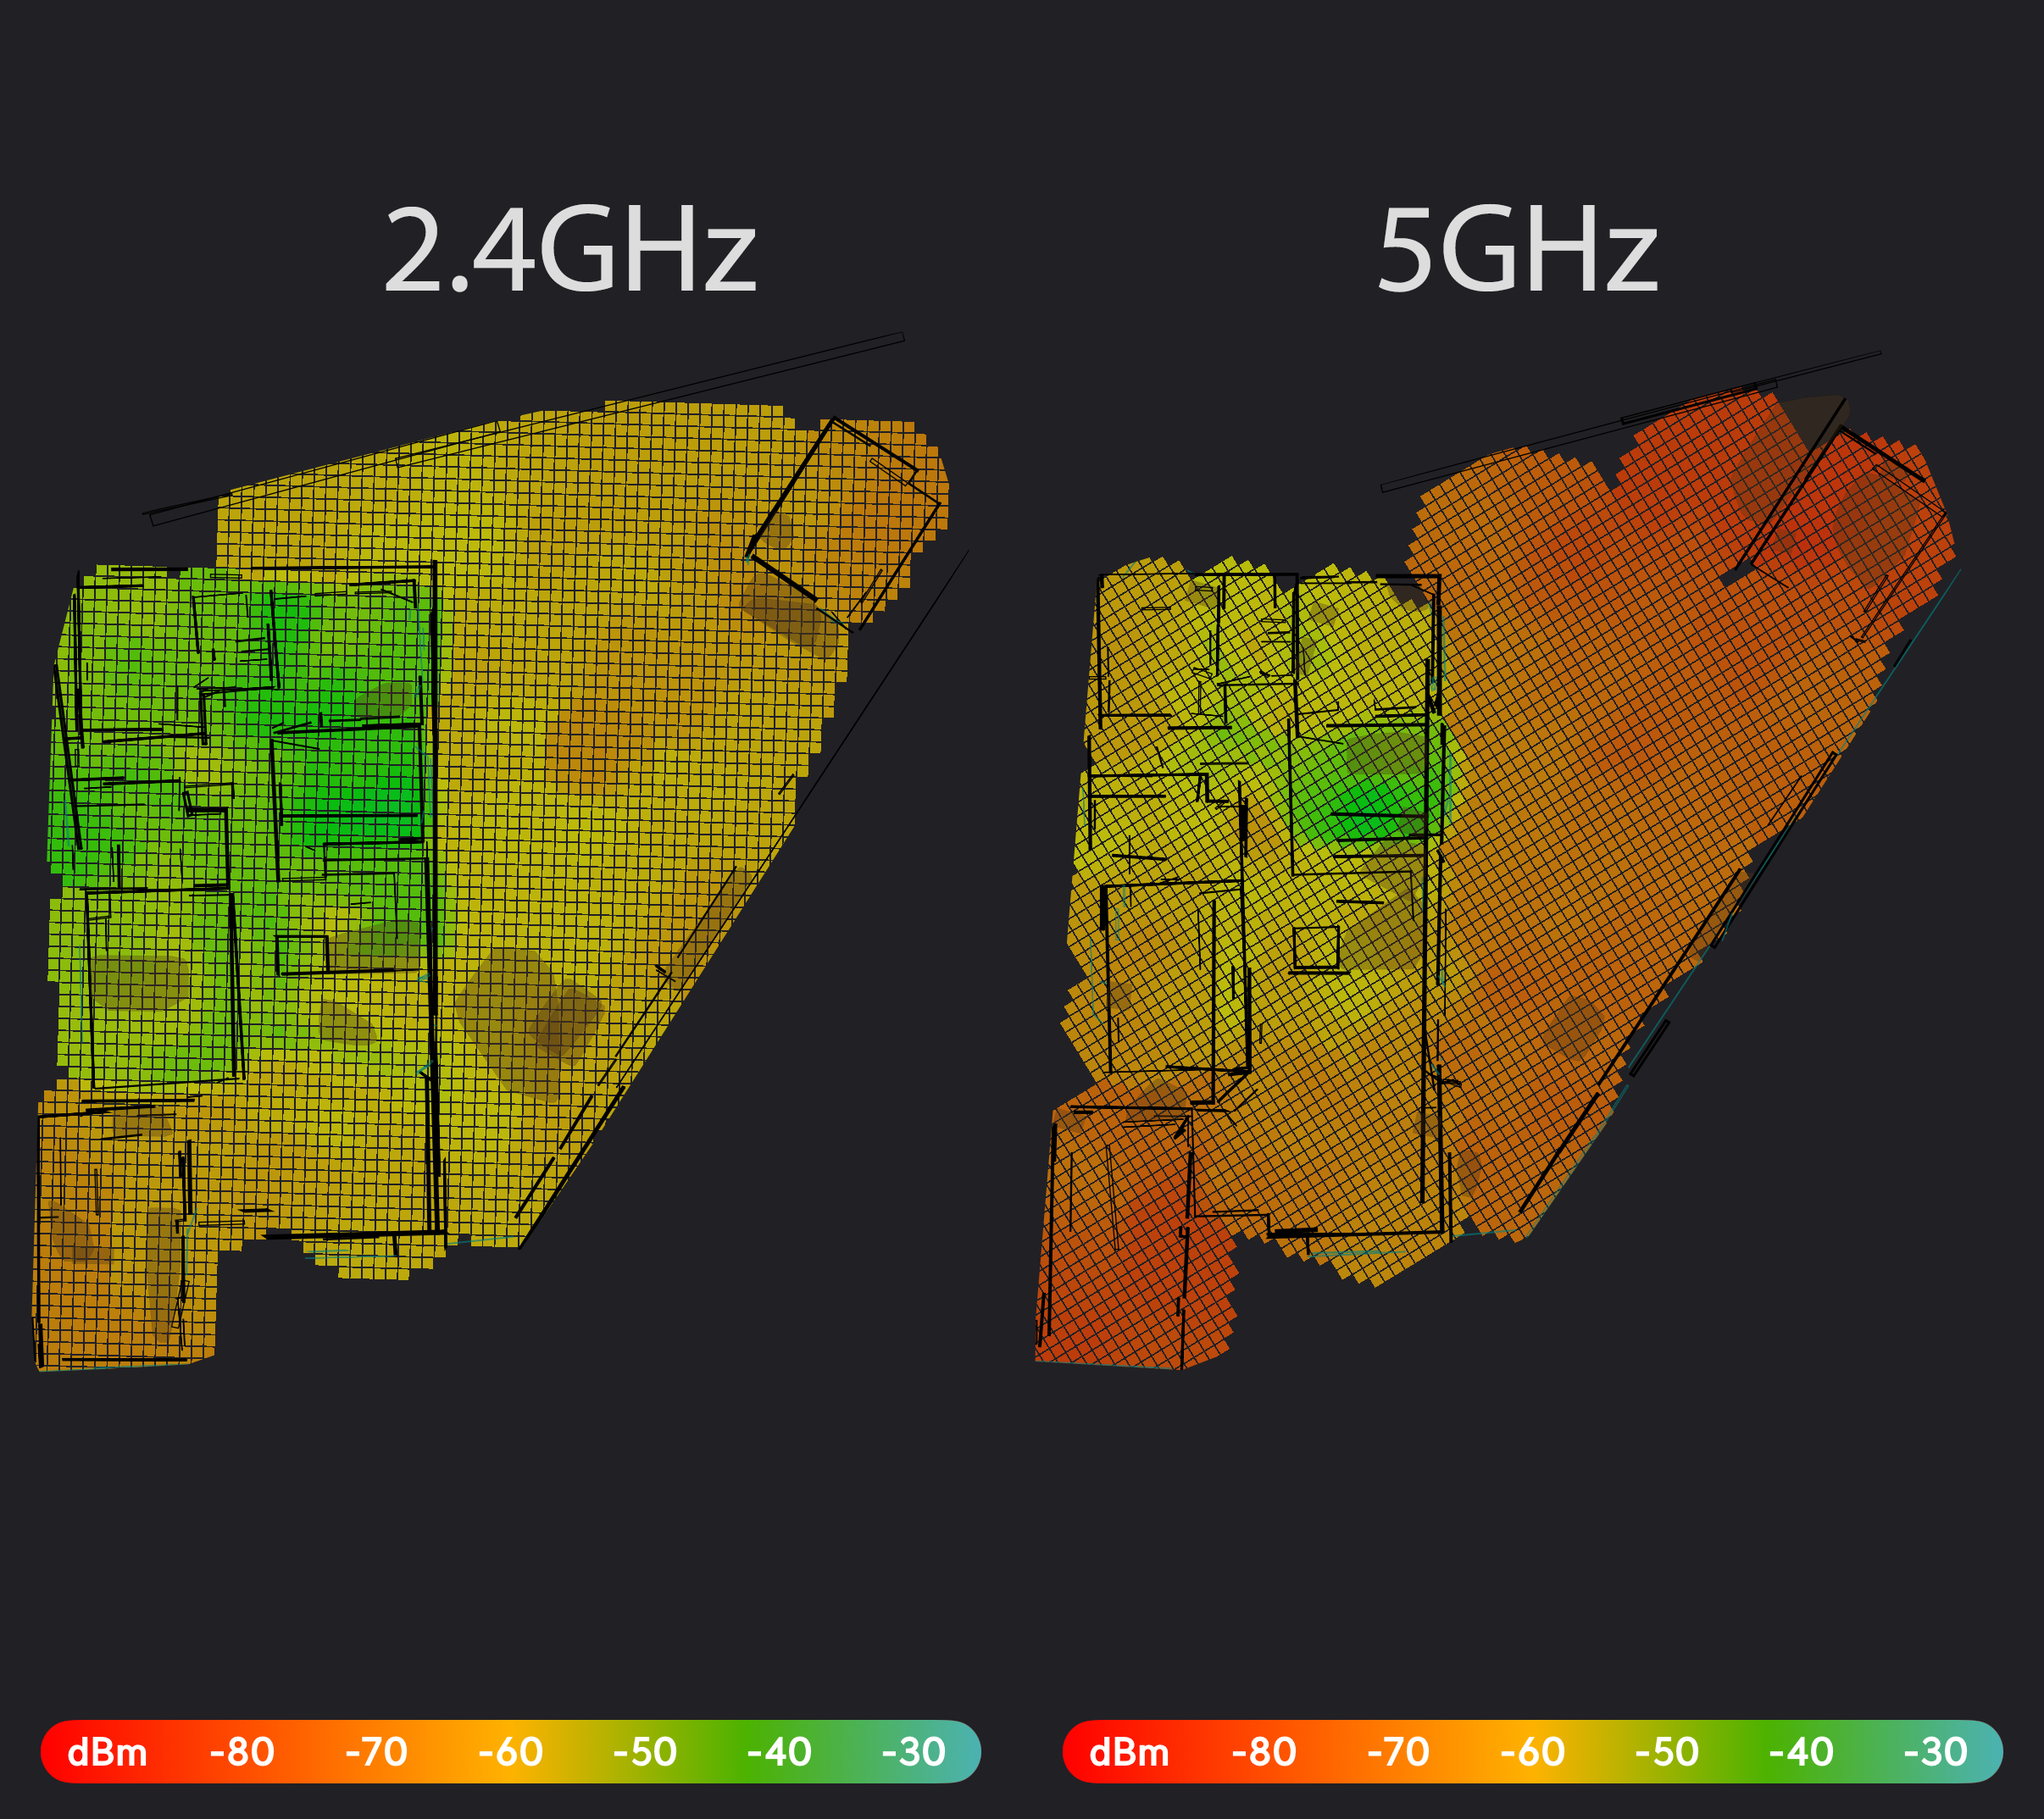
The room with the green signal strength on the 5GHz map is where the router was actually located, our home office is the room directly above that, the lounge room is at the bottom right and the very top-right bit that’s poking out is the back room that’s out in our back yard where the outdoor sensors live.
Unsurprisingly the 5GHz signal doesn’t penetrate through walls very well, but I was surprised at how little it reached the very front of the house where Kristina and I sit and use our computers when we’re not in the home office despite there only being a single wall in the way (though that also explains why I’ve gotten some pretty rubbish speeds when copying files over the network from my machine when sitting in the lounge room).
The router itself is a Ubiquiti Dream Router, and I knew Ubiquiti offered all sorts of additional access points that you could just plug into the network and get running with very little additional mucking around. After a bunch of reading I settled on a pair of the no-frills U6+ APs, and they arrived on the 4th of this month. My plan was to relocate the Dream Router itself to the home office and have one AP at the very front of the house in the lounge room and the other in the back room.
However, I had neglected to notice that the U6+ doesn’t actually have any way of getting power to it except for via Power over Ethernet (PoE) where both data and power is supplied via ethernet cable, which in turn requires a device that can inject power into the ethernet cable. Thankfully the Dream Router has two PoE-capable ports on it, but I wanted to keep the Raspberry Pi 4B+ on ethernet since it’s the heart of our temperature monitoring/display setup and is rather critical to the whole thing, so I needed to buy a separate PoE injector for the AP for the lounge room. Moving the main Dream Router to the home office also meant we needed to get the electrician out to do a bunch of recabling, and after four hours of hard work on Tuesday doing a bunch of extremely hot and difficult work in the ceiling, followed by three hours on Tuesday evening on my part pulling everything in the home office apart to tidy it up, we are in business!
The actual process of adding the new APs to the network could not have been easier: you plug them in, they start up and pop up in the Dream Router’s web interface, you click “Adopt”, and they update their firmware and are automatically configured, even figuring out which wifi channel they should be on so they don’t interfere with each other. You can also lock a specific device to only ever connect to one specific access point, so I’ve got everything that’s permanently in the lounge room set to only connect to the lounge room access point, and the same for the Dream Router and the back room access point as well.
I ran another WiFiman signal strength scan earlier today for both the 5GHz and 2.4GHz networks, and you can clearly see the effect of the router being in the office and having the new AP at the front of the house. The back room signal looks weird because my iPhone took a little while to roam from the prior access point to the one in the back room so it’d already partially mapped some signal strength but you can still see the difference from above:
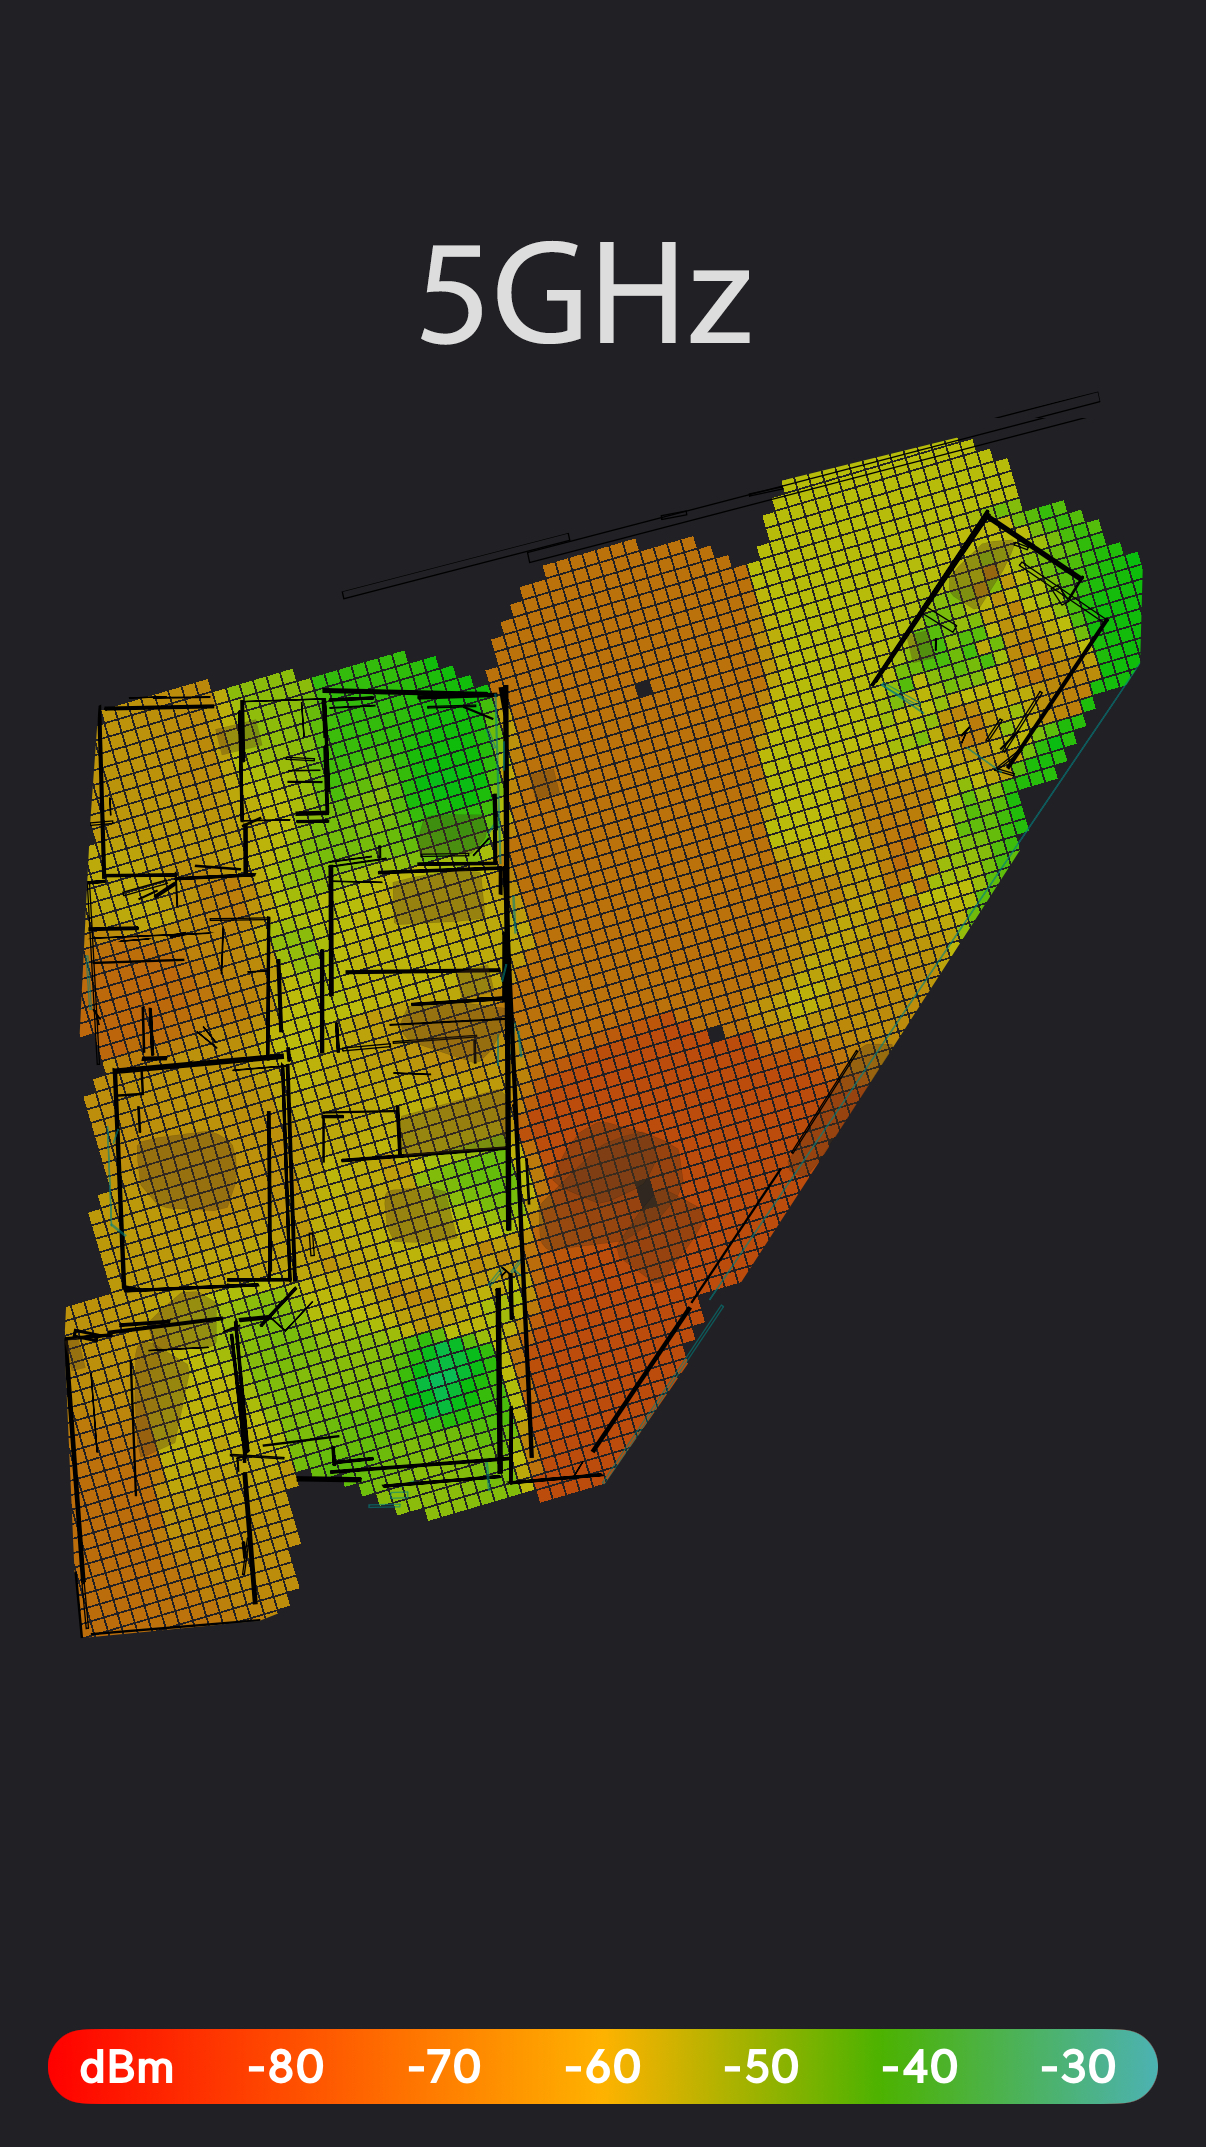
I haven’t included the 2.4GHz one here because the signal strength throughout the whole thing was sufficient that the iPhone never roamed from the original Dream Router I’d started out being connected to. 😅 But looking at the list of signal strengths of all of the clients in the Dream Router’s UI, they’re all absolutely excellent now and I’ve had zero dropouts on any of my ESP32s!