Looking back at 2024, and onwards to 2025

I wrote a blog post at the start of this year with some “I’d like to do this,” and I figured I should probably write one for the end of the year too as a bit of a look back to see how it went!

Music

For the musical instruments, it’s been… okay I guess? I continue to be by far and away the best at drums, followed by bass, with guitar in a distant third. The Justin Guitar course has been very good but it’s divided up into modules with a bunch of lessons about a handful of topics in each, and I got to the end of Module 2 and Justin said, “Before you move onto the next module, make sure you’ve got all of these things down pat, and I’d recommend taking a month or two of revising to really ensure it’s sunken in.” It was at that point that I realised I didn’t actually know most of the stuff nearly as well I thought I had, and after feeling like I was treading water and not getting anyway, I got a bit discouraged and not really sure how to proceed. Thankfully there’s a very active forum community so I asked in September and got some good advice, so I’ve been trying to put that into practice and we’ll see how it goes.

One of the things that I’ve definitely noticed has helped is the “Strumming” course that’s part of the Justin Guitar app… it’s a whole thing on just getting your strumming consistent, and how to practice and how to keep in time, and I’ve absolutely noticed that I’ve gotten a lot better with that.

In terms of recording stuff, I haven’t done a ton of my own unique stuff, just two short little things (well, three but one of them was done with loops so doesn’t really count in my mind).

The first one was from February of this year, with the drums, bass, and two guitar tracks. The Bass Buzz and Justin Guitar courses ended up both getting into chords and songs “in the key of” at the same time, so I figured I should put this new knowledge to use! I used Logic Pro’s quantisation feature for to pull it into time because each track sounded okay on its own but when put together it was fairly obvious that just wasn’t quite all lined up, and I have a limit to how many times I want to record something to try to get it 100%. 😛

Noodling in A Major

Then in May I did another one featuring drums, bass, guitar, and a comparatively rare keyboard appearance. I noticed I was getting a lot better with the timing on the drums because this one didn’t actually need any quantisation at all!

Metal Tones in A Minor Pentatonic

However, the crowning glory of 2024 was the collaboration with Deb and a bunch of other folks from the fediverse under her L-Plate Players group for a Christmas song tribute for our friend Geordie who was a massive Christmas fiend and died unexpectedly in his sleep earlier in the year. It’s called “I’m Staying Home This Christmas” and I did the drums and the bass guitar for it and I’m absolutely stoked at how well it came out:

The full lyrics and list of contributors is on Deb’s Faircamp site.

Most recently (the end of October), I recorded a couple of minutes of me just playing the drums without a metronome or otherwise timekeeping device, and I was surprised at how well I kept time… Logic Pro has an “Adapt” option for the project tempo where it’ll figure out what the BPM was from the recording, and mine ended up ranging from about 106-112 BPM over that two minutes which I reckon is pretty decent. I’ve been slowly recording bass and guitar parts for it over the past few weeks and it’s coming along pretty well, though I have no idea when I’ll be finished!

I also look advantage of my work bonus to upgrade the cymbals on my drum kit, and it makes such a difference to the feel of playing them, they’re a lot thinner and bounce around a lot more like real acoustic cymbals would, and it’s an absolute joy to play on them:
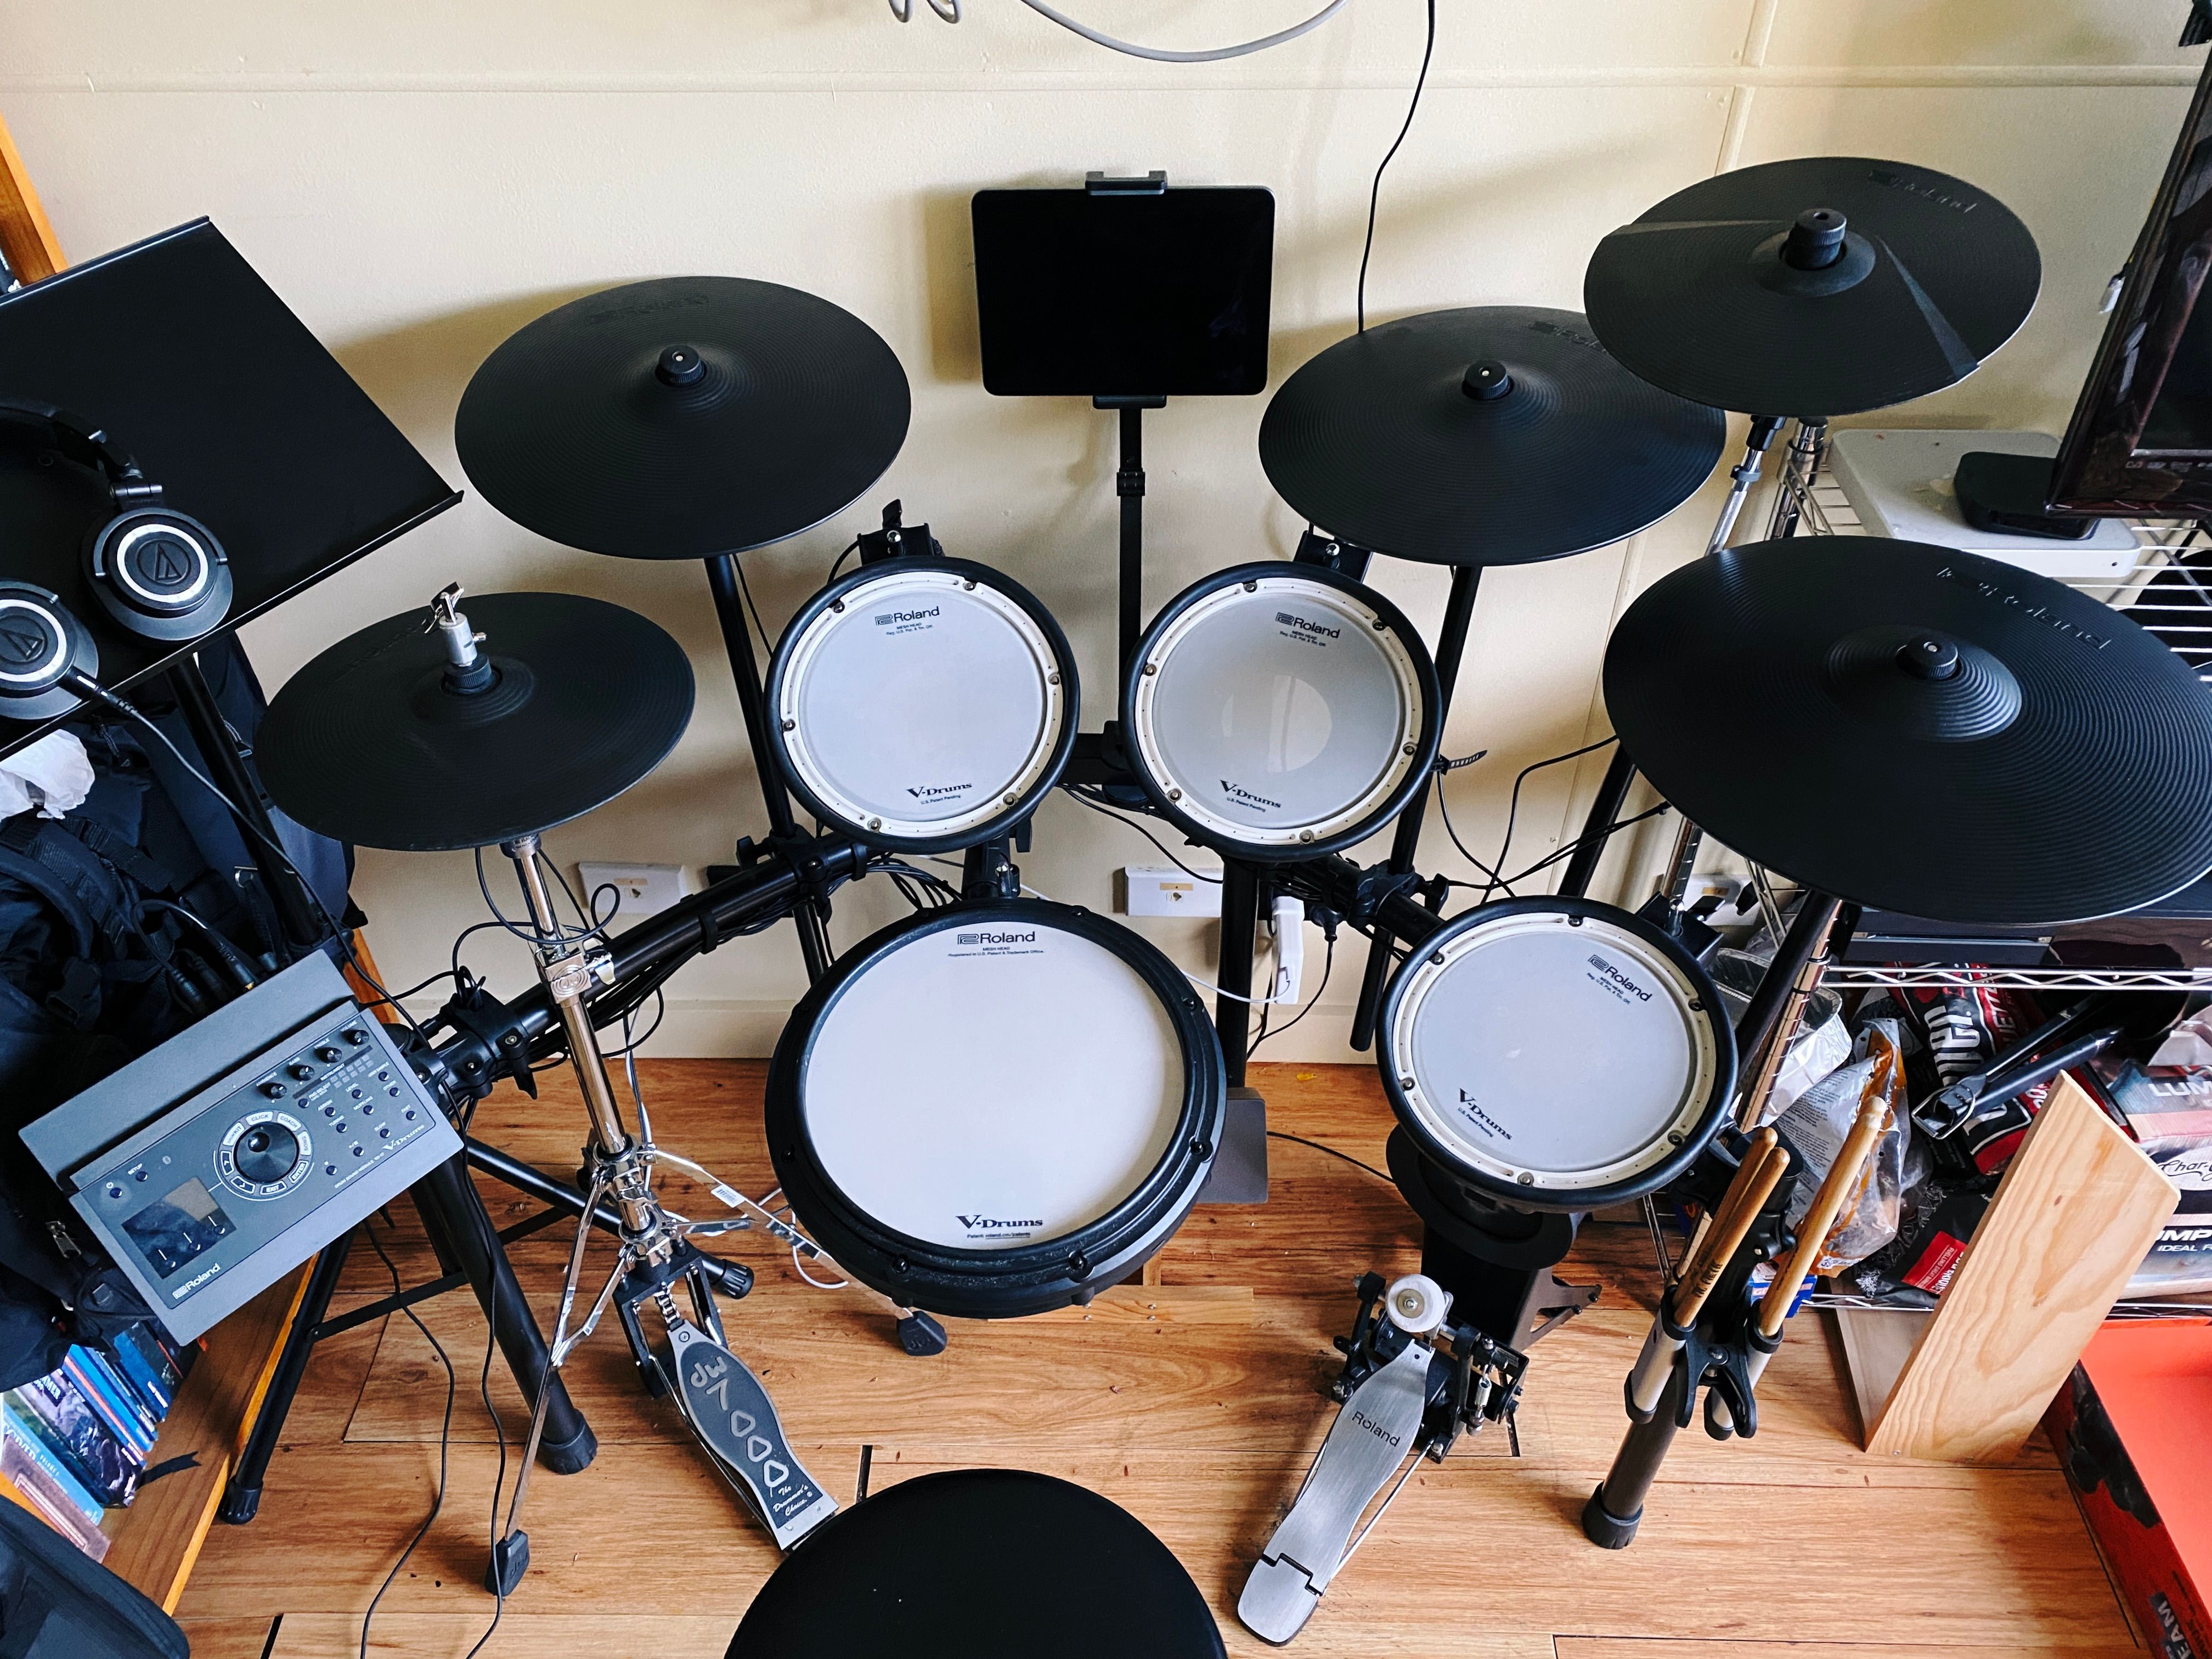
A photo of an electronic drum kit sitting in a corner, with a mesh snare and three mesh tom pads on it, and four black cymbals. Three of the cymbals are noticeably larger (and also cleaner) than the fourth one, and they're the new ones.

Back in August, I discovered that we actually have an entire little music room in the office at work, that has a (very low-end) electronic drum kit, a bass guitar, some guitars, a keyboard, and a full piano!
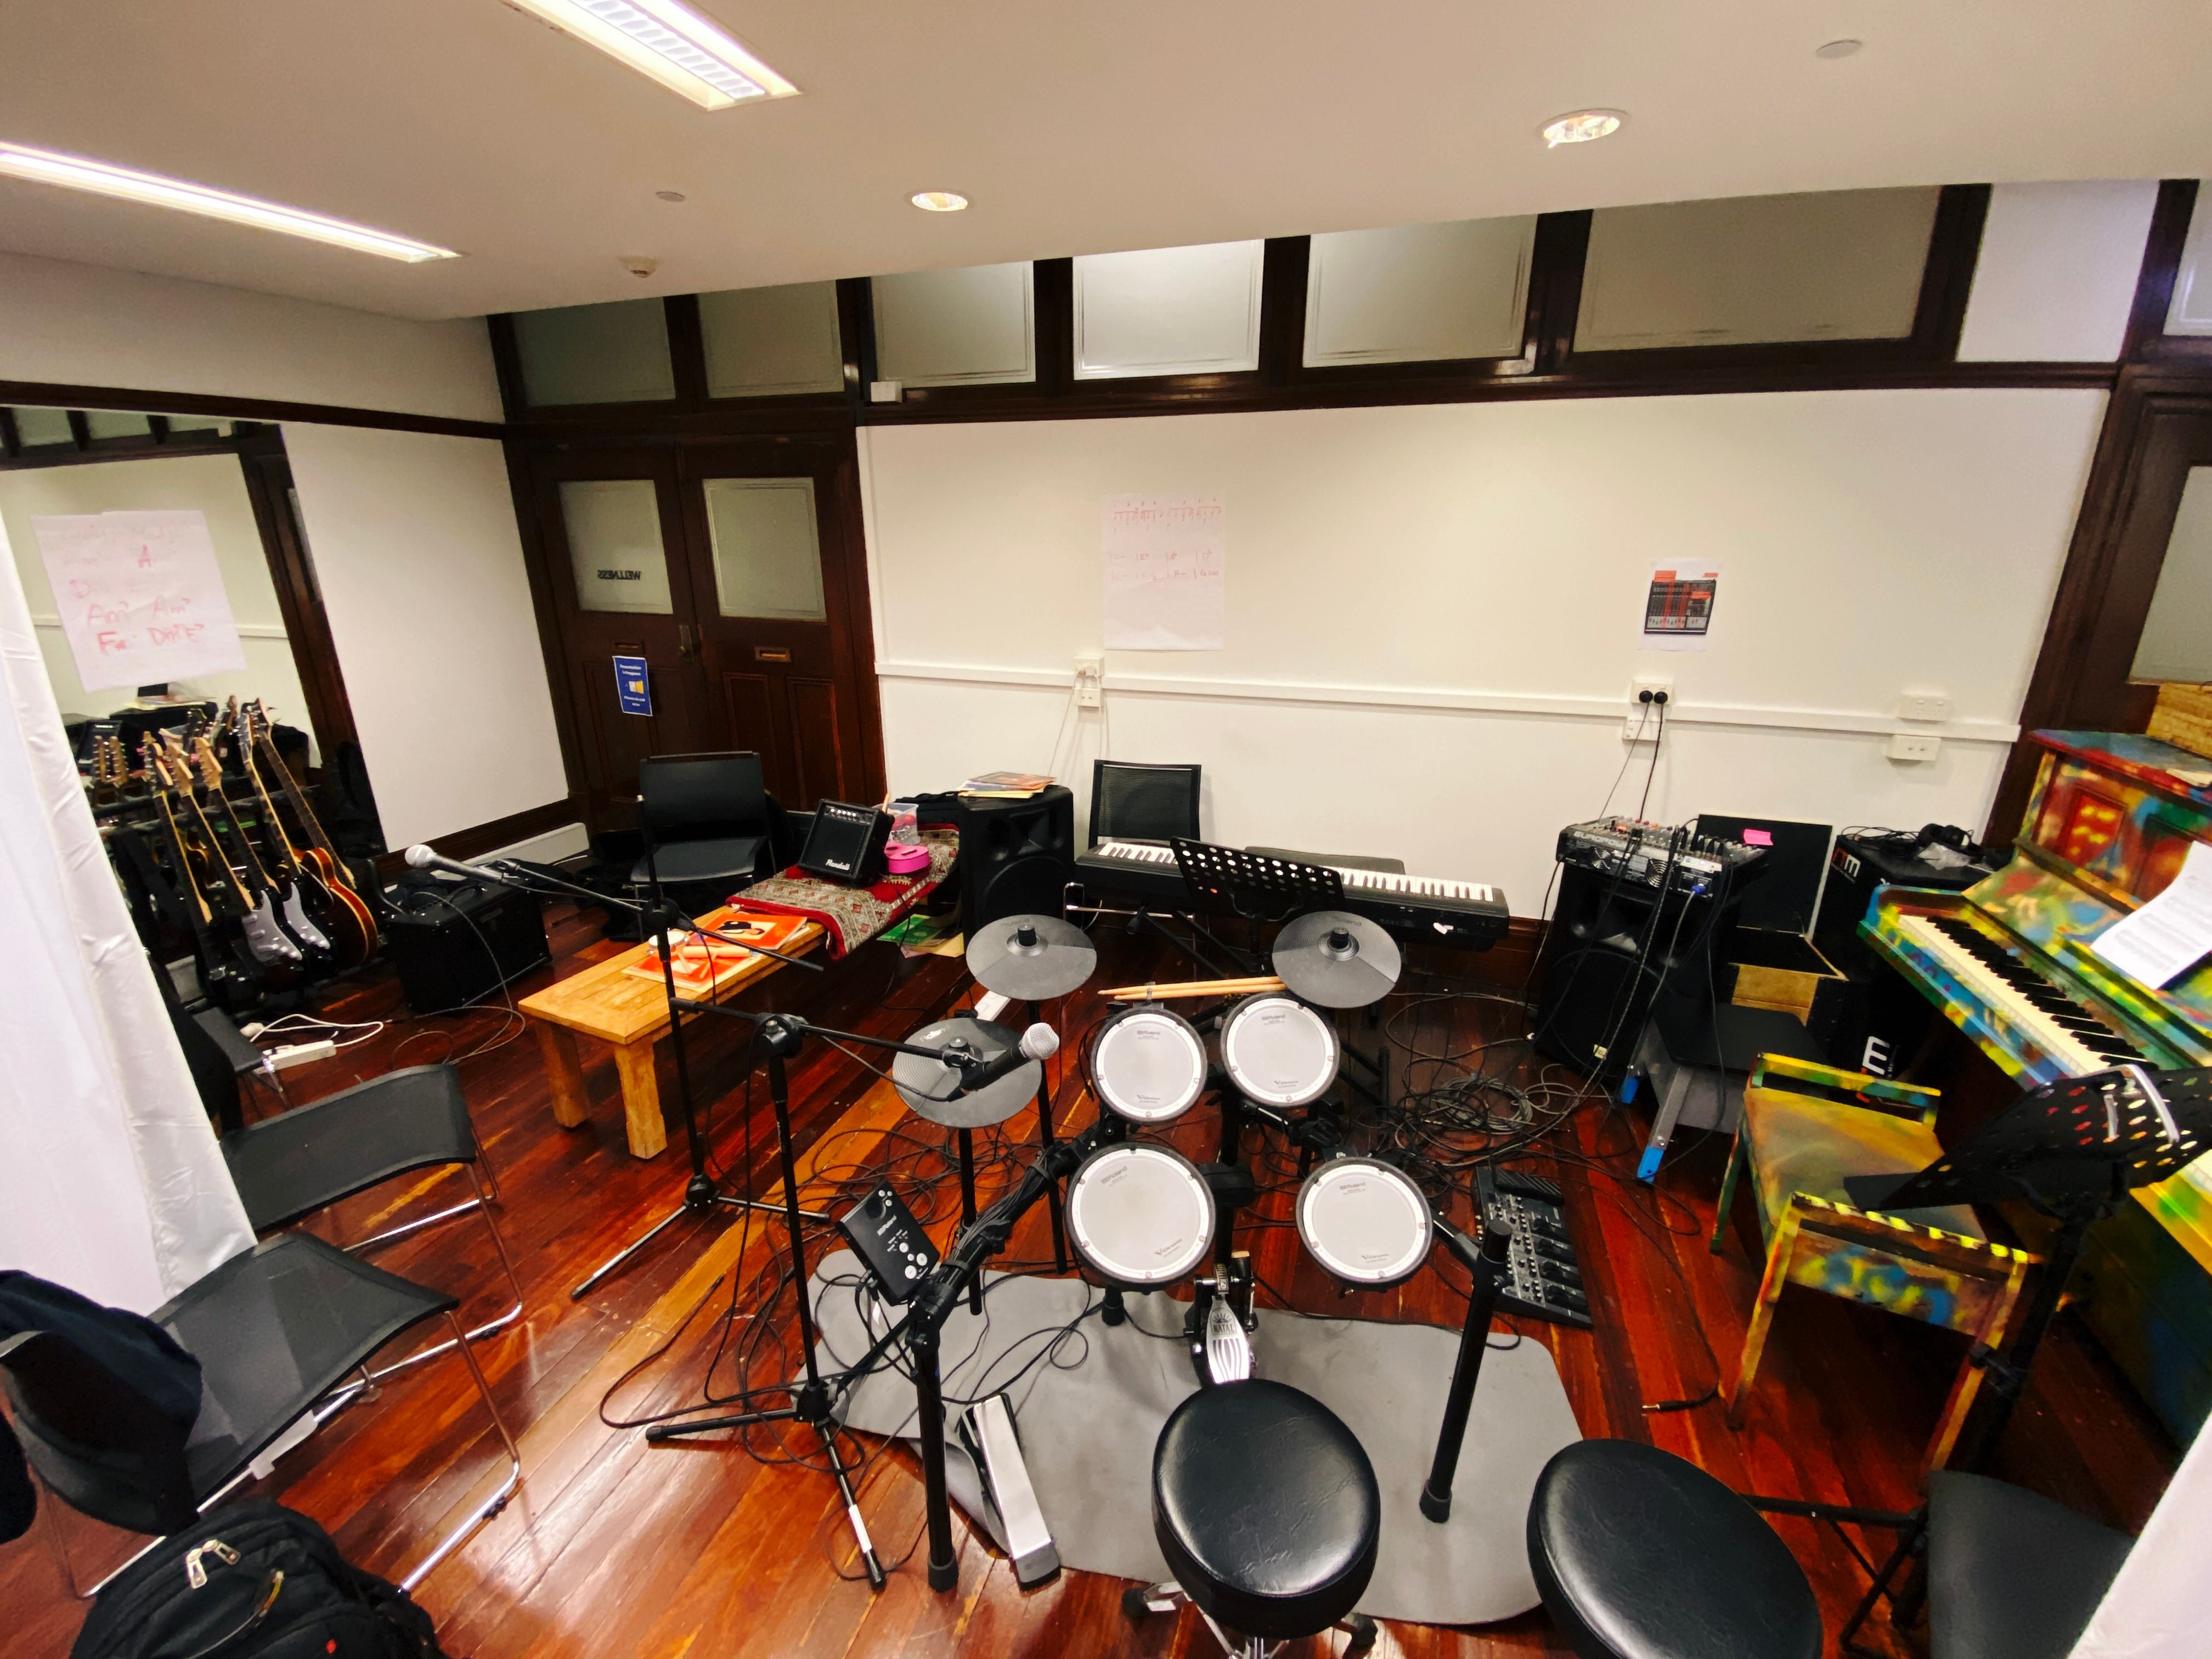
A photo of the corner of a room that has a whole bunch of musical equipment in it: there are three electric guitars and a bass guitar sitting in a stand at the left, two very large speakers, an electronic drum kit, a MIDI keyboard, and a full size piano at the right that is painted in extremely garish bright colours.

There are a number of people who are Actual Musicians who play but I’m not remotely good enough for that, and a few of the people in one of the teams I work with are in the same boat so we’ve started doing semi-regular jam sessions after work and it’s been so fun. I managed to get a recording of us doing a bit of improvising:

(The lights turn off at the end because I very poorly timed things and it was right when the building lights turn off automatically at 8pm, oops.)

Miniature painting

In my post at the beginning of the year I said:

The other thing I want to do more of this year is consistent miniature painting. I’ve been documenting my efforts getting through Warhammer Quest: Cursed Cityand I started out strong and ended up getting through half of the sixty miniatures in the box, but then… completely stopped painting anything.

And I’ve since realised that I just need to paint when the mood strikes and not force anything because that is a surefire way to ruin a hobby. For the Warhammer Quest miniatures, I got all the heroes finished by the end of January as well as the zombies and remaining bats too, but haven’t done anything with them since then.

In February I went back and added a bunch of extra detailing to my Kill Team: Into The Dark terrain, and over the course of January through to March I also finally made use of the Space Marine-sized female heads I bought back in 2022 and got an Intercession squad for Kill Team fully painted. After that, there was a big lot of nothing until October of this year when the new edition of Kill Team came out with a bunch of new terrain, and I’ve been steadily plugging away at that (though haven’t even looked at the miniatures from it, I’ve just been focused on the terrain to start with).

But apart from that, there hasn’t been any other painting, but as long as I’m doing it when I feel like it and it’s not feeling like a chore, I think I’m going to call that a win.

2025

For next year, I’m pretty much just going to keep plugging away at my music stuff and see how it goes!

I’m also going to add “Blog more” to my list of things for next year, because I’ve realised that with being able to post relatively short thoughts as they happen on things like trips we’ve taken or more involved things we’ve done (Kristina’s mum visiting, and going to Perth and Melbourne are the largest examples) I haven’t really had very much to post here, and it would be good to expand on things a bit more like I did with our trip to Switzerland.
Monitoring indoor air quality, and outdoor temperature sensor woes

Previously on Monitor (And Automate) All The Things:

At the end of my last post on the subject I mentioned I was going to add an ENS160 air quality sensor to my arsenal of home monitoring sensors. I actually got that done only a couple of weeks after that blog post was published and it was pretty straightforwards, though I ended up forking the ENS160 library I’d found so I could more easily configure it and have it work better for my ESP32 code architecture.

Because I2C devices like the BME280 can be daisy-chained together and Core Electronics’ sensors thoughtfully have two STEMMA QT connectors on them, I was able to refactor my esp32-sensor-reader-mqtt code to allow for multiple sensors per ESP32 board (which in turn required refactoring of my Pi Home Dashboard Admin page as well). So now we still need only a single ESP32 board each in the office and lounge room, but both of them have a temperature/humidity and indoor air quality sensor attached to them! It’s really interesting watching the huge increase in indoor air quality we get as soon as we open the windows and let the fresh air in (when the weather is amenable to that happening, of course), and having this data is making me much more eager to crack open even just a couple of windows whenever we can.


For my birthday this year I got a little starter kit I got from Core Electronics that has a bunch of sensors and wires and bits and bobs in it, and one of those bits and bobs was a board with three LEDs on it and a STEMMA QT connector. I was pondering what I could do with it, then hit upon the great idea of using it to give a visual indication of what the outdoor dew point, outdoor air quality, and indoor quality was without needing to display full numbers (ranging from blue being the best, through to yellow being not great, and red being actively bad). I used my esp32-sensor-reader-mqtt code as a base and wrote some code to listen to the relevant MQTT topics and change the LED colours based on thresholds for the values it received.

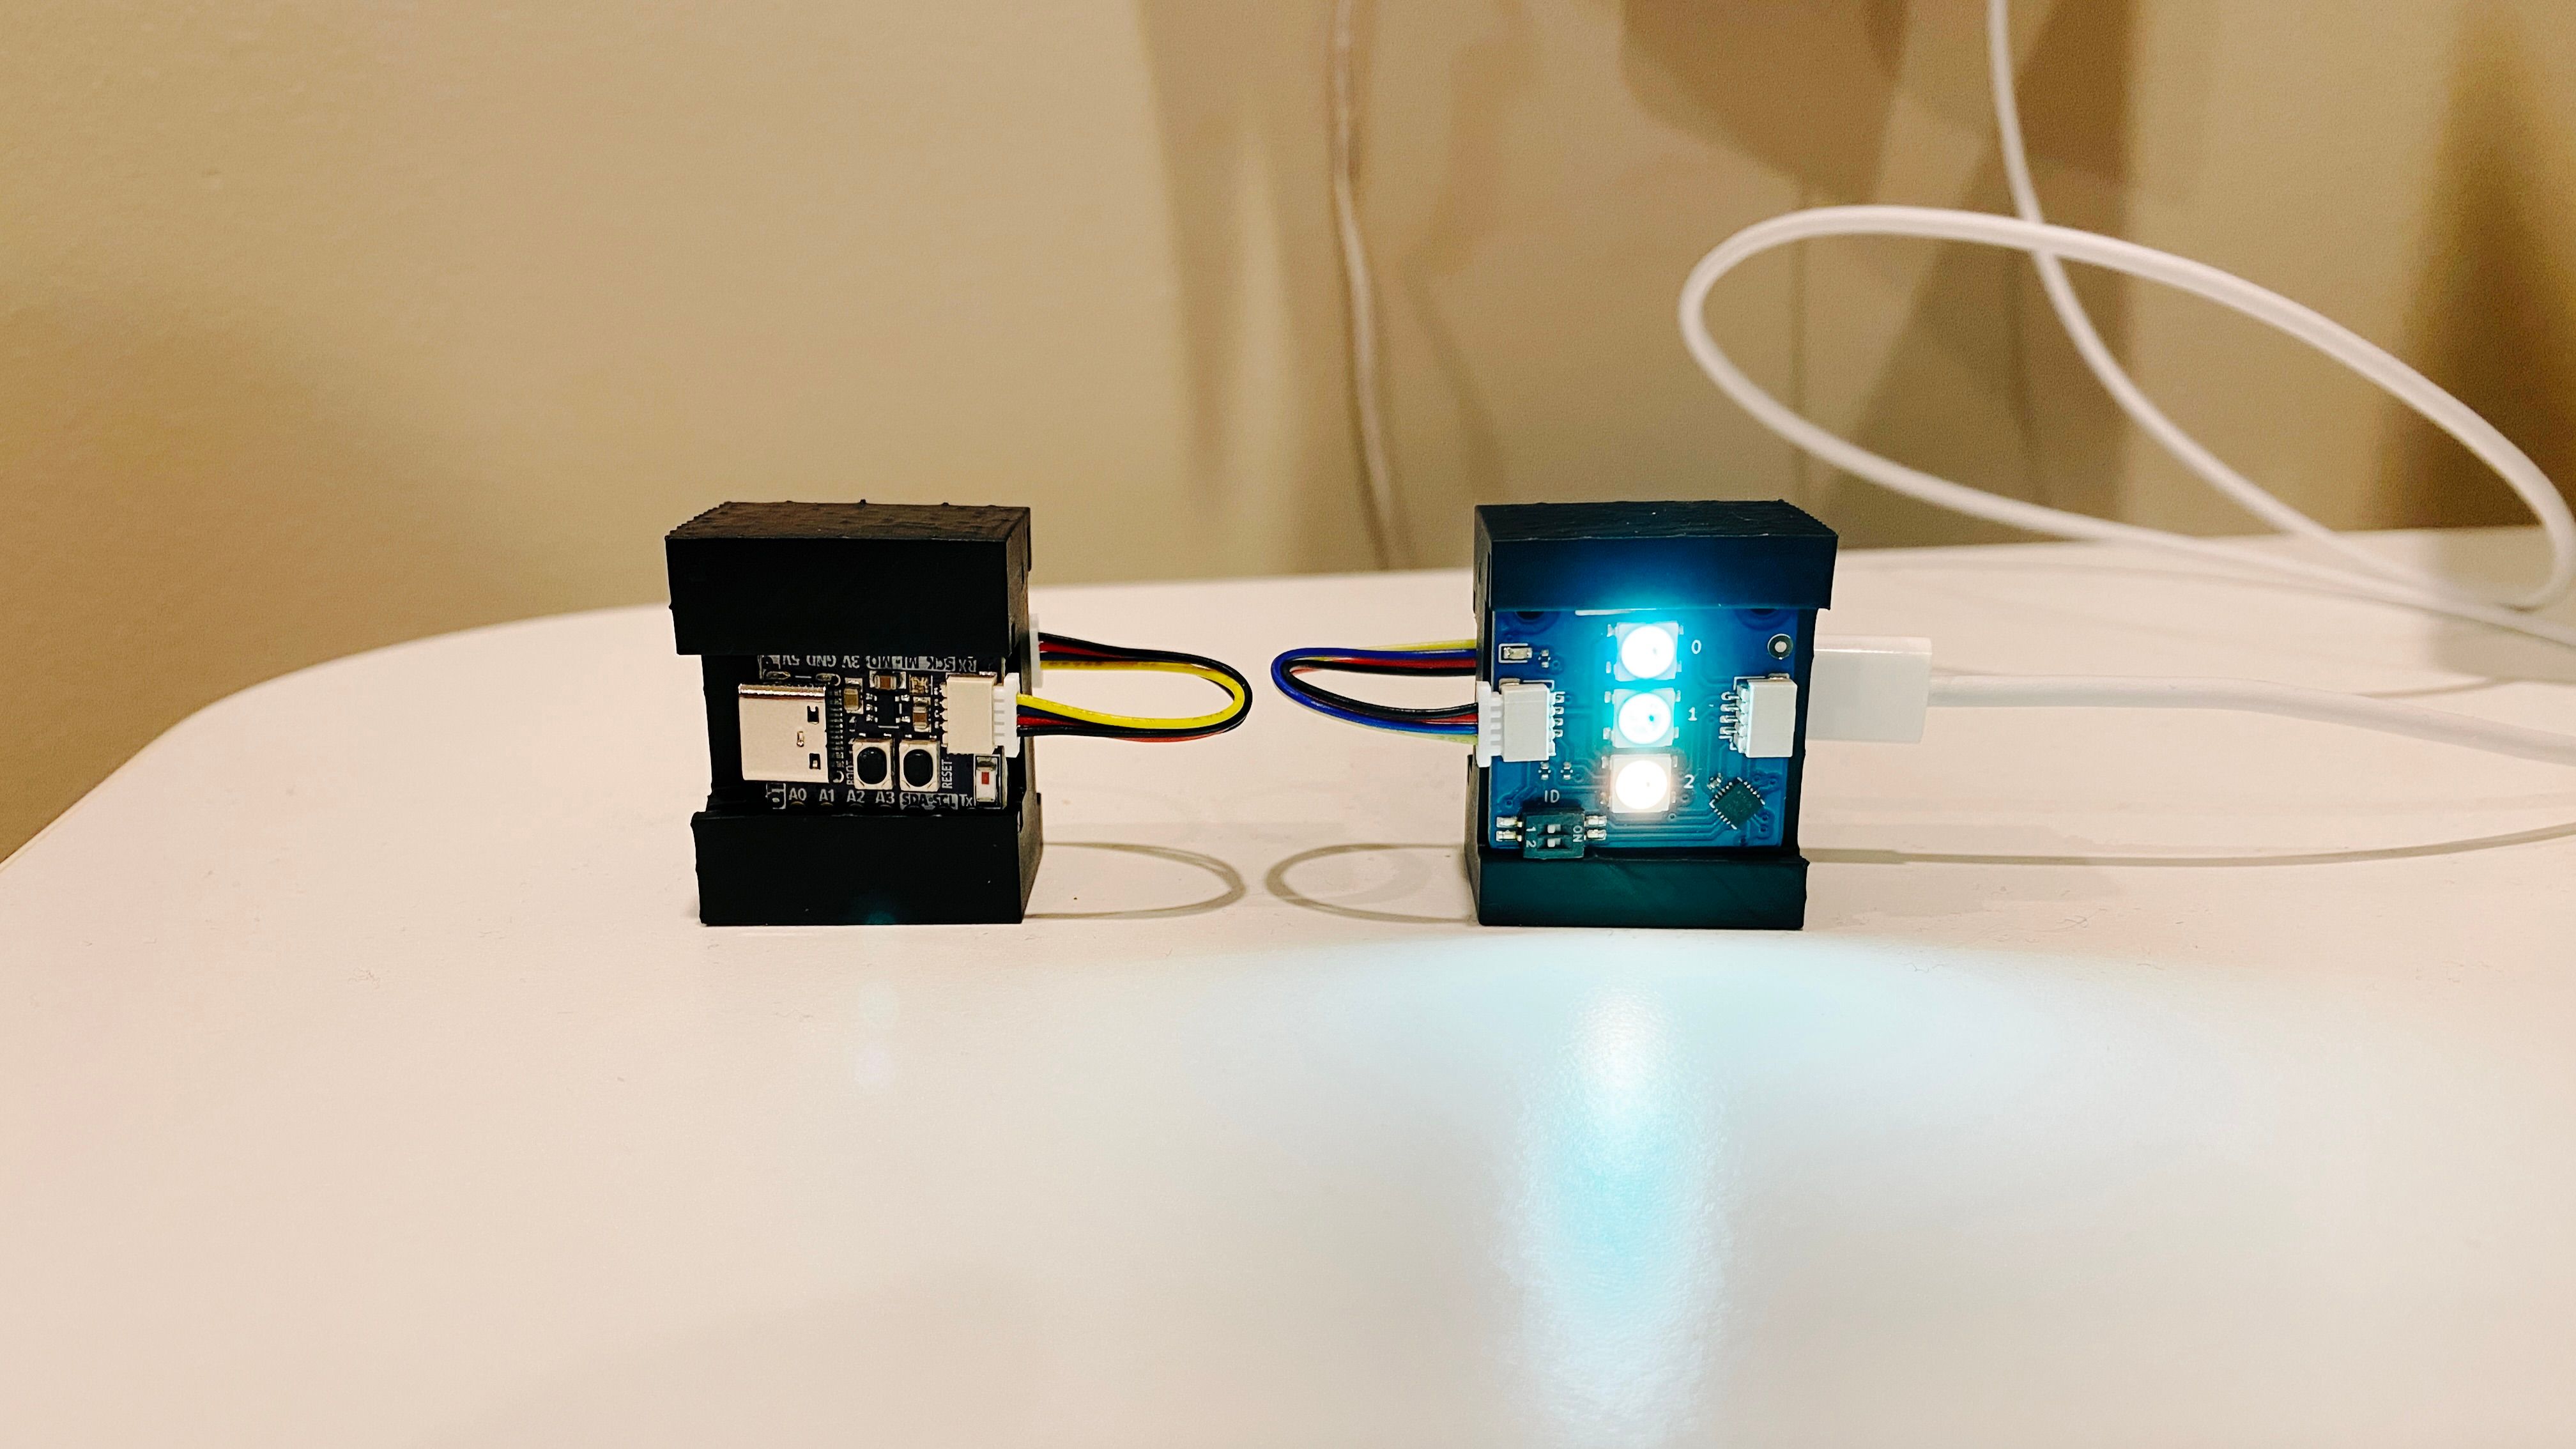
I wanted this whole setup to be fairly compact, not much larger than the LED board itself, and I discovered that Adafruit makes an ESP32 that is TINY and has a built-in STEMMA QT connector so I wouldn’t need to do any soldering: the QT Py ESP32 Pico. I also realised I would need some way of holding this all neatly together instead of being an ugly pile of wires everywhere, and so had my first foray into 3D printing! I used Tinkercad to design a holder, and a friend has a 3D printer and so was able to print out the prototype for me. It turned out the measurements weren’t quite correct so I did a bit of tweaking, got a second printing, and after a coating with black paint via my airbrush, hey presto!

A photo of two small black cube-shaped objects with a vertical slot cut out of the front of them. The one on the right has a larger slot which is holding a blue circuit board with three bright LEDs lit up in blue, green, and yellow. The one on the left has a smaller slot which is holding a smaller circuit board (the ESP32) with a USB-C port on one side of it. (The holder on the left is showing what's on the back side of the holder on the right.) There are three short wires looping out to connect from the ESP32 on the back to the LED module on the front.
The holder from behind on the left, showing the ESP32 board, and the front on the right with the LEDs lit up.

We have two of these LED boards set up, sitting next to the Raspberry Pis that show the temperature/humidity dashboard in the lounge room and the office. I also hooked the ESP32s into my MQTT topic setup that the Raspberry Pis listen to to turn their display backlight off each night at midnight and back on in the morning at 7am so we don’t have blindingly bright LEDs lighting up the whole lounge room and office at night.

These have been running since the end of May with zero problems, just quietly displaying their data and turning off and back on as required!


Also in my previous post, I said that I’d switched to the Bosch BME280 temperature/humidity sensors because the DHT22 that was outside would become saturated after a long enough period of high humidity and would display wildly incorrect humidity readings. Unfortunately I subsequently discovered that the same thing happens with the BME280 because it turns out they actually use the same type of technology for their humidity sensor as the DHT22. 😑 They’re definitely more accurate indoors and I’m happily using them in the lounge room and office, but we had a spate of really wet days in winter this year and the BME280 that was outside ended up in the exact same state as the DHT22s, despite not actually ever being directly exposed to rain.

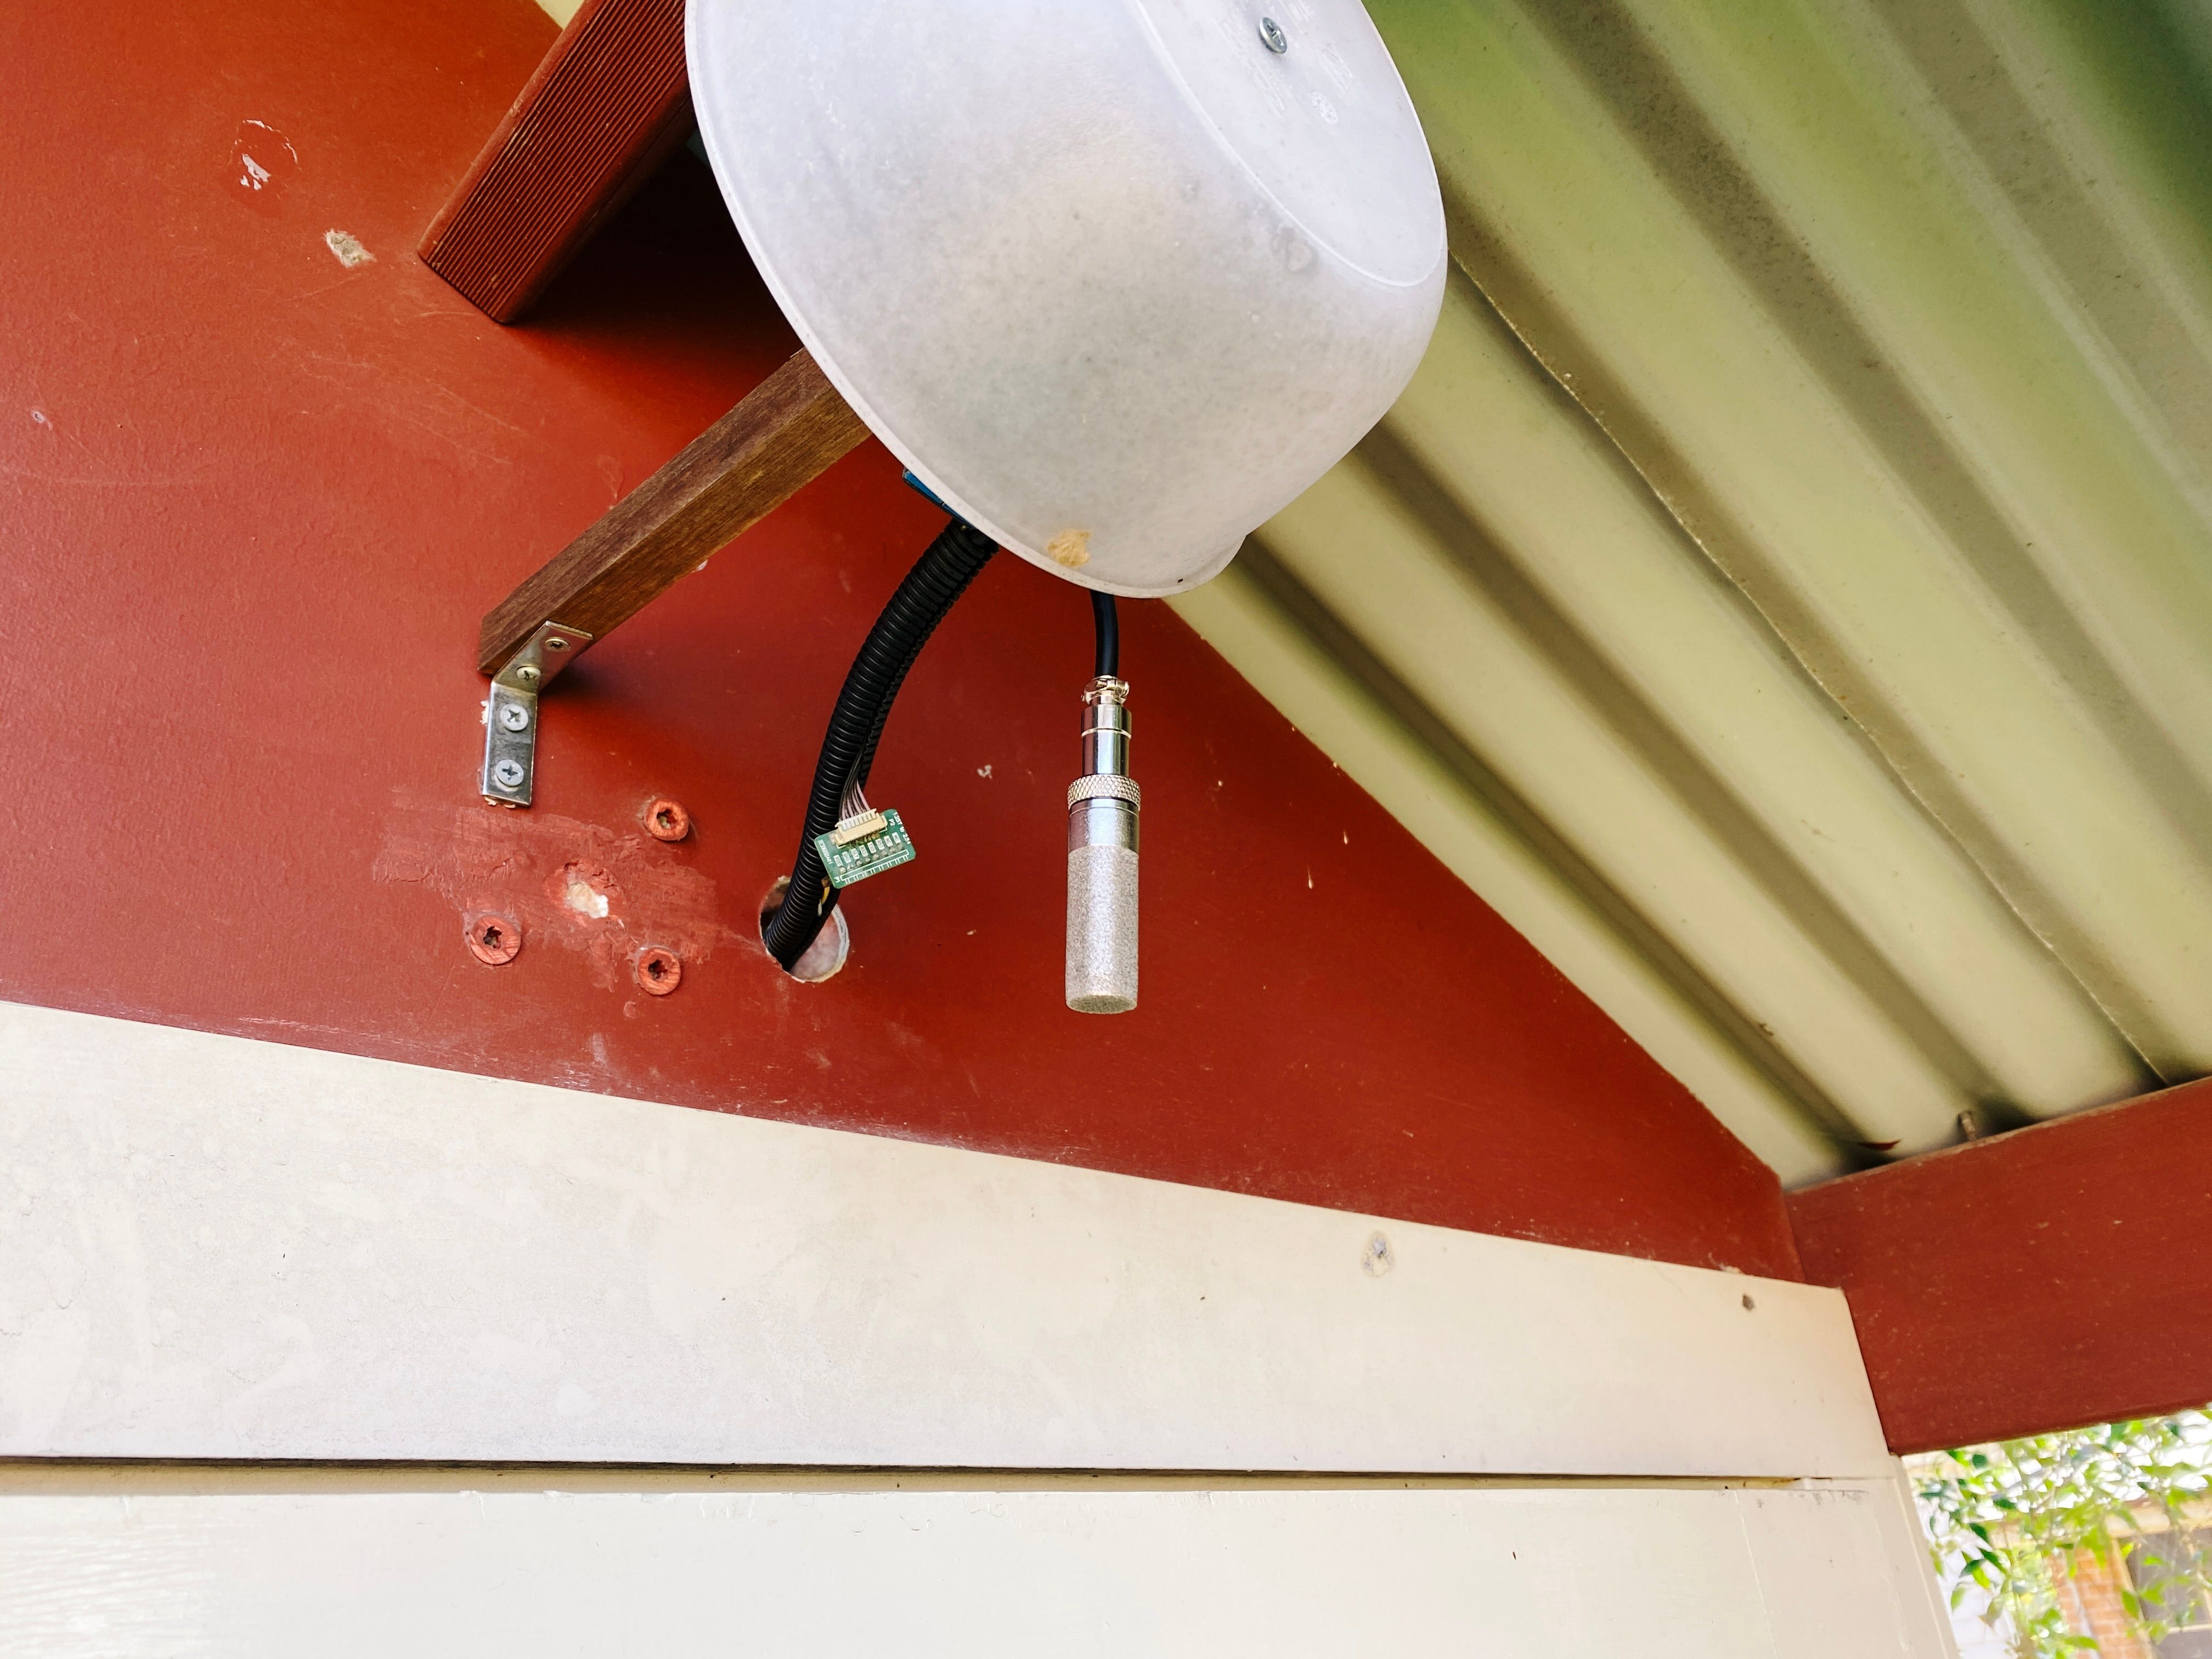
Queue a bunch more research, and I finally found something that uses a totally different type of technology for measuring humidity and is designed to actually work outside, and it even has a little built-in heater than you can trigger to dry the sensor out, the Sensiron SHT-30 (which I will never not read as “sense-iron” rather than what I assume they were going for, “sensy-ron”). Adafruit has packaged this up into a weatherproofed mesh package so I bought one of those, updated my esp32-sensor-reader-mqtt code again (I continue to remain delighted at how the architecture for this whole project has allowed me to extremely easily add additional sensors without a whole lot of effort), and it’s been live “in production” as it were since August of this year with absolutely zero problems:

A photo of our extremely ghetto "weather station": it's a piece of wood attached to the outside of our back room with a tupperware over the end to protect the sensors from direct rain. The new sensor is dangling down underneath the tupperware and looks almost like it has a microphone on the end of it (it's actually the weatherproofing mesh).

I had to make a minor change to the SHT-30 library I’d found to allow for turning the built-in heater on and off so have forked it myself, though I think I could probably get away with not having the heater functionality after all… a friend of mine has the same sensor packed up into a little commercially-purchasable box without the heater being used and his has been sitting outside for over a year with no problems.

One difference between the BME280 and the SHT-30 is that the BME280 calculates the dew point, whereas the SHT-30 only sends temperature and humidity. However, I discovered that you can actually calculate the dew point yourself given a temperature and humidity value, so I was able to have an option to send dew point data for both the DHT22 and the SHT-30!

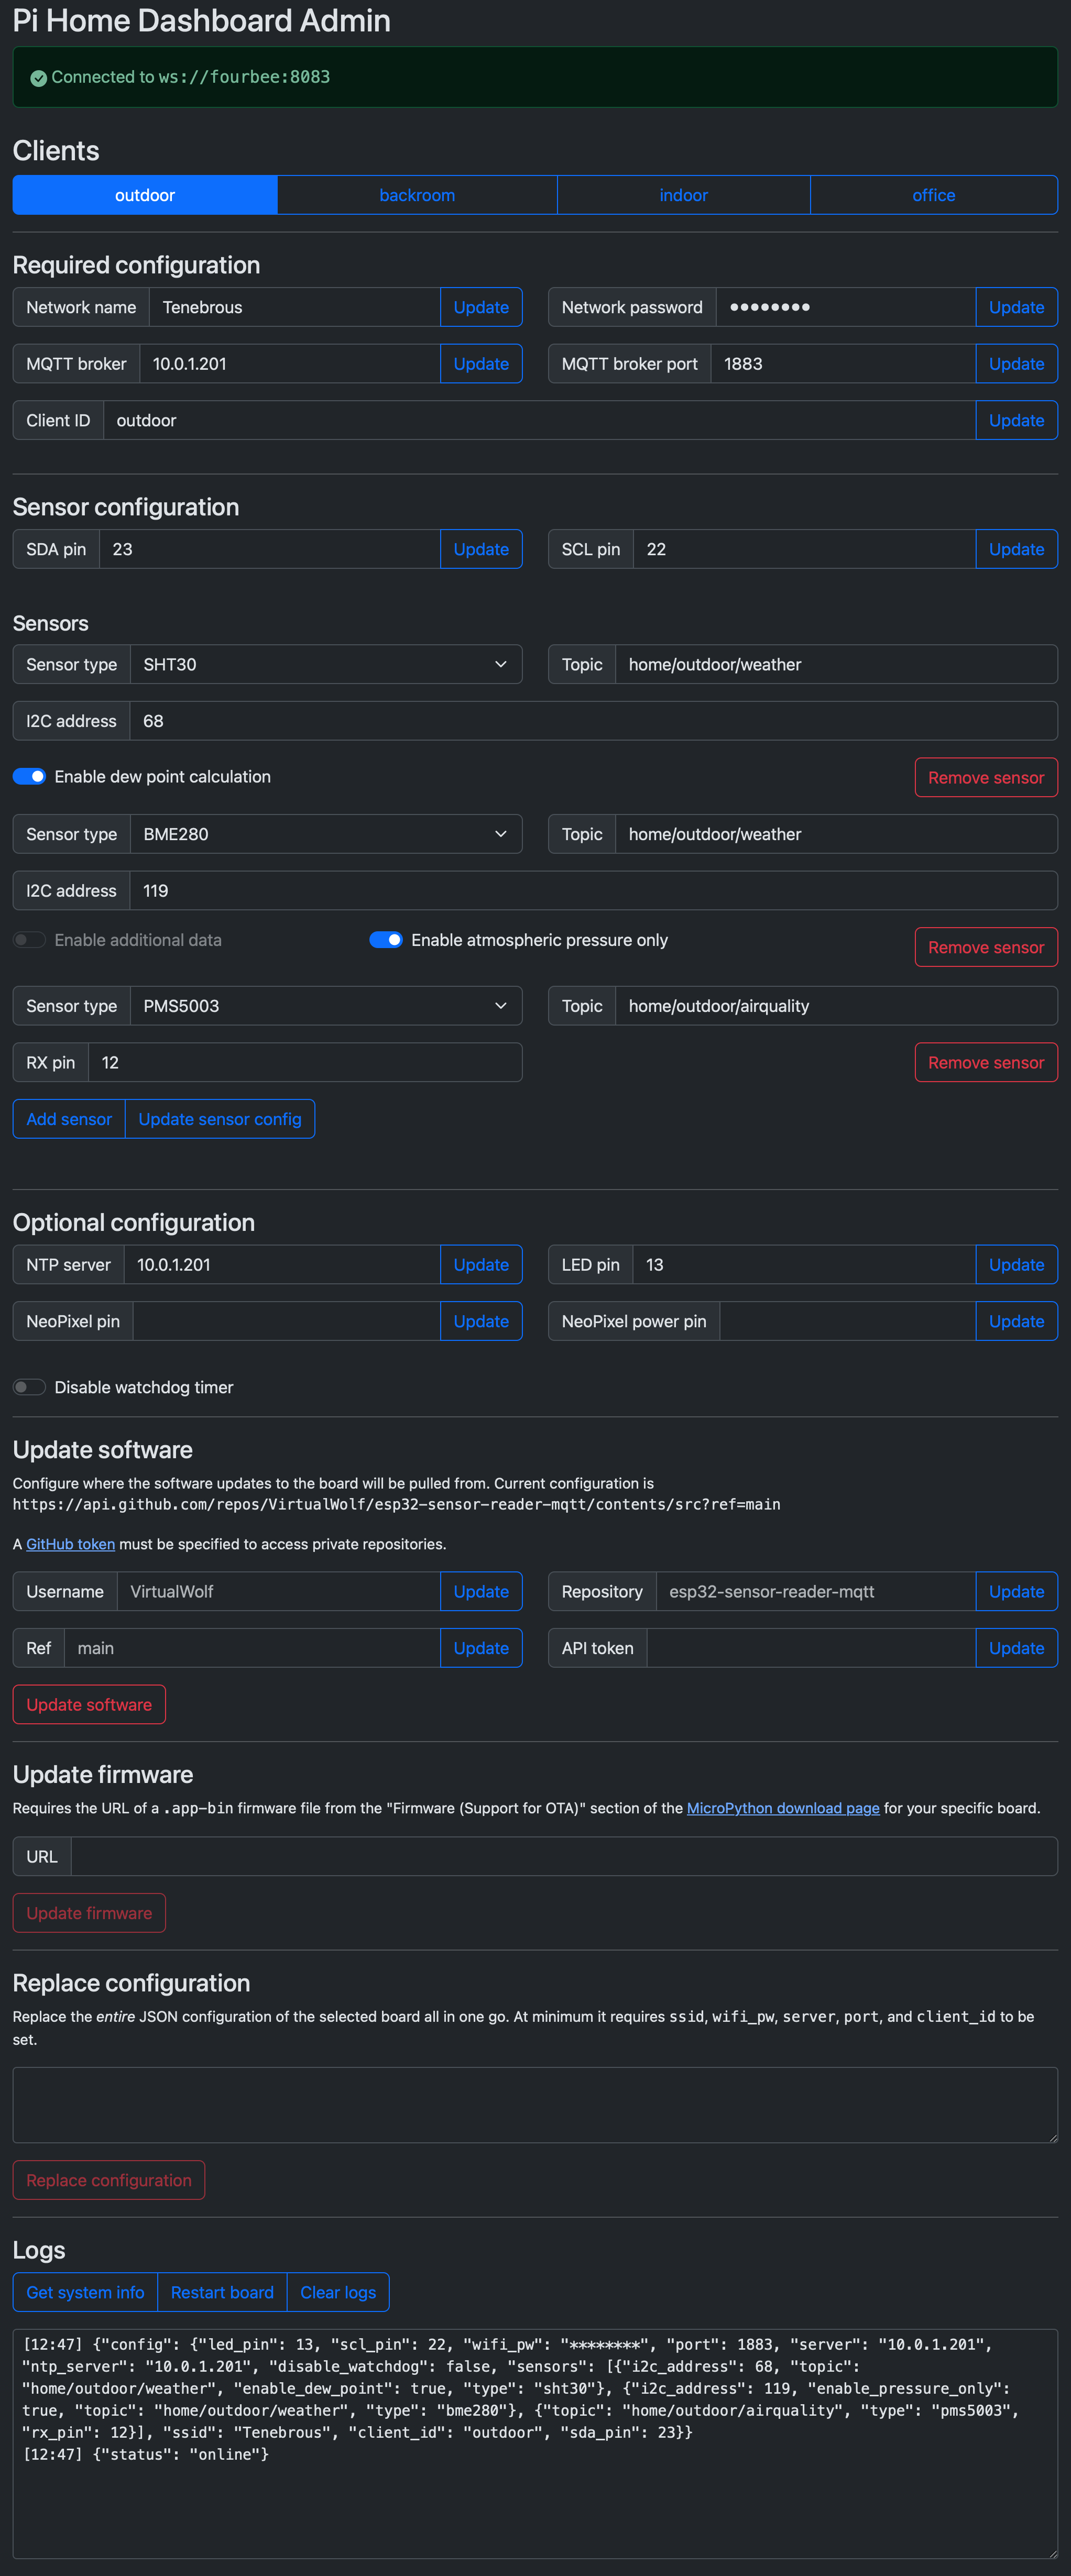
With all of the changes I made to the ESP32 admin page to account for the additional options (including software and firmware updates), it’s rather significantly longer now:

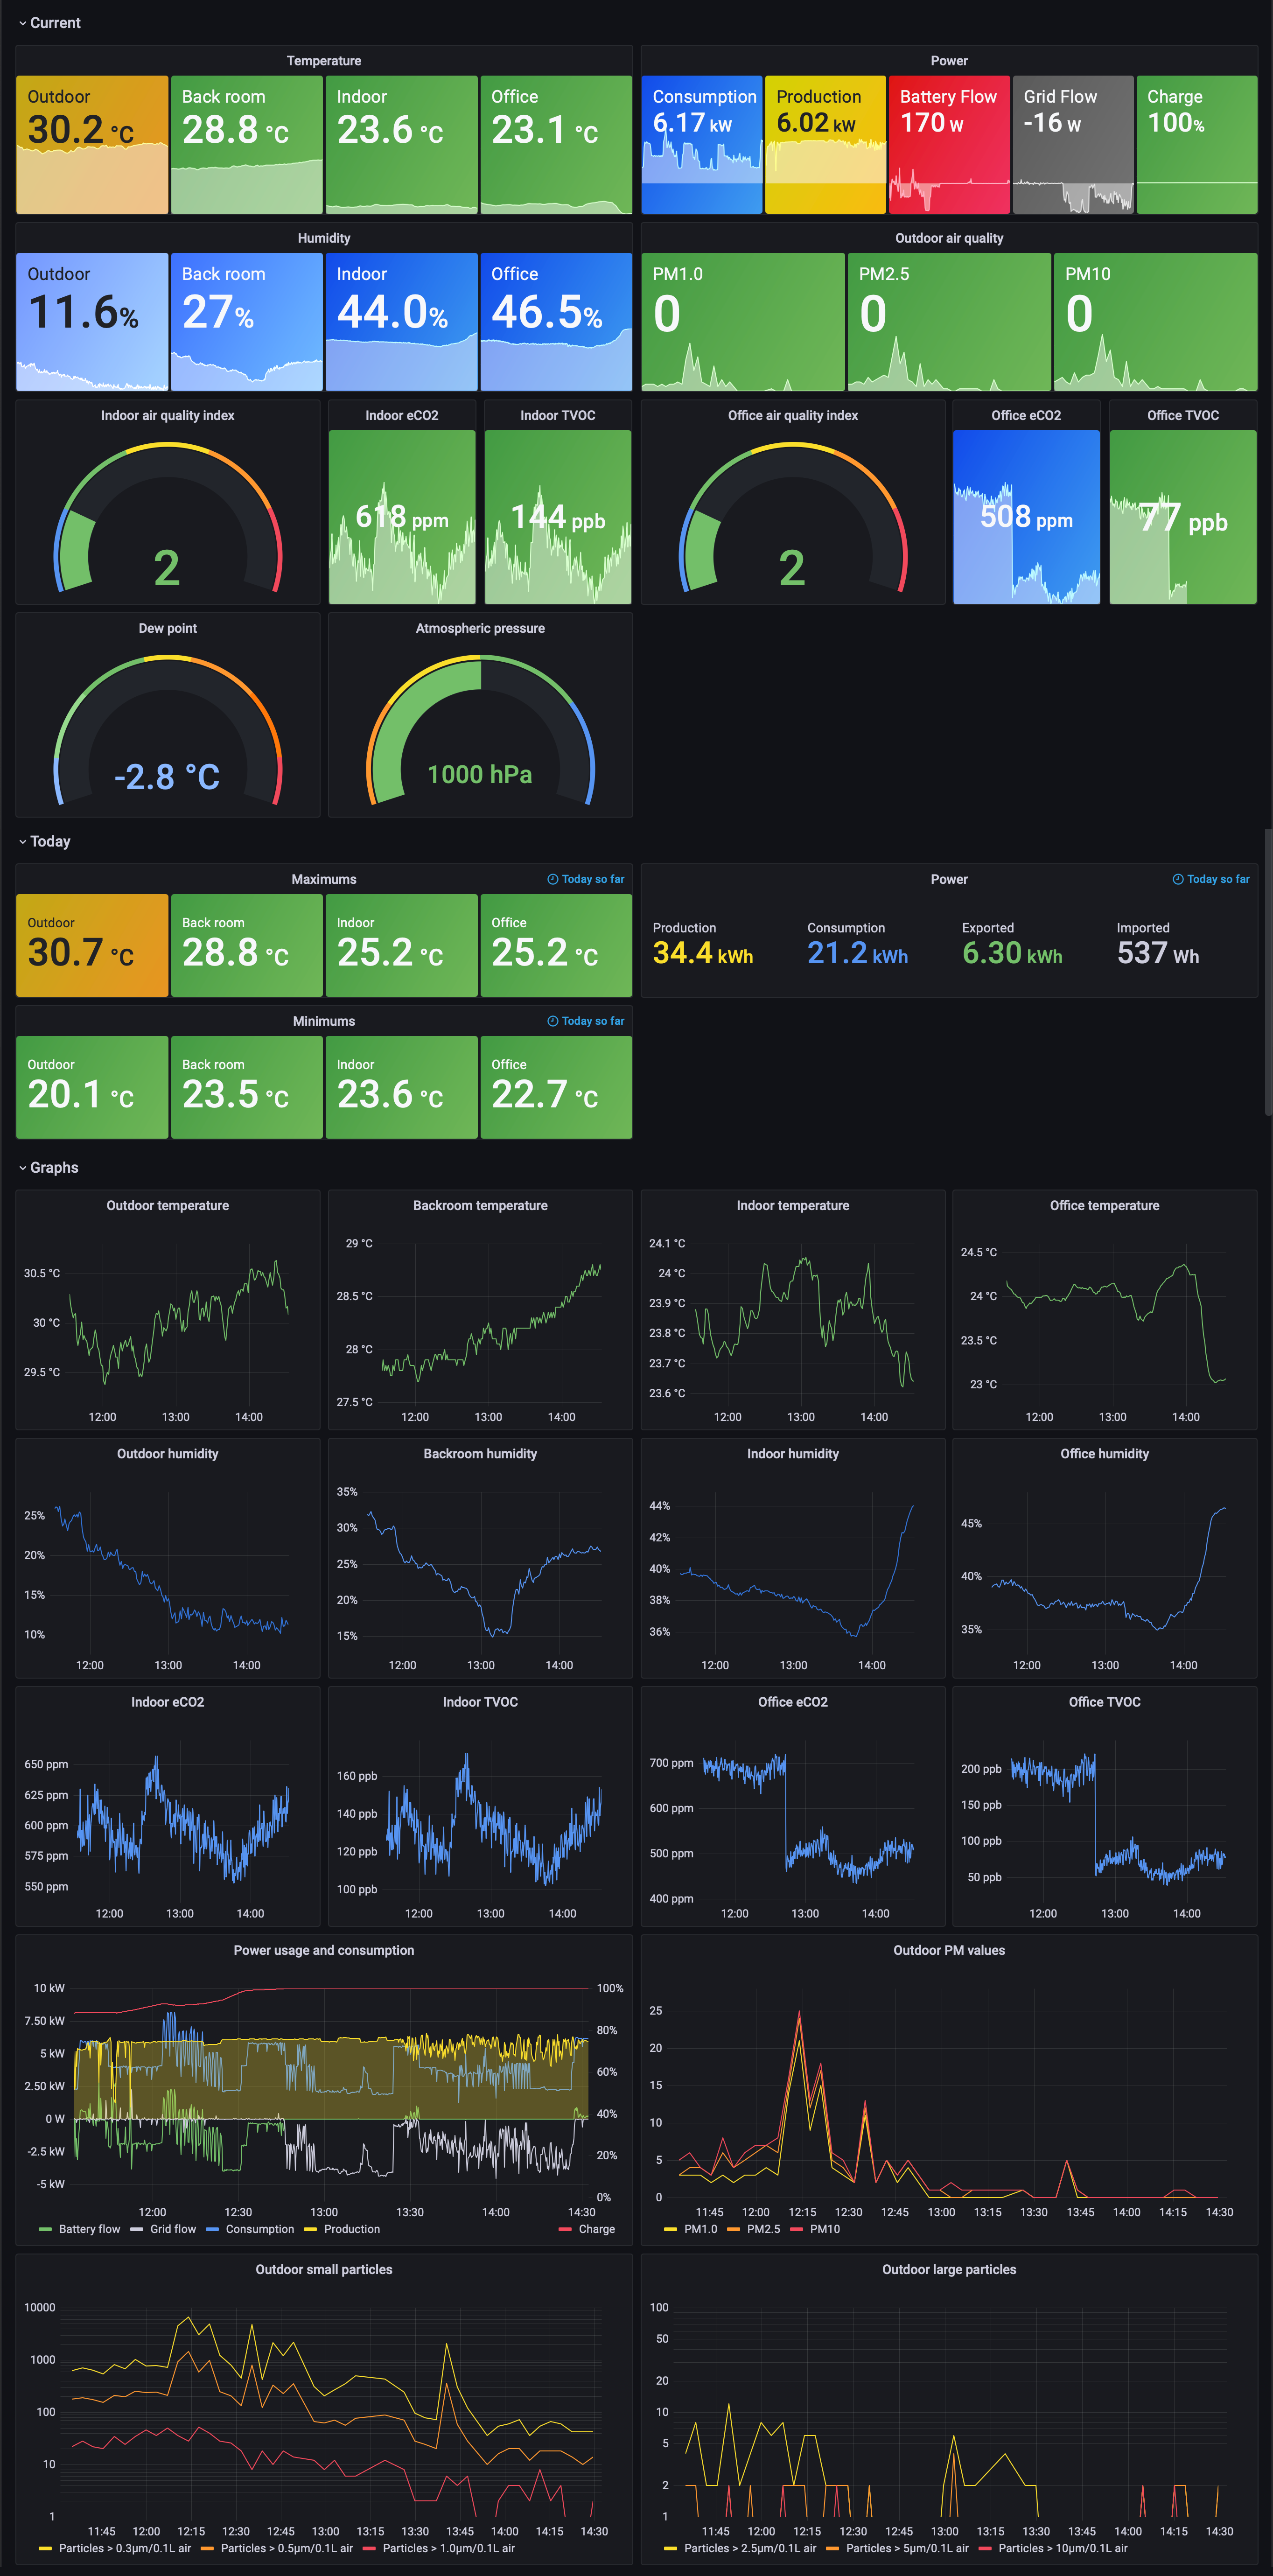
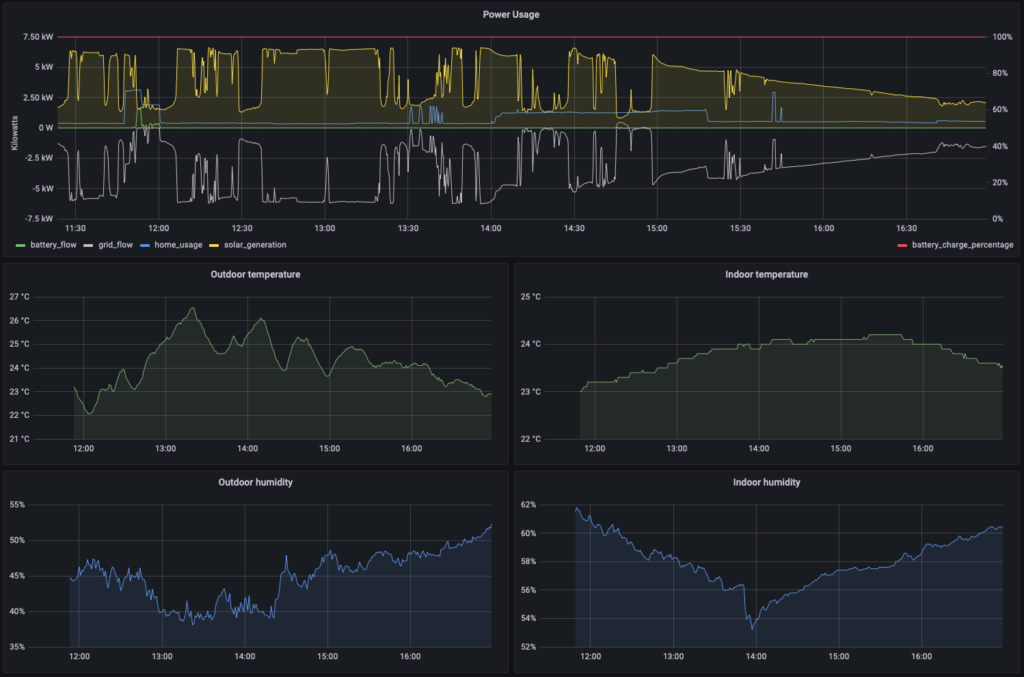
And my Grafana dashboard has gotten equally elaborate!

Better environmental monitoring with the BME280 temperature sensor

Previously on Monitor (And Automate) All The Things:

Ever since I originally moved to the Raspberry Pi setup for our temperature monitoring back in 2017, I’ve been using DHT22 temperature/humidity sensors. They work well enough but they’re quite low-cost and we were noticing that as soon as the temperature starting cooling down outside, the humidity reading would shoot up until it hit 100% even though that clearly was not the case just from standing outside and feeling that it wasn’t muggy. Unless it was properly low humidity, this 100% reading would persist throughout the night until after the sun came up, even after replacing the sensor with a brand new one because the old one got wet in a particularly heavy downpour.

I started investigating alternative sensors and then remembered I’d previously come across the Bosch BME280 which in addition to temperature and humidity also measures atmospheric pressure. A bare sensor by itself obviously isn’t particularly useful, but I found a mob just up in Newcastle called Core Electronics who actually manufacture their own circuit boards to put sensors and other little “maker” things on. Conveniently one of the sensors they offer is the aforementioned BME280 on this nifty little compact board that has a common connector known as “PiicoDev” from them so you don’t need to solder anything. (The connector is also known as “STEMMA QT” or “Qwiic” depending on which company is making it, but they’re all physically identical.)

I found a few MicroPython libraries for the BME280 and settled on this one because it also calculates the dew point for you. After that I ordered a couple of the sensors and got to hacking on my esp32-sensor-reader-mqtt project to add the ability to select which sensor type you’re using.

(I also ended up also rolling my esp32-air-quality-reader code in to allow usage of the PMS5003 air quality sensor we have because that repository was using an old and creaky version of the code I was busily hacking on, and given I had added support for the BME280 already it was a trivial matter to also do the PMS5003.)

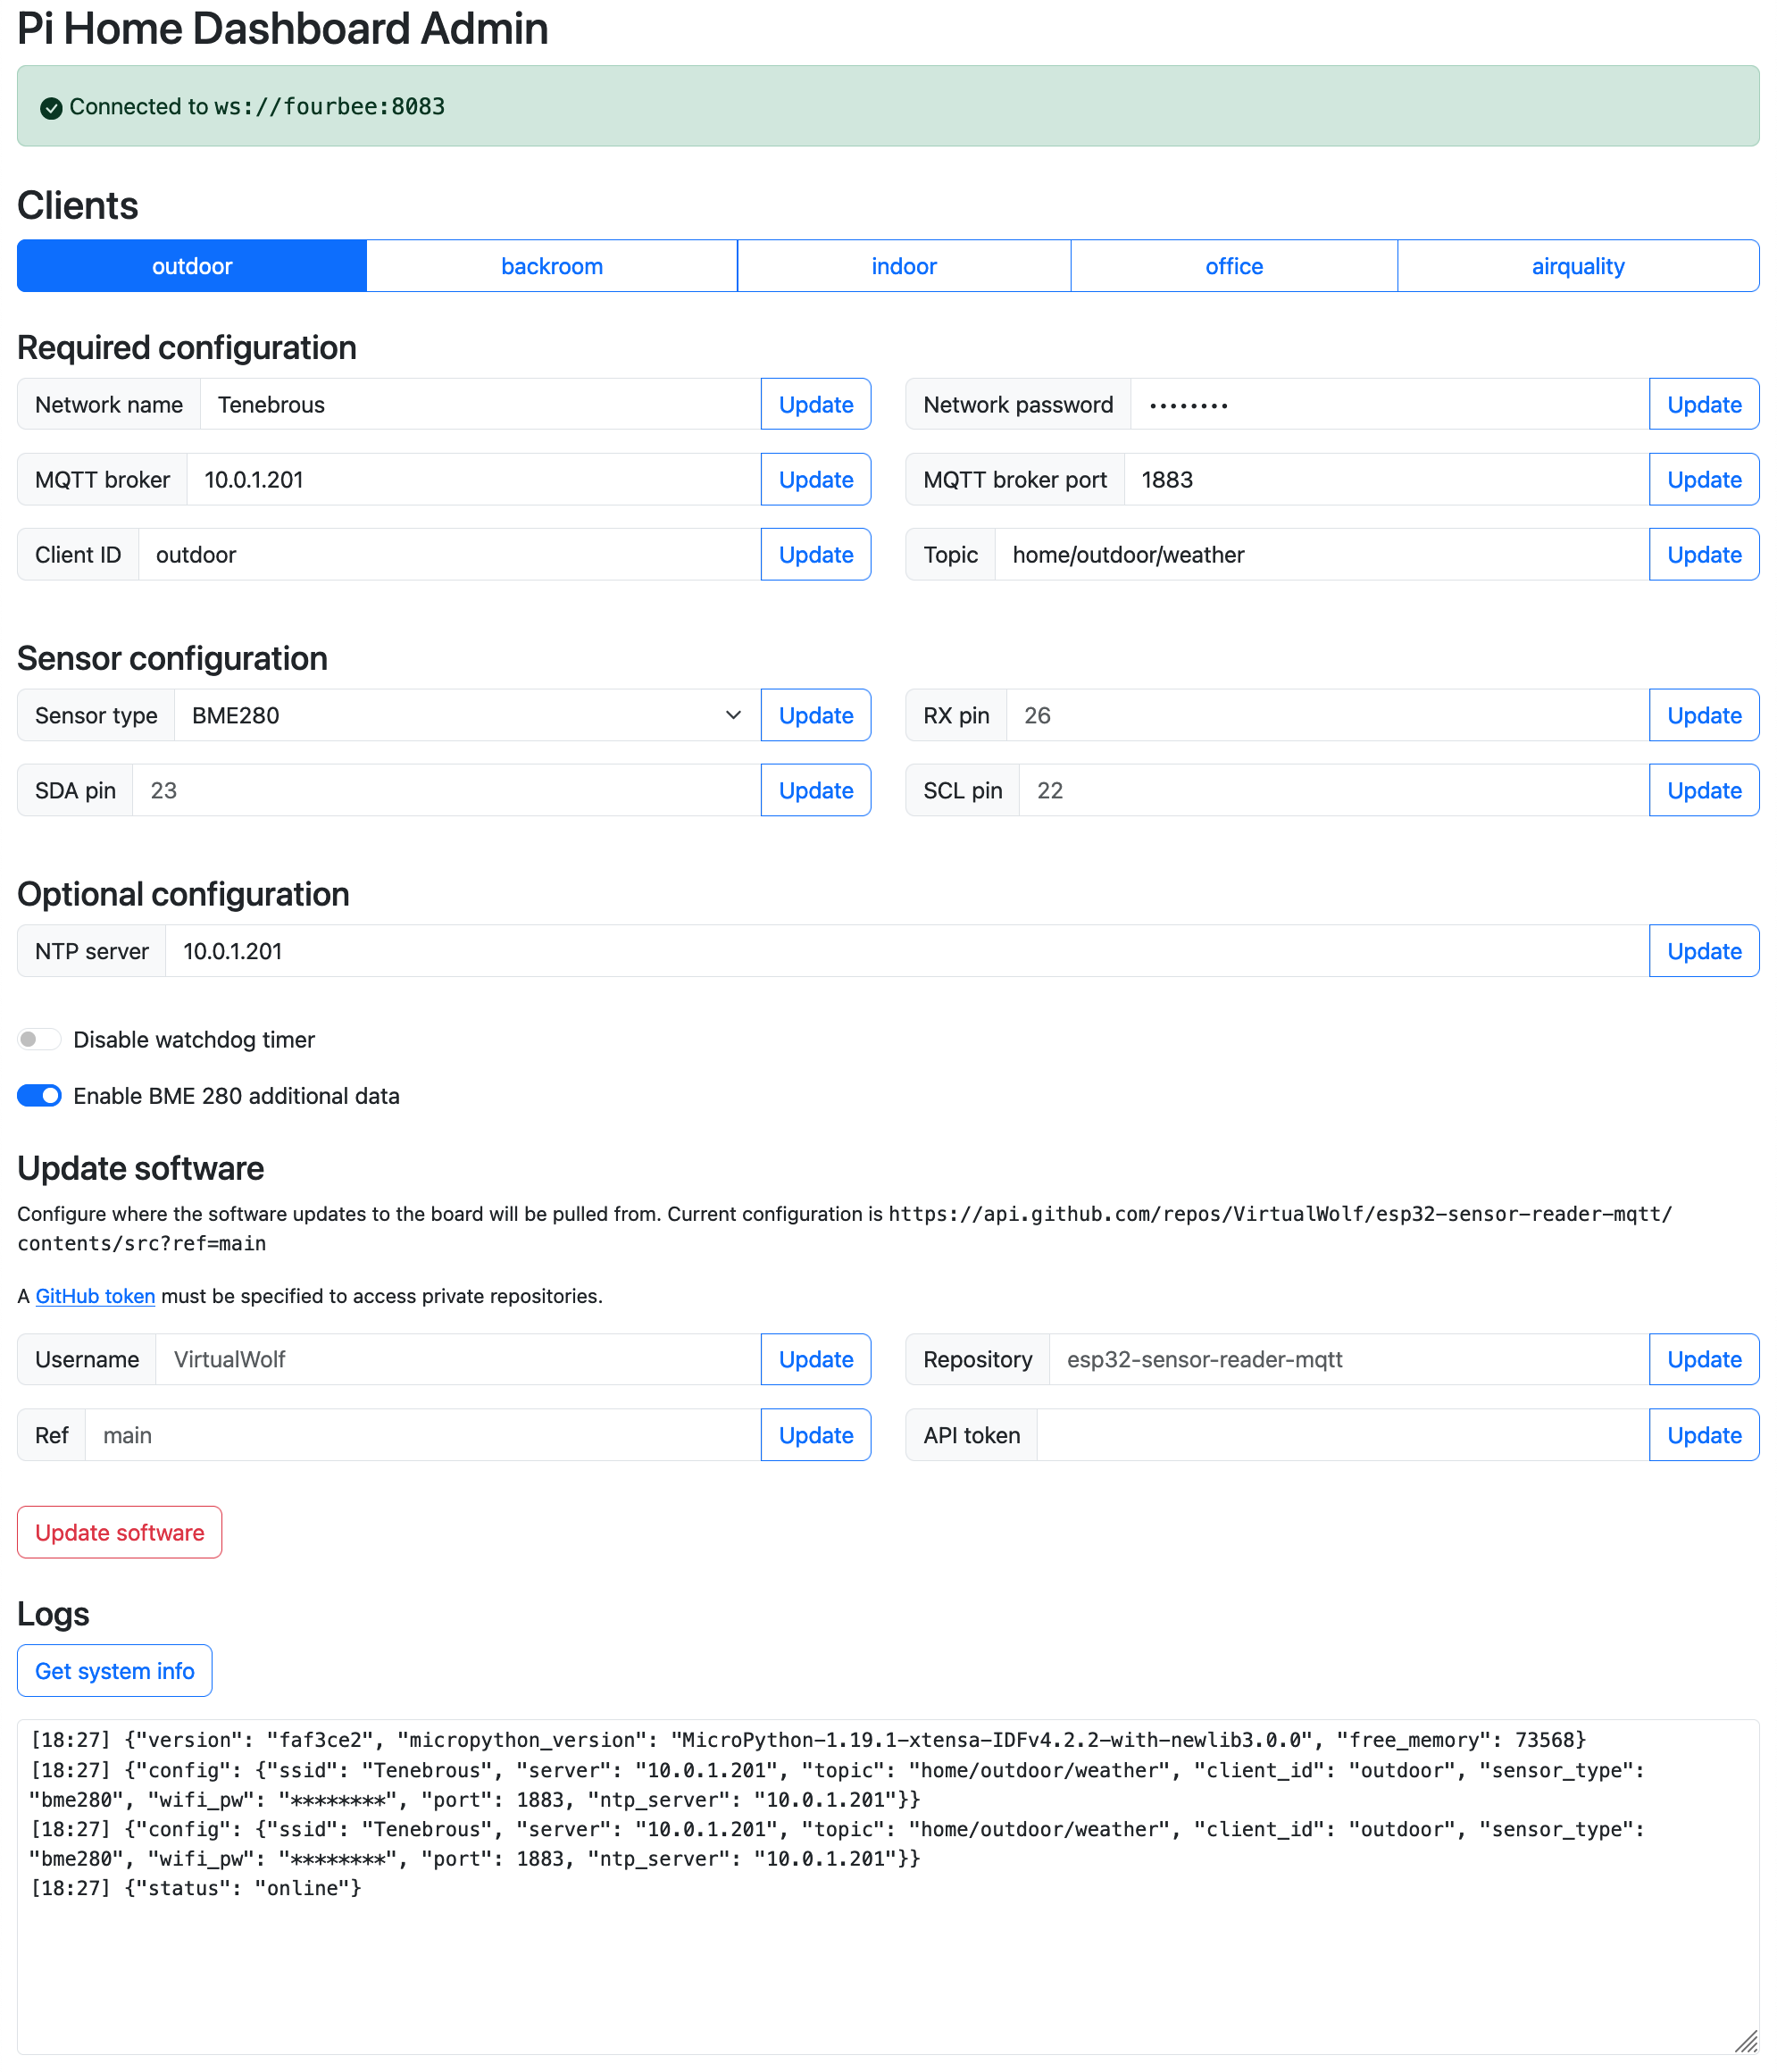
As all of that progressed, the number of options the esp32-sensor-reader-mqtt code could use was increasing and I realised I needed some way of changing settings that was easier to use than having to remember a bunch of mosquitto_pub CLI commands and the specific JSON payload and MQTT topic each one used. I’d previously started writing an admin frontend for them as part of my pi-home-dashboard project but hadn’t finished it, so dusted that off and ended up with this lovely setup!

A screenshot of the Pi Home Dashboard Admin page, with buttons along the top to select which client is being configured, a bunch of text boxes underneath for setting the configuration, and a "Logs" box at the bottom showing all the logs being emitted from the board.

It’s all in a single HTML page, uses MQTT.js to talk directly to the MQTT broker that’s running on the Raspberry Pi, Vue.js for the interactivity, and Bootstrap to make it look nice. It also uses MQTT’s Last Will and Testament functionality to track whether or not the board is online (it restarts if you update a setting) and disable the field inputs if it’s not, plus it allows for remote software updating directly from GitHub so I don’t need to physically plug the boards into the computer like some sort of barbarian when I want to update them! And it’ll grab the latest Git commit hash and save it so I know which code is actually running on the board.

With that all done, I updated our Grafana dashboard with the new data.

A screenshot showing spark graphs with the current temperature and humidity for the four ESP32s we have, our power usage and consumption, outdoor air quality, and the two new bits, two gauges showing the current dew point and atmospheric pressure.

Pleasingly, all of the new readings have been very close to what the Bureau of Meteorology reports!

And finally for my birthday later this month I’m getting Core Electronics’ PiicoDev Starter Kit which has several other sensors in it, and on top of that I included an ENS160 air quality sensor which measures VOCs and eCO2 indoors so I have a lot more more hacking fun to come. 😁

Hello, 2024

I’ve never been someone who has ever made New Year’s Resolutions, but at the same time looking back at my blog post about learning musical instruments and inspired by Georgie’s blog post the other day, I’m going to do a bit of this:

If you’ve known me for a while, you know that I don’t love making yearly goals or resolutions, but I thought I’d write down a few intentions for the year.

I think the main thing that’s really triggered it is the fact that I’ve had my guitar for three and a half years now (plus the Ibanez JIVA I got at the end of 2022), and I still can’t actually play any songs. I’ve got the basic open chords pretty well down (I’m even managing to mostly get the F Major barre chord fully ringing out about 80% of the time), and I can play the C Major scale accurately and at a decent pace, but that’s not a lot for the amount of time that’s passed.

Well okay, I guess that’s not strictly true, I’ve done a bit of mucking around and recorded a few things, the most recent and one I’m most happiest with being this:

But I still can’t do any sort of string-crossing like I’ve been learning on the bass, so stuff like the song above is just me sticking to the one string and moving up and down the frets. I’m by far and away the best at the drums, and I really need to knuckle down and actually get into a proper practice routine with the guitar, so hopefully the act of writing this blog post will get me into gear!

The other thing I want to do more of this year is consistent miniature painting. I’ve been documenting my efforts getting through Warhammer Quest: Cursed City and I started out strong and ended up getting through half of the sixty miniatures in the box, but then… completely stopped painting anything. I managed to do half of my Navis Breachers in September but didn’t do the rest, and after that did only two of the smallest goblins from the Warhammer Underworlds warband Grinkrak’s Looncourt in October. After that there was a whole lot of nothing until I started the Vargskyr last week. I wouldn’t say it felt like work, but I was just really uninspired and blargh, and that’s not really a good headspace to be in for something that’s creative. You could make the argument that it was just burnout from having painted 32 miniatures over the course of like a month, but I’ve had this same pattern pretty much every prior year as well. So I think I’m going to try to just do a bit of painting each week and get something done, rather than going boom and bust. 🤞🏻

On a more positive note, one thing I have been enjoying doing is reading a couple of chapters of a book before bed. This has gotten me through the entirety (bar the last book) of the 41 books of Terry Pratchett’s Discworld novels, all of Iain M. Banks’ Culture series, as well as Timothy Zahn’s Quadrail one. Most recently I’m doing yet another re-read of the very excellent Chronicles of the Shadow War trilogy, which is a continuation of Willow set fifteen years after the movie.

So yes, onwards and musically upwards!

Automating Raspberry Pi setup (and ESP32, and Linode) with Ansible

(Update April 2024: When I originally wrote this blog post, the official Raspberry Pi distribution of Debian hadn’t been updated for Debian 12 and so I was still on Debian 11. They’ve since updated it, so I ran a trial run on my spare Raspberry Pi 4B+ and made a couple of minor changes to the Ansible playbooks, and flashing the “production” 4B+ to Debian 12 with the full Ansible setup was an absolute unqualified success! 🎉)

Back in 2017 when I first moved off the old and busted NinjaBlocks platform to a Raspberry Pi for my temperature sensor setup, I said:

[…] if the hardware itself died I’d be stuck; yes, it was all built on “open hardware” but I didn’t know enough about it all to be able to recreate it.

I definitely have no problems with the hardware now (and with my move to ESP32s and MQTT for the temperature sensors themselves it’s even simpler), but I recently realised that the software configuration on the Raspberry Pis was still a problem: the configuration and setup of everything had had a steady pace of organic updates and tweaks and if one of the SD cards died or had a problem and I had to reformat it, I’d have a hell of a time recreating it afresh. On the “main” Raspberry Pi 4B+ alone I would need to:

  • Install all the various software packages (vim, git, tmux, Docker, etc.)
  • Add my custom shell configuration and bashmarks
  • Install Chrony and configure it to allow access from the ESP32s
  • Configure the drivers for the JustBoom DAC HAT and install and configure shairport-sync to allow for AirPlay to the big speakers in the lounge room
  • Configure and run the Mosquitto Docker container to allow all my temperature, humidity, air quality, and power data to flow to all the various places it needs to go
  • Configure and run the pi-home-dashboard Docker container so the Raspberry Pi Zero Ws can display our little temperature dashboards
  • Configure and run the powerwall-to-pvoutput-uploader Docker container so our power usage data can be both sent to PV Output and also be read by InfluxDB and the Raspberry Pi Zero W dashboard

In addition to all of that, the Raspberry Pi Zero Ws that display our little dashboards required a whole bunch of constant tweaks and changes to get them working properly (they run a full Linux desktop and display the dashboard in Chromium, and Chromium has an extremely irritating habit of giving a “Chromium didn’t shut down properly” message instead of loading the page you tell it to if there were basically any issues at all; fixing that required a whole lot of trial and error until I narrowed down the specific incantations to get it to stop).

Setting all of that back up from scratch would have been an absolute nightmare so I figured I should probably automate it in some fashion. And in addition, it means I would be able to keep future changes under version control as well so no matter what I’ve done I’d be able to restore it if necessary. At work we use a piece of software called Ansible to bring up the required software and configuration on the Amazon EC2 instances we run, so I thought that’d be a good place to start.

Even though it’s developed by RedHat and isn’t just some random open-source piece of software (although it is open-source), I still found the documentation to be not great in terms of explaining everything step-by-step and building on that knowledge in subsequent steps. But after a bunch of reading and trial and error, plus several weeks of getting it all working, I have my entire Raspberry Pi setup for all the Pis we have at home fully automated! I can wipe the SD card, reflash it with a fresh copy of Raspbian, then run Ansible and it gets everything installed and configured and working exactly how I need it.

I uploaded the whole shebang to GitHub to hopefully help others out as well. It’s obviously completely customised for our setup, but it at least gives a reasonable idea of how everything works.

It starts by creating an inventory, basically a list of the hostnames you want to run playbooks against (a “playbook” is a file that describes the list of steps to run in order to get to the desired state you need). Alongside that, you can group the hosts together so you can target a playbook to run on a specific set of hosts. For example, the server group only consists of the main Raspberry Pi 4B+ described above, but the dashboards consists of all three of the Pi Zero Ws that are running the dashboards.

One of the really handy things with Ansible is that you can set variables that will be reused in various places, and you can configure them for all hosts, or per group, or per individual host. I’m using a combination of those, and inside the server group it will actually look up items from within 1Password so I can commit the code to source control and not be storing secrets in it. You can also set variables per individual host as well, which I use to specify the dashboard URL that each of the Pi Zero Ws should load.

The playbooks themselves live in the playbooks directory, and they specify a set of hosts to run against, and a series of roles to run. The roles are reusable sets of tasks, so for example I run the initialisation role against all of the Raspberry Pis no matter what they’re ultimately going to be doing, for doing the initial things like setting the hostname and updating all the software packages, configuring Git, etc.

After the initialisation is done, the server playbook will run all the various steps to get Docker installed, NVM and Node.js installed, then get everything else configured and installed that needs to be configured and installed. Compare to the dashboards playbook that will also run the same initialisation steps, but then runs the dashboard role which installs the drivers for the HyperPixel display and various other things that need doing, and will configure the autostart file so on boot Chromium comes up with the correct URL depending on which Raspberry Pi it’s running on! The dashboard_url variable in that template file is set in the host_vars directory per specific hostname, so I can customise it for each one.

After my complete success here, I decided I wanted to do the same for when I needed to reflash my ESP32s, because previous it relied on me remembering to update a configuration file with the name of the ESP32 and I had definitely messed that up on a couple of occasions. That was relatively straightforwards as well, and I added it to my esp32-sensor-reader-mqtt repository (and included a playbook to just erase a board because I never did it quite often enough to remember what the specific steps were).

And then finally after that, I decided I should also automate my Linode setup. I’d posted back in 2019 about using Linode’s StackScripts to set everything up, but the problem with that is that you run it at the very beginning and your Linode is set up appropriately at that point, but any changes you make after that aren’t saved anywhere, so you’re essentially back to square one again. The final sentence in that blog post was this:

As long as I’m disciplined about remembering to update my StackScript when I make software changes, whenever the next big move to a new VM is should be a hell of a lot simpler.

But in news that will surprise nobody, I was not at all disciplined. 😅 The other problem is that you can’t test the StackScript as you’re going (they only run when you first spin up the Linode afresh), you have to update it and hope those steps work in future. With Ansible, the idea is that everything is idempotent, so you can run everything as many times as you want and it won’t change if something has been configured already, so it enables you to easily test out parts of the playbook updates without needing to wipe the whole damn thing. It’s taken a bit over a month of working on it after dinner and on weekends, but now the whole Linode setup is fully automated as well.

However, the other wrinkle is that where the Raspberry Pis don’t store any data on them and can just be wiped without problem, my Linode hosts this blog, my website and all its images, all the various images I’ve posted to Ars Technica over the years, and a bunch of other things too. I ended up splitting the Ansible process into two, there’s the configuration and then another separate playbook that copies everything over from the old Linode onto the new one and then registers a new SSL certificate with Let’s Encrypt and updates Cloudflare to point the DNS of my website and blog and the general server hostname to the new Linode.

That bit was a bit nerve-wracking, I tested the process a bunch of times and pulled the trigger for real last weekend, then had a minor panic attack when I realised that the database dump of my website hadn’t been reimported since I originally tested the process back on the 9th (I suspect it didn’t import because there was already data in the database, but unfortunately it didn’t actually error out so I didn’t know), so I didn’t have any of the posts I’d made nor any of the temperature data since then. 😬 Fortunately I realised this the morning after I’d done the migration and had wisely left the old Linode up and running, so I renamed the database on the new Linode so I could harvest the temperature data that been sent since the migration, dumped the old database from the old Linode and imported it into the correct location on the new Linode, and then exported and reimported just the missing temperature data, and we’re back in business.

This time I should be able to revisit this in three or four years when I next do a big upgrade and it should actually be quite painless (famous last words, I know, but I’m much more confident this time).

A musical journey

Sixteen years ago today, I bought my first guitar! It was a Fender Squire in a $400 everything-you-need starter kit, but I never managed to stick with it enough to learn much of anything, barely even the most basic open chords. The learning DVD I bought was boring as hell, the guitar was really heavy and kept going out of tune, and the amplifier it came with sounded awful.

I didn’t get rid of it though, it moved from house to house with us, and it was just sitting in our back room collecting dust when on a lark during the first COVID lockdowns in 2020 I decided to pull it out and maybe have a stab at learning to play again given the sheer richness of learning resources to choose from these days. First thing to do was to get it tuned up, and the very first string I tried to tune immediately snapped. I looked down the neck and realised that it warped to all hell and back, and given I never particularly liked it—in either a nice-to-play or an aesthetic sense—I decided I’d actually splurge a bit and spend more and get a guitar that made me want to pick up and play it.

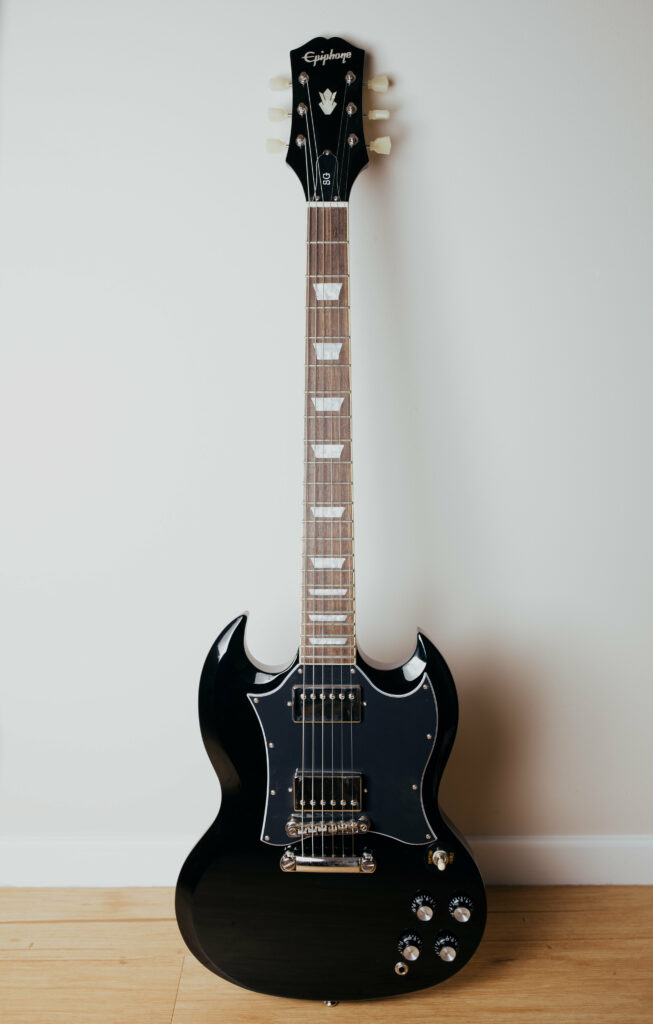
After a ton of research on learning all about guitar pickups and where the sweet spot is for a guitar that’s properly good in its own right but not unreasonably expensive, I settled on an Epiphone SG Standard in ebony.

A photo of a shiny black electric guitar sitting sitting upright against the wall.

It arrived in mid-June and looked absolutely mint. For actually learning how to play again, I started with Fender Play. It was pretty decent, and absolutely a huge step up from the extraordinarily dry learning DVD I bought in 2007.

Then come mid-2021 we had more lockdowns, even harsher than 2020’s, where we weren’t even allowed to travel more than 5km from our homes. At some point during all this I randomly remembered how much I’d always enjoyed playing the drums in Guitar Hero back in the day, and that a friend had mentioned he had an electronic drum kit from Roland, and I thought, “Why not learn to play the drums too!”

Cue more research, and I settled on Roland’s TD-17KV drum kit.

A photo of an assembled Roland electronic drum kit.

It arrived at the end of July and came with a trial of Melodics, which is a learn-to-play drums app (and also keyboard and also synth pad) where you plug the drum kit into your iPad or computer and it has an almost Guitar Hero-esque system where it scrolls across and you hit the correct pad or cymbal with the particular hand at the right time.

A screenshot of the iPad app "Melodics". It's showing a pattern of notes to hit on the drums, right/left/right/right/left/right/left/left on the hi-hat and snare, so you end up doing in groups of three, but for the kick drum it's on every second note.

It works really well, but while I didn’t want an actual in-person teacher, I felt like I needed something a bit more than just learning from the app. I discovered this drum teacher who’s based in the UK, Mike Barnes, and he puts out a ton of great videos on his YouTube channel, they’re really clear and he does them all in one single take rather than that thing that so many people on YouTube do where they’ll edit out every little bit of silence or gap. He’s got a Buy Me A Coffee page too where you can subscribe for a monthly fee and he’ll send you notations of the stuff he puts up on YouTube, works with you for a practice plan, and you can email him with questions or to get feedback on things you’re working on. I signed up to that in mid-2022 and it’s been really good, highly recommended if you’re learning drums!

On the drum kit itself, I’ve since replaced the stock hi-hat pedal and cymbal with a VH-11 on a proper acoustic hi-hat stand, and it physically moves open and closed and you get a much better sense of how to manipulate the pedal to get the sound you want.

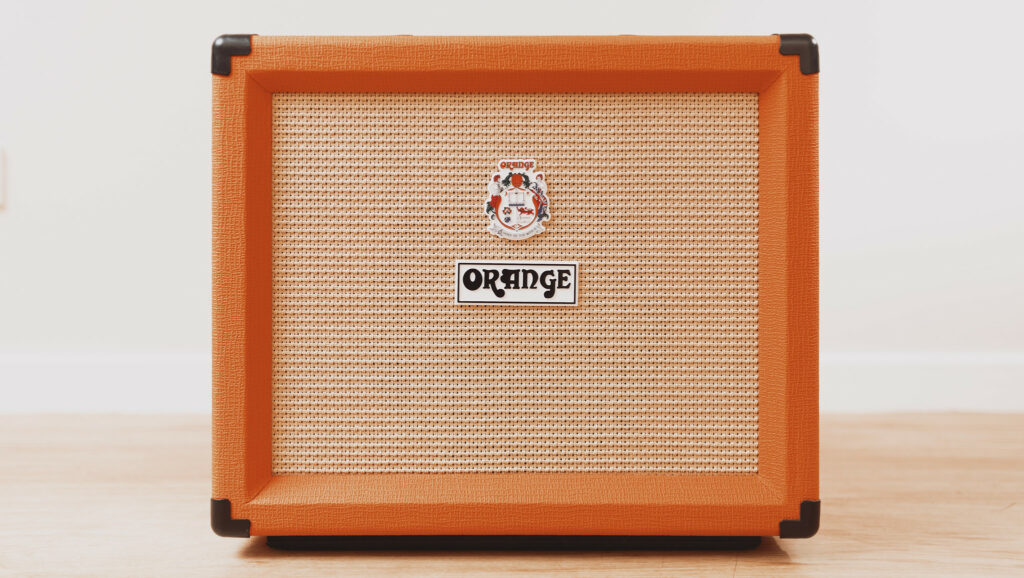
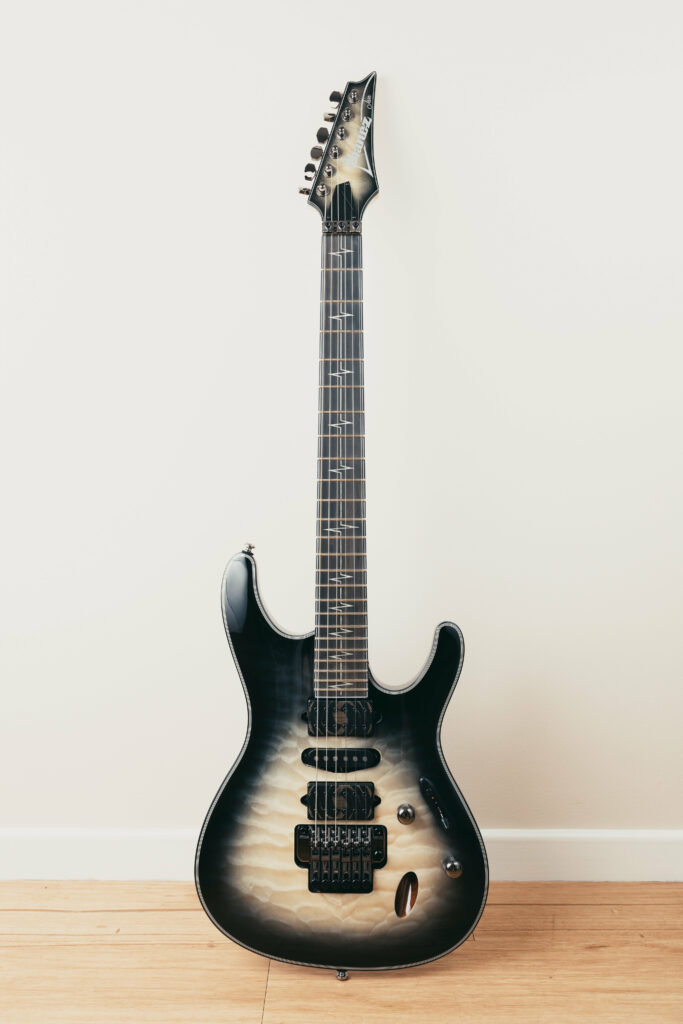
I was thoroughly enjoying learning all this new stuff, and at the end of July 2022 I bought a for-real guitar amplifier with vacuum tubes, the extremely eye-catching Orange Rocker 15 Combo, and in August bought some guitar pedals and decided to treat myself to a new guitar. Nothing was wrong with the old one but I wanted some more variety. I did a bunch more research and became completely obsessed with Nita Strauss‘ signature Ibanez JIVA10 guitar, the amount of different tones you can get out of it thanks to the two custom humbucker pickups and the middle single coil is brilliant, and it looks so pretty to boot. 😍

Also at the start of August that year I ditched Fender Play and signed up for Guitar Zero 2 Hero, which is a course by this Aussie guy based in Melbourne.

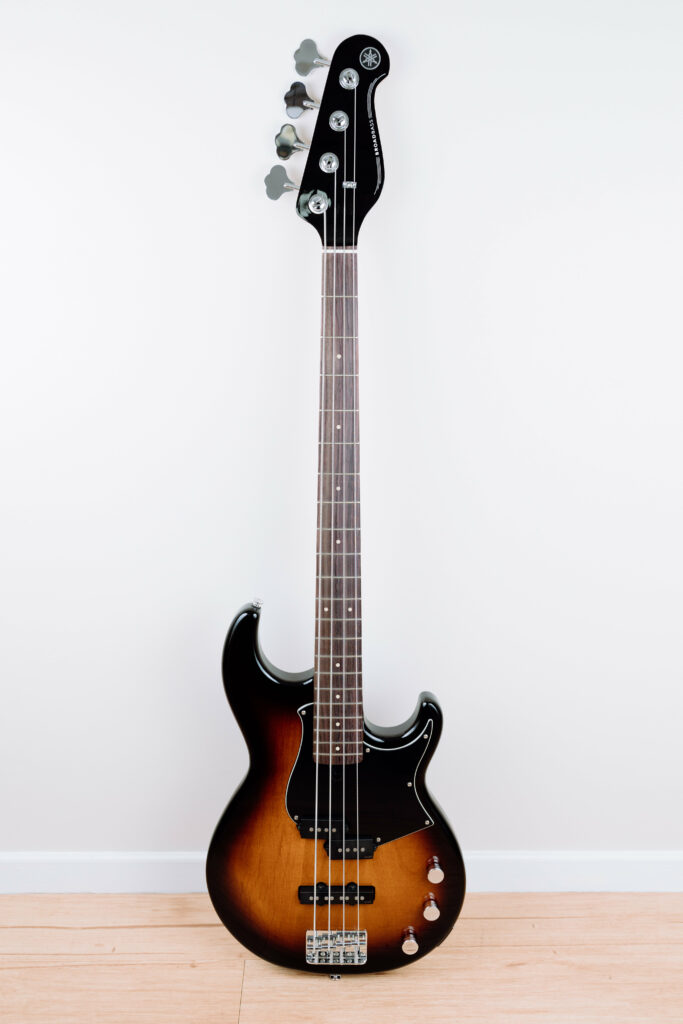
For my 40th birthday this year, I decided to keep expanding my musical repertoire and bought a bass guitar and amplifier! A friend of mine had mentioned that he had bought a bass and was learning to play which is what inspired me. Cue another bunch of research and I landed on the extremely handsome Yamaha BB-434 bass and another Orange amplifier.

A photo of a Yamaha BB-343 bass guitar propped up against the wall. The body fades from black around the edges into a dark rich orange/red wood in the middle
A photo of an Orange Crush Bass 25 bass guitar amp. It has a black mesh on the front with the rest of it being the customary bright orange colour

I’d seen many recommendations for the “Beginner to Badass” course at bassbuzz.com so I signed up for that and can confirm it’s excellent. You get a really good feeling of progress and learning as you go through the course and it makes you want to keep playing more, and the guy that produces it gives a really good indication of when you should continue to the next course versus getting stuck in one lesson and losing motivation.

I actually ended up realising that I wasn’t feeling that sense of progress or learning from the Guitar Zero 2 Hero course and was kind of stuck in the mud and hadn’t been playing it. So I ditched that one and found multiple recommendations from people on the bassbazz.com forums saying the closest thing to the Beginner to Badass course for guitar is Justin Guitar (which weirdly is another Aussie guy). I’ve only been doing it since the end of September this year, but it’s very promising so far and I’m getting more of a feeling of progress. In the almost three and a half years years since I bought my guitar I still haven’t managed to get anywhere beyond basic open chords and a couple of power chords from the Fender Play course, but I’m feeling more motivated now to actually stick with it and learn, and I think the Justin Guitar course is helping.

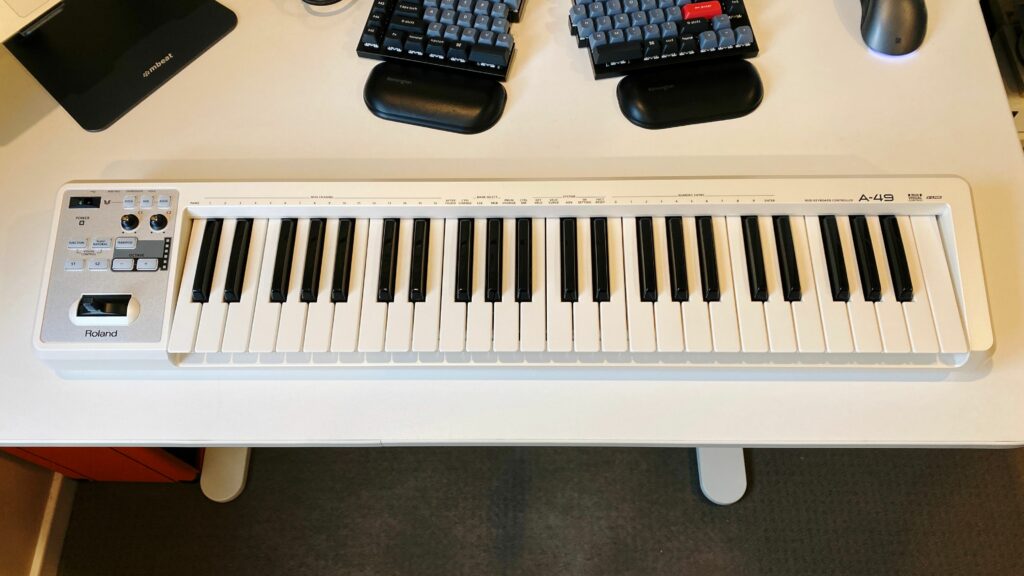
And then finally, because I’m already subscribed to Melodics and it also includes a keyboard course, I bought a MIDI keyboard at the end of last month as well. 😅

A photo of a Roland A-49 MIDI keyboard in white sitting on my (also white) desk. As the name suggests it has 49 keys, and has a number of buttons and knobs on the left hand side.

I actually bought one waaaay back in 2004 but in a similar vein to what happened with my original guitar, never stuck with it due to a lack of good learning resources.

In terms of how well I’m going with things, I’d say I’m far and away best at the drums. Melodics has definitely gamified things and you get “streaks” for practising for just five minutes a day each day, so during my lunch break I’ll go out to the back room where the drum kit is and get my at-least five minutes done. I also discovered this guy Jack Curtis who makes drumless backing tracks, they all come with both regular versions and ones with a click track, and they’re such fun to play along with, so between that and Melodics, all up I’ll probably be playing drums for a good 30-40 minutes every day and I think it definitely shows.

At the start of this year I recorded myself playing along to one of Jack Curtis’ tracks and even between then and now I can see I’ve come quite a lot further again. I need to get around to recording myself playing some more of those, maybe even that same song, but the latest highlight has been playing the drums on this collaboration with some friends. 😁

In terms of guitar, it’s been less good, though I’ve made a few recordings. This one from May of 2022 really clearly shows how not-great I was at keeping in time, I recorded another in December which was a fair bit better, and added bass to it in April of this year. Finally, this from May is better again, playing single notes rather than chords but really only from a single string at a time.

My current goal is to really stick with learning the guitar and get past the basic open chords and be able to properly do justice to the JIVA10 I bought. I started again from the very beginning with Justin Guitar just to be sure I covered everything, and he’s got a separate music theory course that I think I’ll start on as well, and will hopefully report back with good news! 😛

Back to the office for a week

Back to the office for a week

My workplace has leant heavily into remote-first work since COVID hit and we’ve hired a ton of people outside of the usual places where we have physical offices (Sydney in Australia, Mountain View in the US, etc.), and even for those of us who were regularly in the office pre-COVID, working from home is the norm now. A side-effect of that is that we don’t have nearly as much connection between coworkers especially for people who can’t come into the office even if they wanted to, so as a result we have “Intentional Togetherness” events for teams every six months or a year—I forget the cadence—where we’ll actually fly everyone in the team over from wherever it is they are and hold a whole bunch of in-person workshops and collaboration and just generally hang out.

One of my coworkers does the same job I do but is based over in Austin in Texas and we flew him out as well, plus people from New Zealand, Brisbane, Melbourne, and probably other places I’ve missed. I’d never met the Austin guy in person for obvious reasons, and it was really nice seeing everyone else in person too. He actually arrived on Thursday morning last week and so I went into the office on Thursday and Friday, plus all of this week. There was lots of going out for coffee and figuring out what we’d get for lunch and all the usual things you do when you’re in the office plus just generally chatting. I posted the highlights (which are 95% food-related) here.

My commute is a fifteen minute walk to the train station then an hour on the train (thankfully the office is right next to the station), and pre-COVID when I’d be in the office every single day we’d get up at 7:10am to get the 8:00am train to be in the office a bit past 9am, and wouldn’t get home again until past 7pm. There was no way in hell I was going back to doing that again so instead for this week I’d get up at my usual working-from-home time of 8:15am, start work a bit before 9am, then walk to the station and catch the 9:37am train and work from the train while I was commuting. Bar the post-work events we had, I was also getting the 4:50pm train home and working for the last hour on it to avoid peak hour.

Even with those changes compared to the pre-COVID commute, it’s now Friday evening as I type this, and I am absolutely wiped out. My social battery is not nearly at as high a capacity as it was pre-COVID and looking back at what my commute and hours used to be, I can’t believe I used to do that five days a week. And outside of the social battery aspect, this has felt like the longest seven days I’ve had for a long time (and I had a weekend in between the first two days I was in the office and this week). I know some people hate working from home for all sorts of reasons, but man, personally I would never go back to having to be in an office every day. Going in once in a while to see people or to play things after work, absolutely. But every day? Hard nope.

Conveniently this weekend is a long weekend because Monday is the Labour Day public holiday, so I’ll have an extra day to recharge!

Ten years of house!

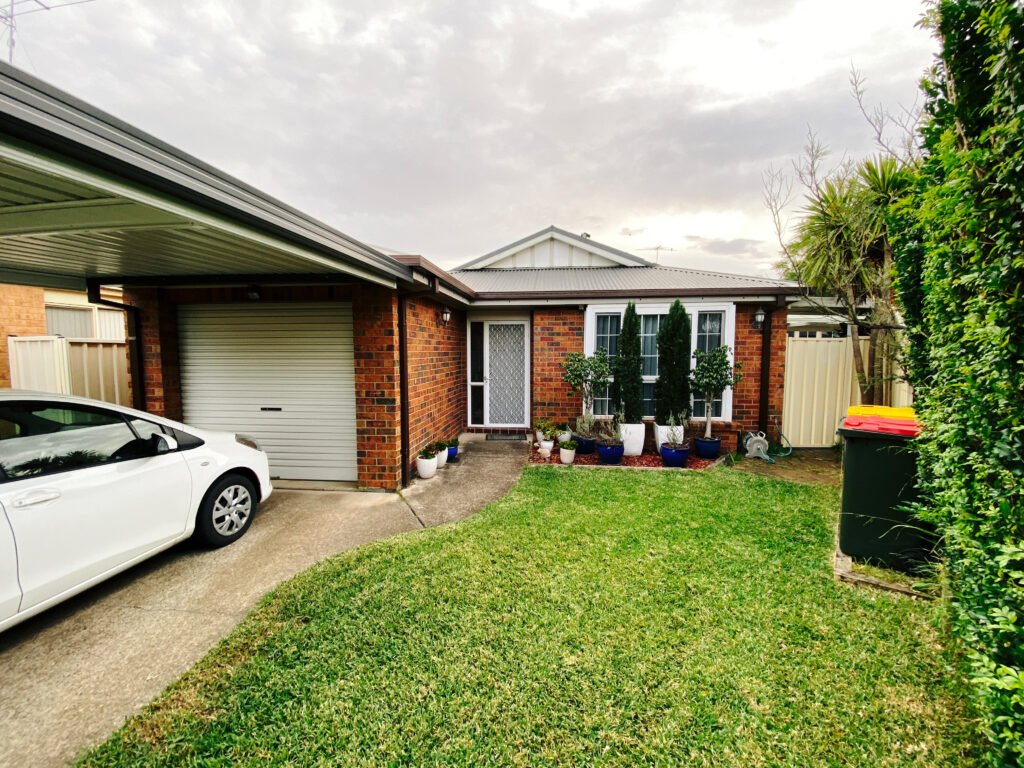
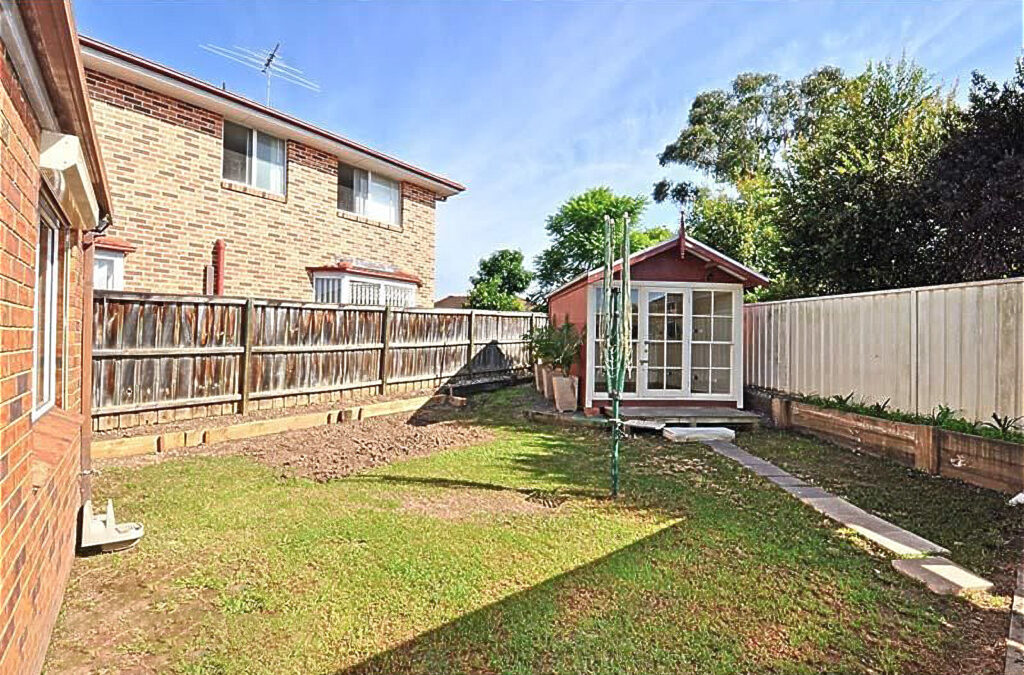
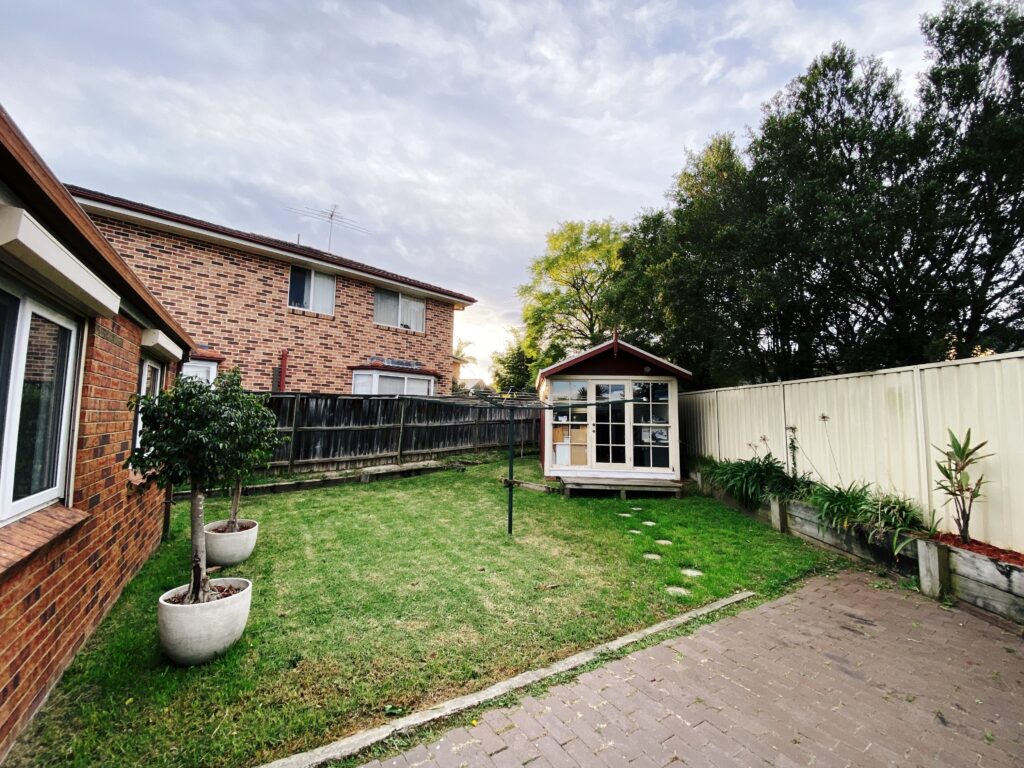
Today marks ten years since we moved into our house!

This is the second-longest I’ve lived in any one place, when I was born we were living in a very small house and just before my 10th birthday we moved to where my parents still are to this day. After that, I moved out of home when I was 24, so only another four years here and it’ll be the longest I’ve lived anywhere!

It’s funny looking at the old photos and comparing them to now (apologies for the dreadful quality, these are upscaled from the really tiny real estate photos).

Before
Today
Before
Today

I blogged about the move a few days after we’d first moved in and how we turned the “office” that was the garage back into an actual garage, and since then we have:

We also want to redo the whole backyard and back room there, but that’s a massive project and is going to be a number of years down the track yet.

Phew!

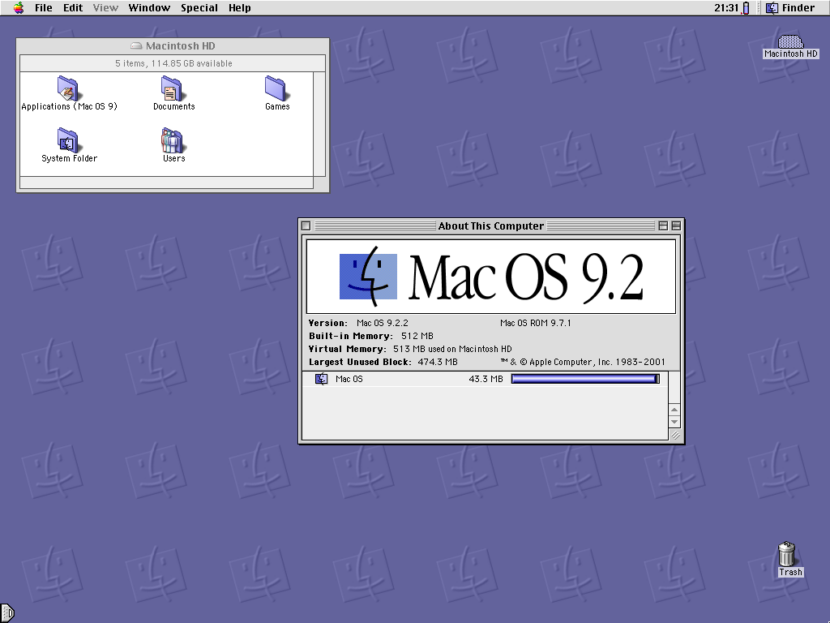
Replacing the hard disk in a PowerBook G3 “Pismo”, and other fun with Mac OS 9

Replacing the hard disk in a PowerBook G3 “Pismo”, and other fun with Mac OS 9

I posted nearly five years ago about my shiny new Power Mac G4 and how much I was enjoying the nostalgia. Unfortunately the power supply in it has since started to die, and the machine will randomly turn itself off after an increasingly short period of time. Additionally, I’d forgotten just how noisy those machines were, and how hot they ran! I’ve bought a replacement power supply for it, but it involves rearranging the output pins from a standard ATX PSU to what the G4 needs, and that’s so daunting that I still haven’t tackled it yet. I decided to go back to the trusty old PowerBook G3, as I’ve since gotten a new desk and computer setup that has much more room on it, and having a much more compact machine has been very helpful.

One thing I was a bit concerned about was the longevity of the hard disk in it and I started investing the possibility of putting a small SSD into it. Thankfully such a thing is eminently possible by way of a 128GB mSATA SSD and an mSATA to IDE adapter! I followed the iFixit guide — though steps 6 through to 11 were entirely unnecessary — and now have a shiny new and nearly entirely silent PowerBook G3 (though it’s disconcerting at just how quiet it is given it’s an old machine… I realised I’m so subconsciously used to hearing the clicking of the hard disk).

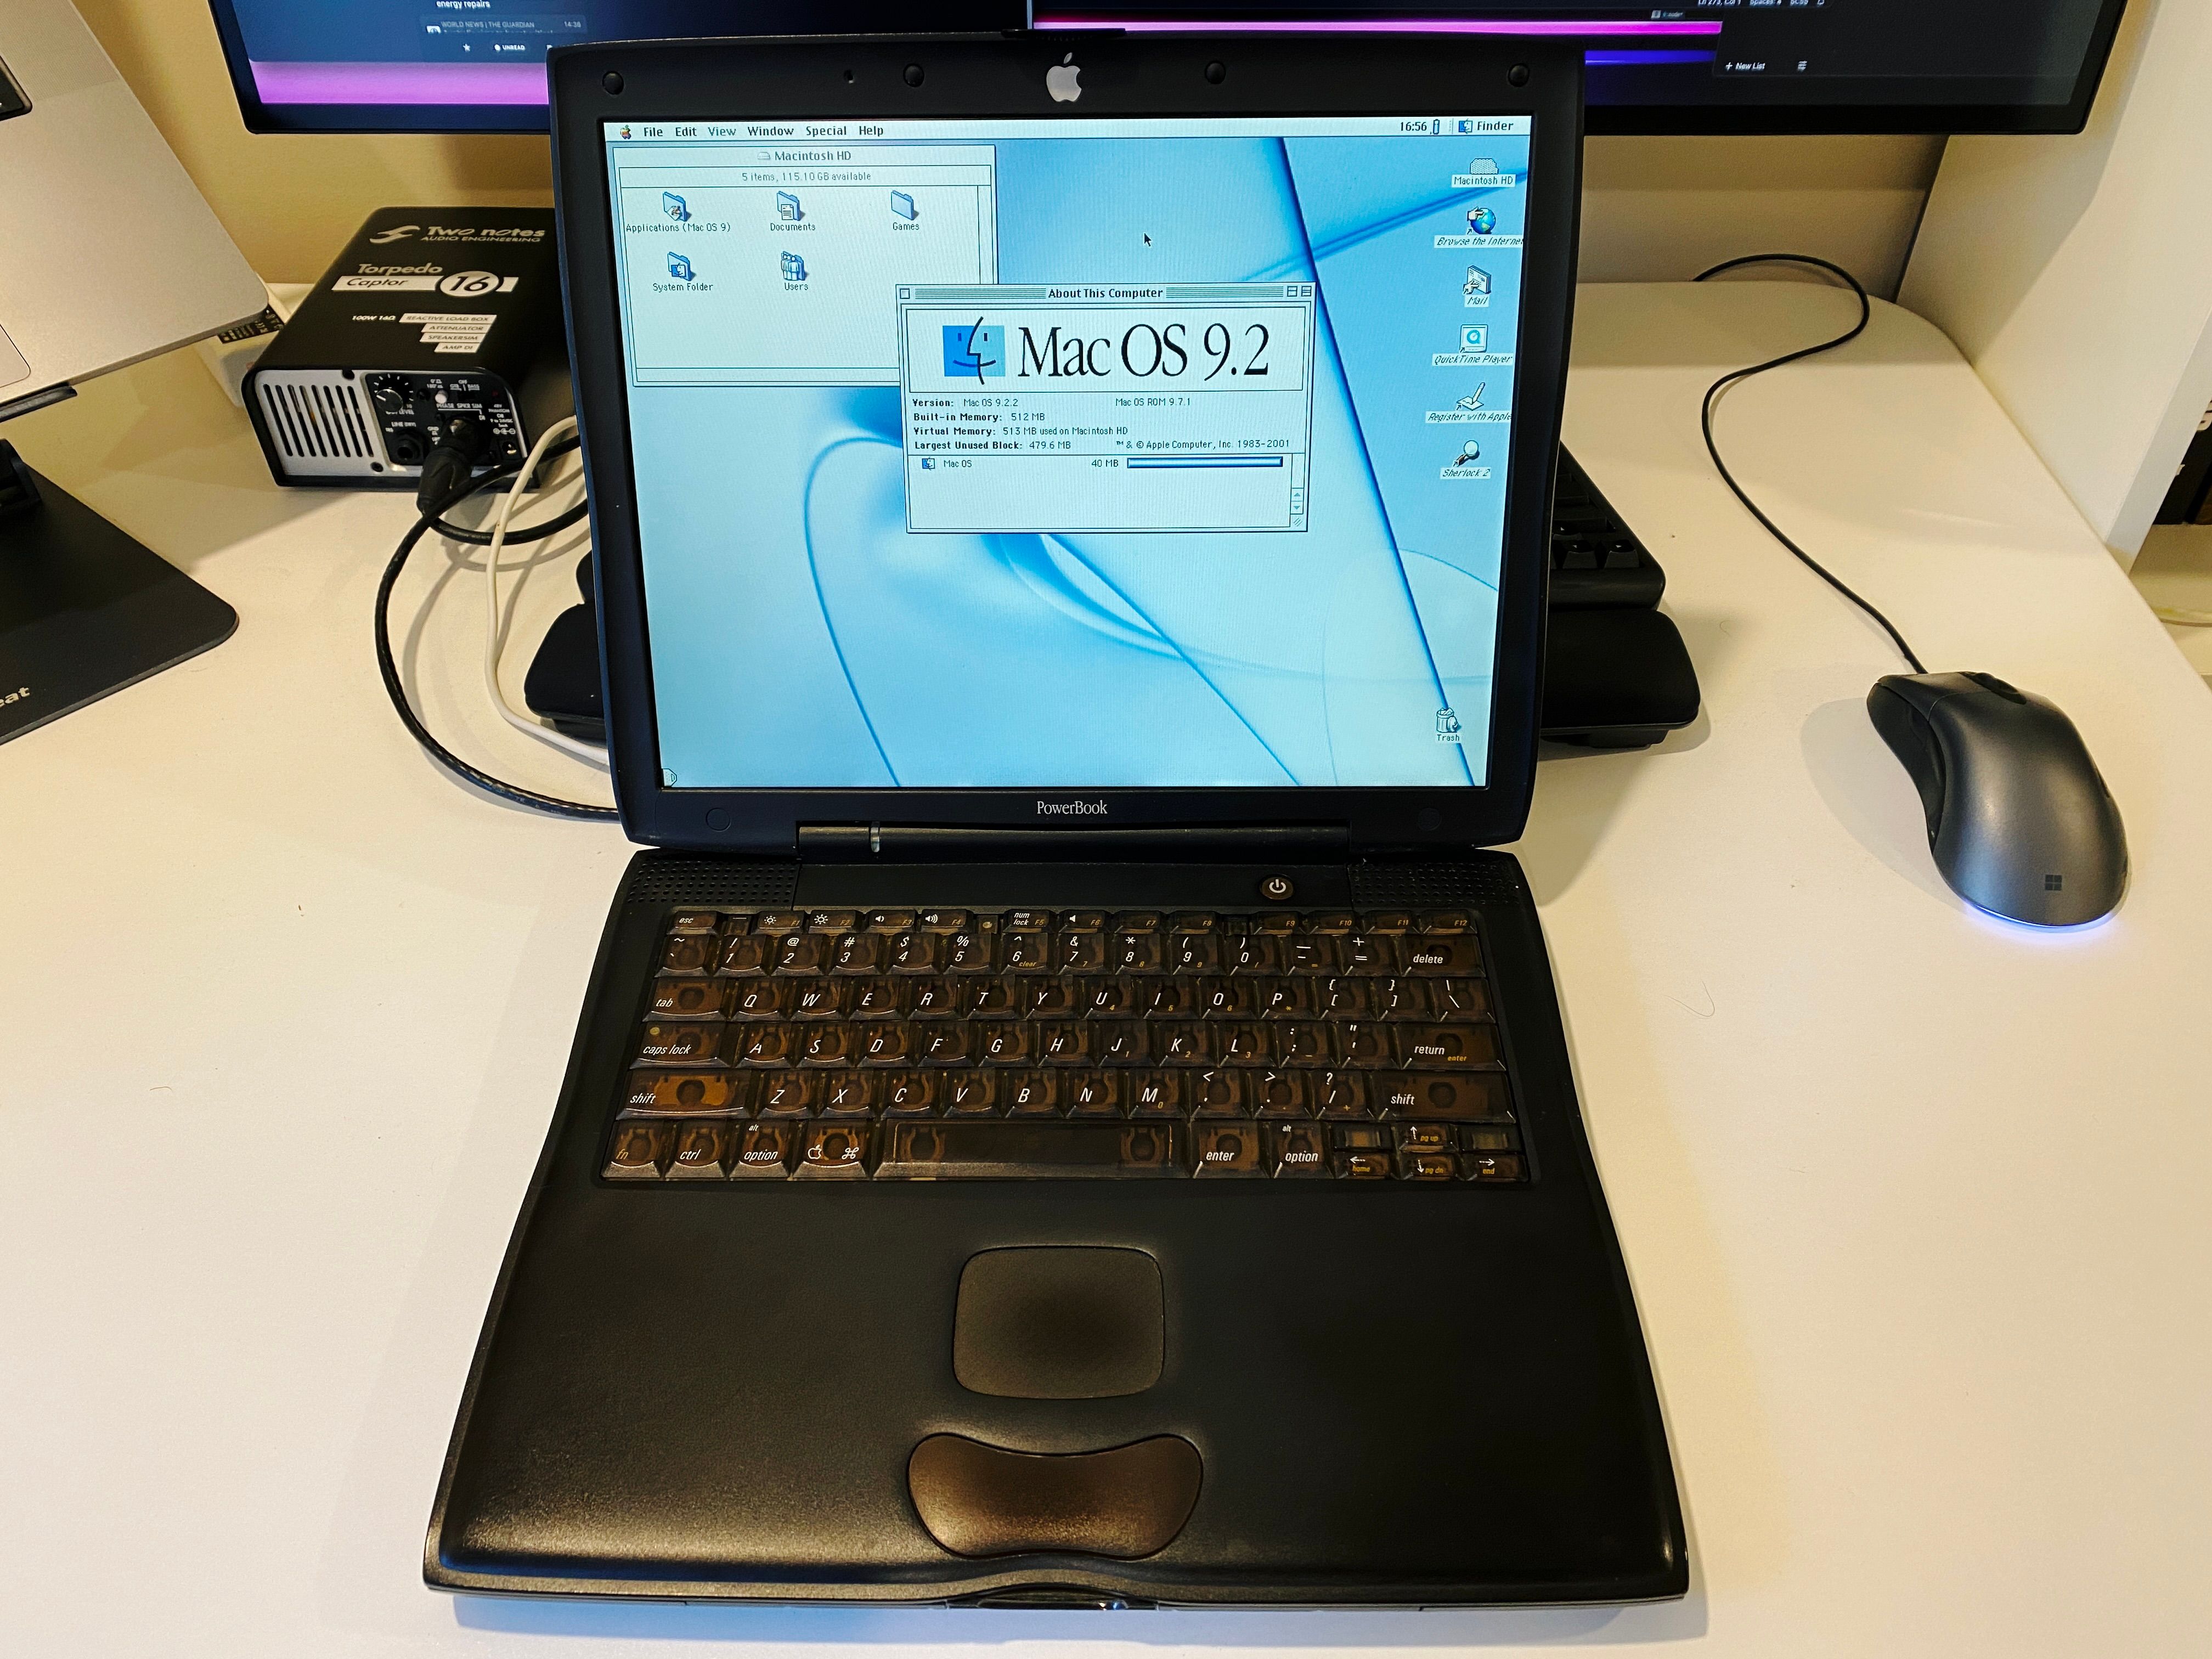
A photo of a black PowerBook G3 sitting on a desk, booted to the Mac OS 9 desktop. The machine is big and chunky, but also has subtle curves to it, and the trackpad is HILARIOUSLY tiny compared to modern Macs.

I even had the original install discs from the year 2000 when mum first bought this machine, and they worked perfectly (though a few years ago I’d had to replace the original DVD drive with a slot-loading one because the original one died and it stopped reading discs entirely).

One I had it up and running, another sticking point is actually getting files onto it. As I mentioned in my previous post, Macintosh Repository has a whole ton of old software and if you load it up with a web browser from within Mac OS 9 it’ll load without HTTPS, but even so it’s pretty slow. Sometimes it’s nicer just to do all the searching and downloading from a fast modern machine and then transfer the resulting files over.

Mac OS 9 uses AFP for sharing files, and the AFP server that used to be built into Mac OS X was removed a few versions ago. Fortunately there’s an open-source implementation called Netatalk, and some kindly soul packed it all up into a Docker container.

I also stumbled across a project called Webone a while ago, which acts essentially as an SSL-stripping proxy that you run on a modern machine and point your old machine’s web browser to for its proxy setting. Old browsers are utterly unable to do anything with the modern web thanks to newer versions of encryption in HTTPS, but this lets you at least somewhat manage to view websites, even if they often don’t actually render properly.

Both Netatalk and Webone required a bit of configuration, and I rather than setting them up and then forgetting how I did so, I’ve made a GitHub repository called Mac OS 9 Toolbox with docker-compose.yml files and setup for both projects in them, plus a README so future-me knows what I’ve done and why. 😛 In particular getting write permissions to write from the Mac OS 9 machine to the one running Netatalk was tricky.

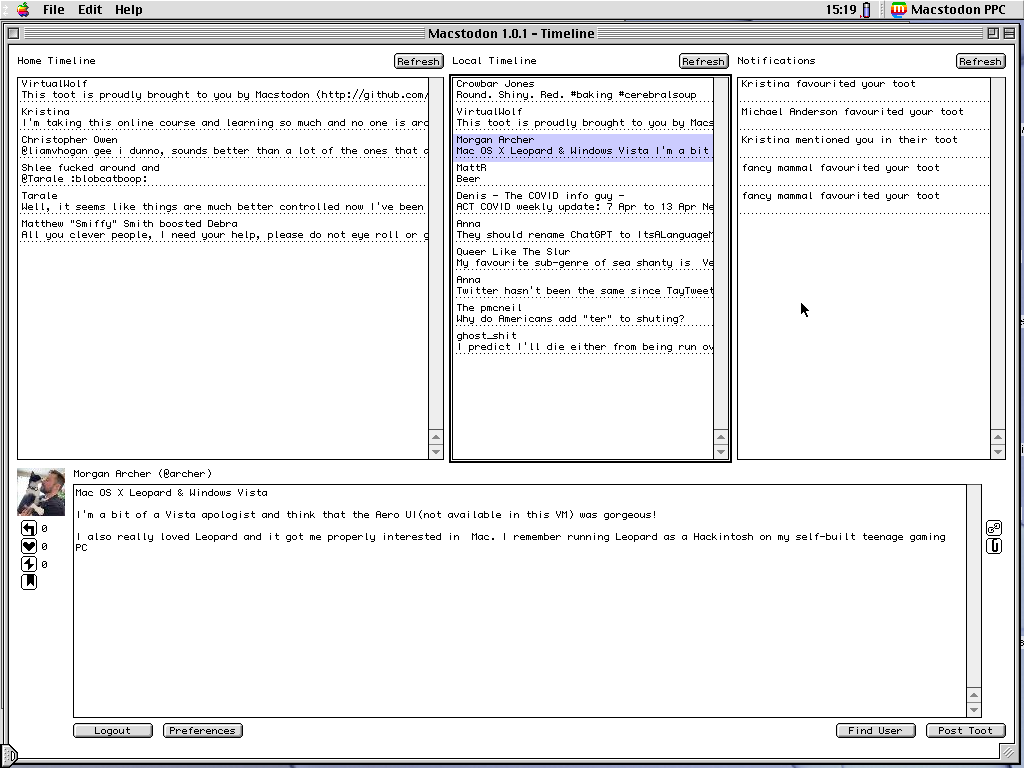
I also included a couple of other things in there too, and will continue to expand on it as I go. One thing is how to convert the PICT format screenshots from Mac OS 9 into PNG, since basically nothing will read PICTs anymore. It also includes a Mastodon client called Macstodon:

A screenshot of a multi-pane Mac OS 9 application showing the Mastodon Home and Local Timelines and Notifications at the top, and the details of a selected toot at the bottom.

And also the game Escape Velocity: Override (which I’m very excited to note is getting a modern remaster from the main guy who worked on the original):

A screenshot of a top-down 2D space trading/combat game with quite basic graphics. A planet is in the middle of the screen along with several starships of various sizes.

I mentioned both the Marathon and Myth games in my previous post, but those actually run quite happily on modern hardware since Bungie was nice enough to open-source them many years ago. Marathon lives on with Aleph One, and Myth via Project Magma.

Upping my monitoring game with MQTT

Previously on Monitor All The Things:

(The display that used to show the air quality has been changed to show a clock instead, and the air quality monitoring is done via another ESP32 now. I’m also sensing a definite theme with my blog post titles here).

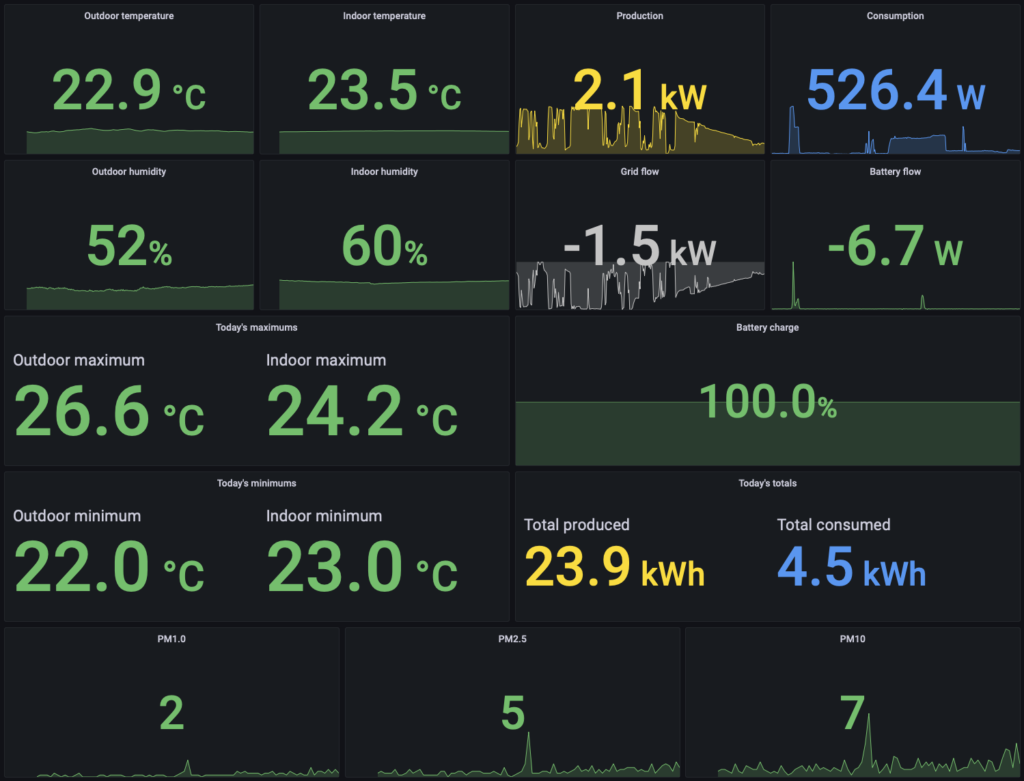
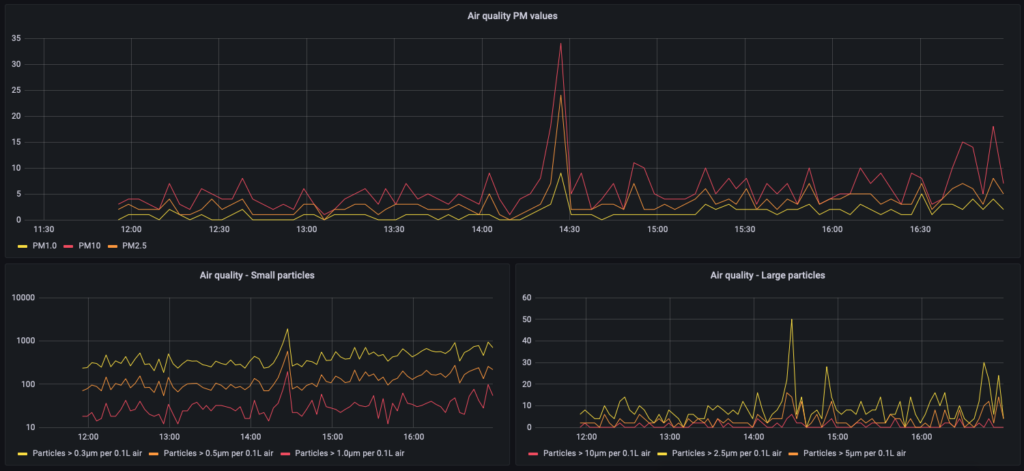
I hadn’t blogged about it, but I also have all of this (indoor and outdoor temperature and humidity, power usage and generation plus battery charge, and outdoor air quality) going into InfluxDB for visualising in Grafana. The dashboard I made looks like this:

Pretty spiffy, eh?

It’d very much evolved rather organically as I went though, so lots of different things on different hosts sending HTTP calls all over the place, including my own slightly dodgy system for getting the ESP32s that are connected to the temperature sensor to save their readings onto the local filesystem if my website couldn’t be contacted (for example if we had an internet outage), as well as two separate things hitting the Powerwall’s local API every five seconds to pull the power data (one for the little HyperPixel display at the front of the house, and one for the visualisation stuff above).

I figured there had to be a cleaner and more elegant way of doing this. At work I deal with Amazon’s Simple Queue Service (SQS) quite a lot and use it in one of the services I built, so I wondered if there was a way to accomplish something similar myself, so I could just have everything drop messages onto a queue and have the things that need to read them pick those messages up from the queue.

Turns out there is, and it’s called MQTT!

It’s an absurdly simple and lightweight protocol, you have a central server called a “broker”, a publisher that sends messages to a given topic on the broker, and as many subscribers as you want that also connect to the broker and each listen on a topic or topics, and the broker ensures those messages get from the publisher to each subscriber. There’s also quality of service settings where you can have it guarantee that the message is received by the subscriber at least once, and it’ll queue up the messages for the subscribers if they drop offline and the messages will all be sent once the subscriber comes back.

Interestingly, you can also have a broker on one machine connect to a broker on another machine, and have it send messages on a particular topic to the remote broker, which seemed like it’d be a good way to get weather updates to my website.

There’s a guy who wrote an MQTT client library in MicroPython for the ESP32, mqtt_as, so that would take care of the ESP32 side of things, I’d use a popular open-source MQTT broker called Mosquitto, and there’s a Javascript MQTT client called MQTT.js that would be used for my website and all the other TypeScript parts of the setup.

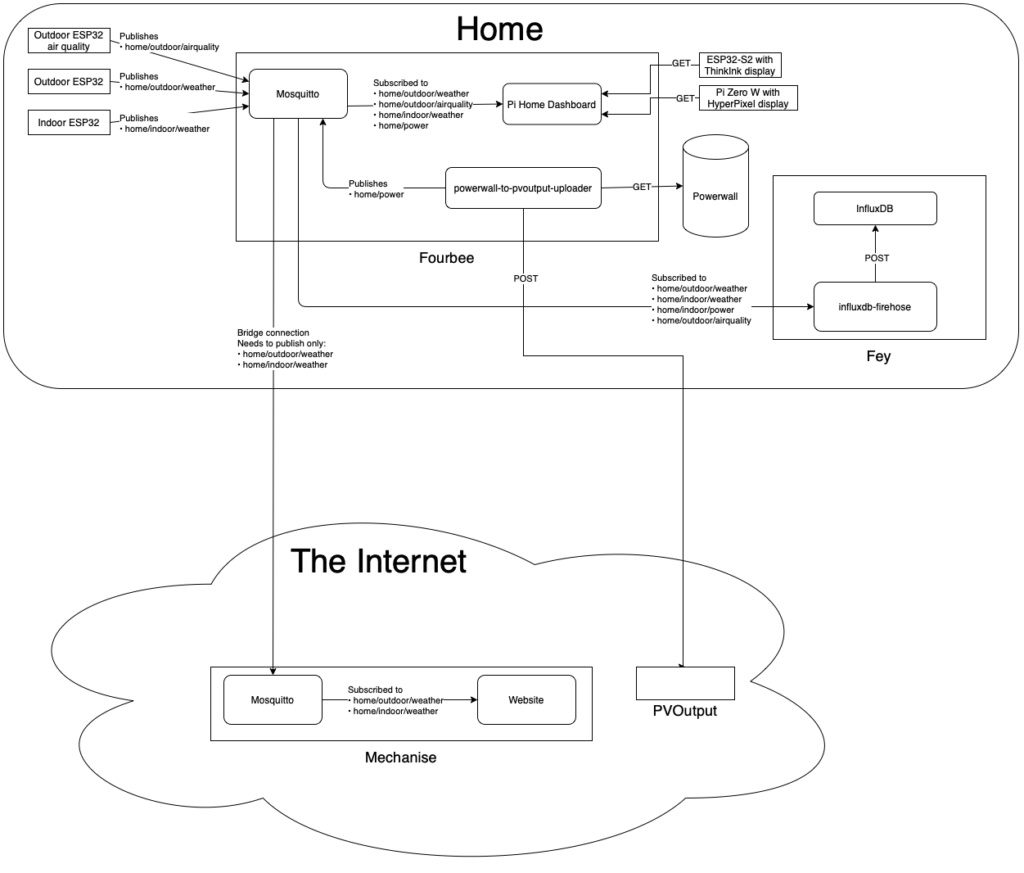
I did a bunch of brainstorming in draw.io and came up with this elaborate diagram:

(Mechanise is the hostname of my Linode, which my website runs on, and PVOutput is a website for sending your solar power generation data to, a bunch of people at work also do the same and we’re all in the same “team” so we can see how much combined we’ve all generated together).

After that, it just involved a whole bunch of coding (as well as ordering two spare ESP32s so I could test that my code worked without having to pull apart my existing setup), which I’ve uploaded to GitHub:

Despite having written up a careful plan and done what I thought was getting all my ducks in a row to make a quick switchover this morning, there were a number of things I ran into that caused it to take a few hours to get going (things like forgetting to configure PostgreSQL on the Raspberry Pi 4B to allow things running in Docker to access it, needing to add an extra published port on the Linode so my website could connect to Mosquitto, and most annoyingly of all, a recent VSCode update breaking Pymakr and having to revert to an old version of both pieces of software). I got everything up and running in the end, and now if I add any new monitoring things, it’ll be quite simple to publish the data to Mosquitto and slurp it up into InfluxDB!