Kristina and I had a date night last night in which we ate trashy food and then took the Xbox 360 out of storage and fired up Guitar Hero: Warriors of Rock. It was an excellent time except that my Guitar Hero World Tour guitar had stopped registering downward strums, and only upwards strums worked.
I figured I’d pull it apart today and see what was up, and thanks to this guide I figured it out, and am documenting it here for posterity (my problem wasn’t one of the ones described in that guide, but it was very handy to see how to disassemble the thing in the first place).
Tools needed for disassembly
- Philips-head #0 and #1 screwdriver
- Torx T9 screwdriver
Process
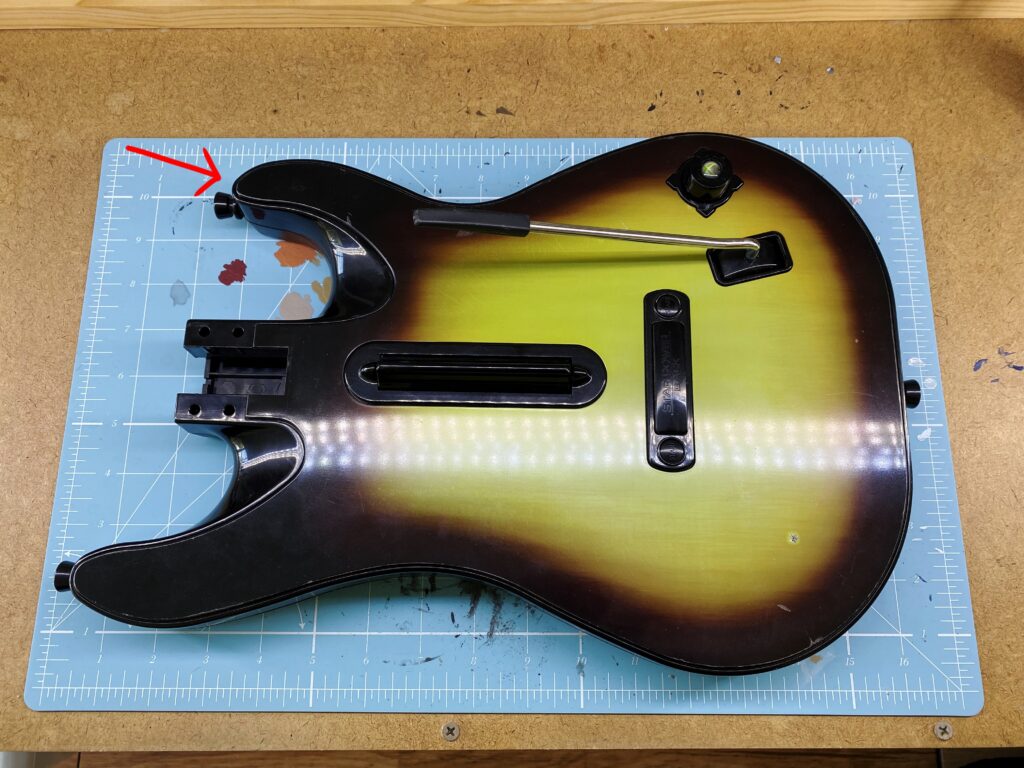
Firstly the neck needs to be removed, and the “Lock” button at the back towards the base of the guitar set to its unlocked position.
Next, the faceplate needs to be removed. This can be done by just getting a fingernail or a flathead screwdriver underneath either of the top bits of the body, pointed to with a arrow here, and gently prying it away from around the edges.
After that, there’s twelve Torx T9 screws to remove, circled in red, and another four Philips-head #0 ones, marked in green.
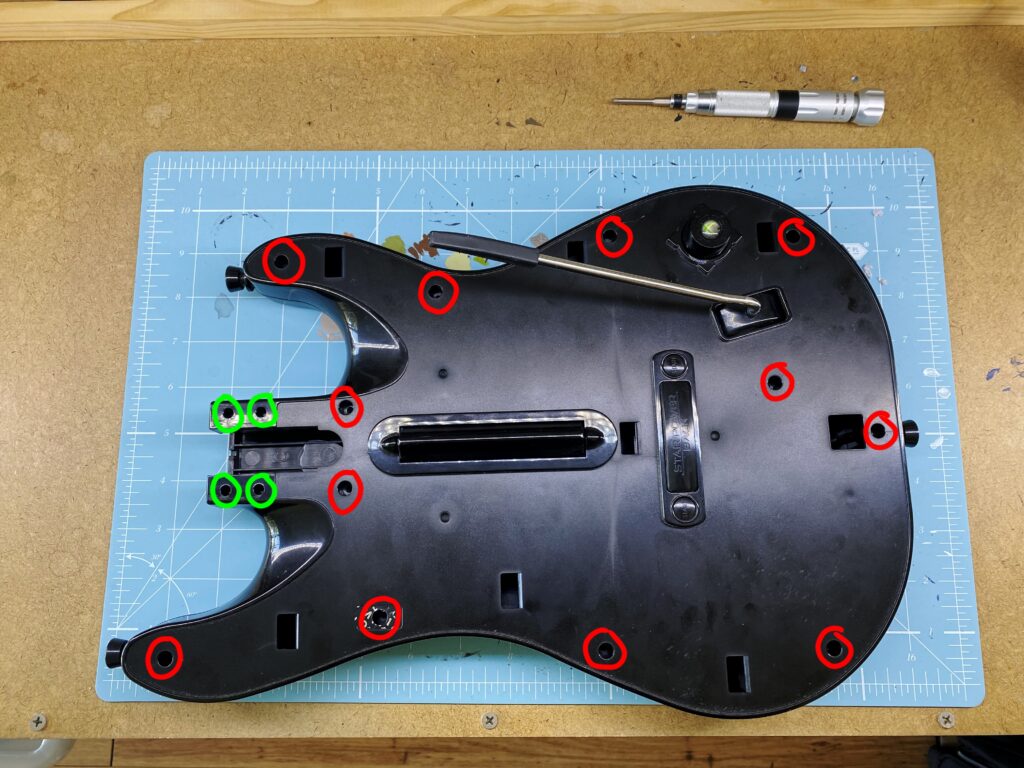
Once they’re all out, you can gently separate the front of the guitar where all the electronics live from the back of it.
Next there’s four Philips-head #1 screws to remove to get the circuit board that contains the actual clicky-switches away from the strum bar itself. Leave the middle two alone as they attach the guides for the springs of the strum bar.
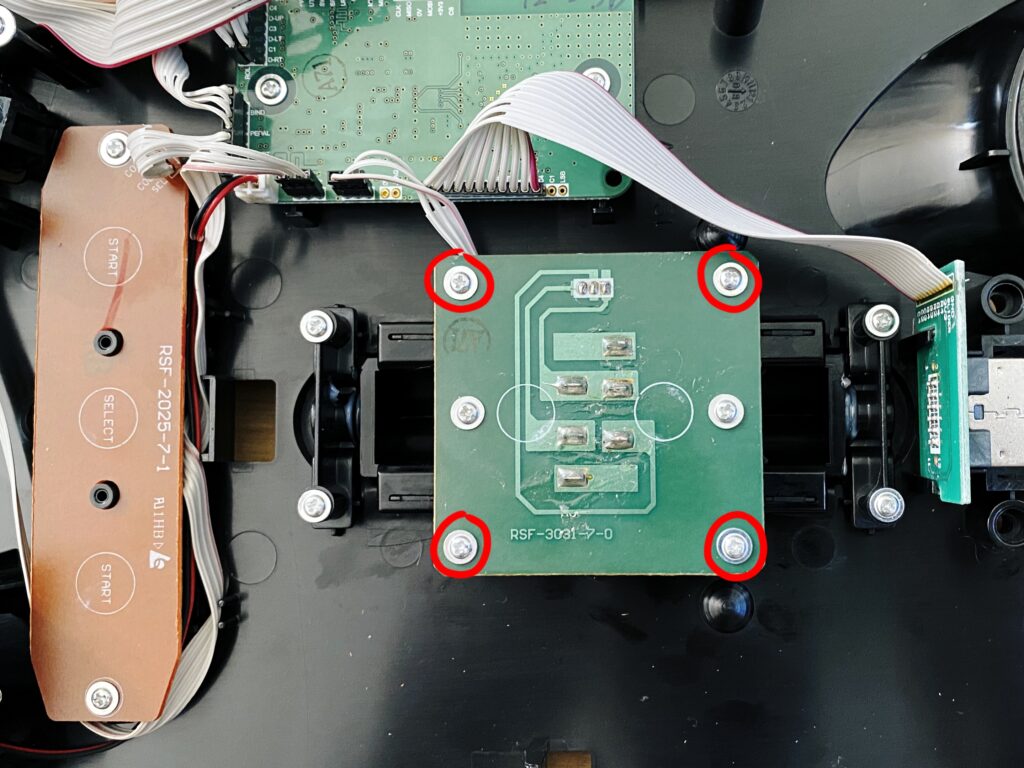
After this, it’s a bit of a choose-your-own-adventure, as what you do next really depends on what’s wrong with the strum bar. On the underside of the circuit board above are the switches, it’s definitely worth making sure they both click nice and solidly when you press on them directly. If they don’t, it’s apparently possible to source exact replacements (“275-016 SPDT Submini Lever Switch 5A at 125/250VAC”) and fix it with a bit of soldering, but thankfully this wasn’t necessary in my case.
In the next image, undoing the Philips-head #1 screws circled in blue will allow you to take the strum bar assembly itself out and give it a re-lubricating (don’t use WD40, use actual proper lubricating grease) to make it rock back and forth a bit more smoothly. Another improvement you can make is adding a couple of layers of electrical tape to the areas I’ve circled in red. They’re where the strum bar physically hits the inside of the case, and the electrical tape can dampen the noise a bit.
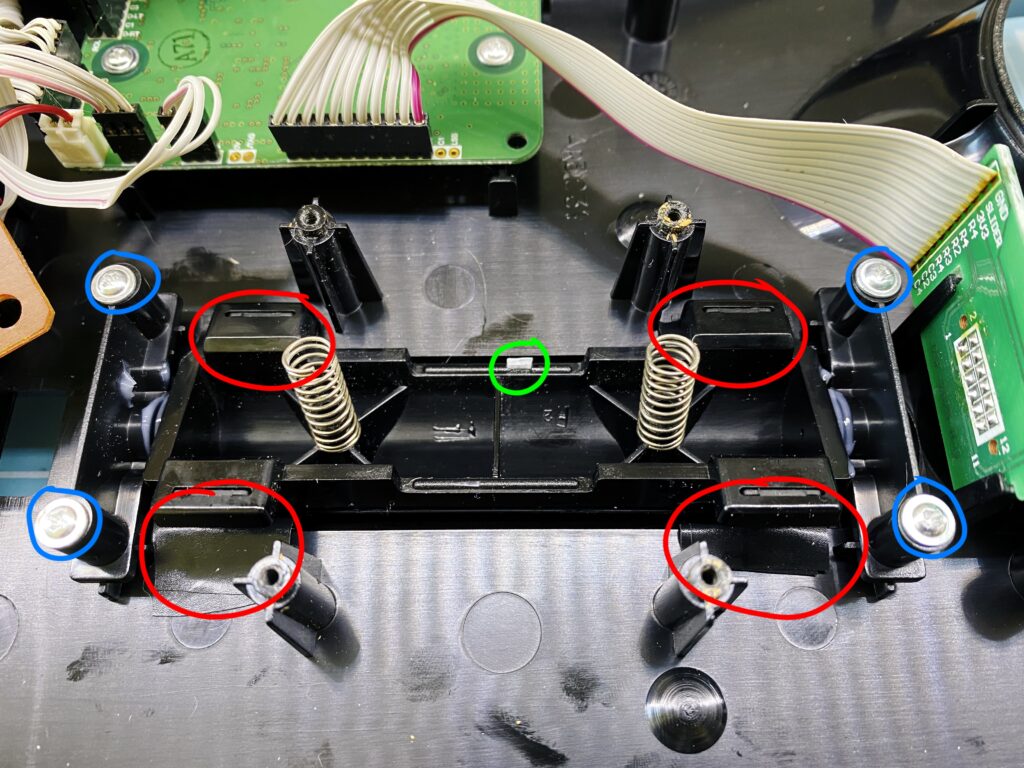
What the strum bar problem ultimately ended being in my case is that the middle indented section where the switch rests against the strum bar to register a downstroke had actually worn away and could no longer press the switch in far enough to click. My solution, circled in green, was to chop a tiny piece of plastic from a Warhammer 40,000 miniature sprue and glue it—with the same plastic glue I use for assembling plastic miniatures—to the strum bar. Then I reassembled everything and it’s as good as new!
awesome !: 🙂
WELL DONE !
thanks you for the tutorial & advice my friend 🙂
I think you will save my GH5 controller
Mark
Haha yay! Great to hear.
Is the guitar hero 5 controller Torx t9 as well?
Yeah I think they’re basically identical but you’d have to crack the GH5 one open to check because I don’t have that specific one myself. 🙂
Thanks for the tutorial! I’ve just fixed a faulty guitar I bought very cheap and now it works great!
Excellent!