Back at the start of 2018 I blogged about my Raspberry Pi temperature display setup and it’s been pretty excellent and utterly reliable since then, but because of its small size — the display is only 2 inches — it wasn’t particularly visible from across the room. That, combined with the discovery that the Envoy power consumption monitoring system we had installed with the solar panels has a locally-accessible API that you can use to get real-time production and consumption data (which lives at http://<ip-of-the-envoy-box>/production.json?details=1), made me start looking into larger displays so I could include both temperature/humidity data and our power consumption.
My first port of call was the 2.7-inch version of the original 2-inch display. I ordered it on the 6th of April then… nothing showed up. I’d assumed the PaPiRus was MIA and had instead ordered a 4-inch, 800×480-pixel display in the form of Pimoroni’s HyperPixel4 display, the non-touch version. The Raspberry Pi registers it as a regular display so you run a full desktop environment windowing system on it rather than the way the PaPiRus works.
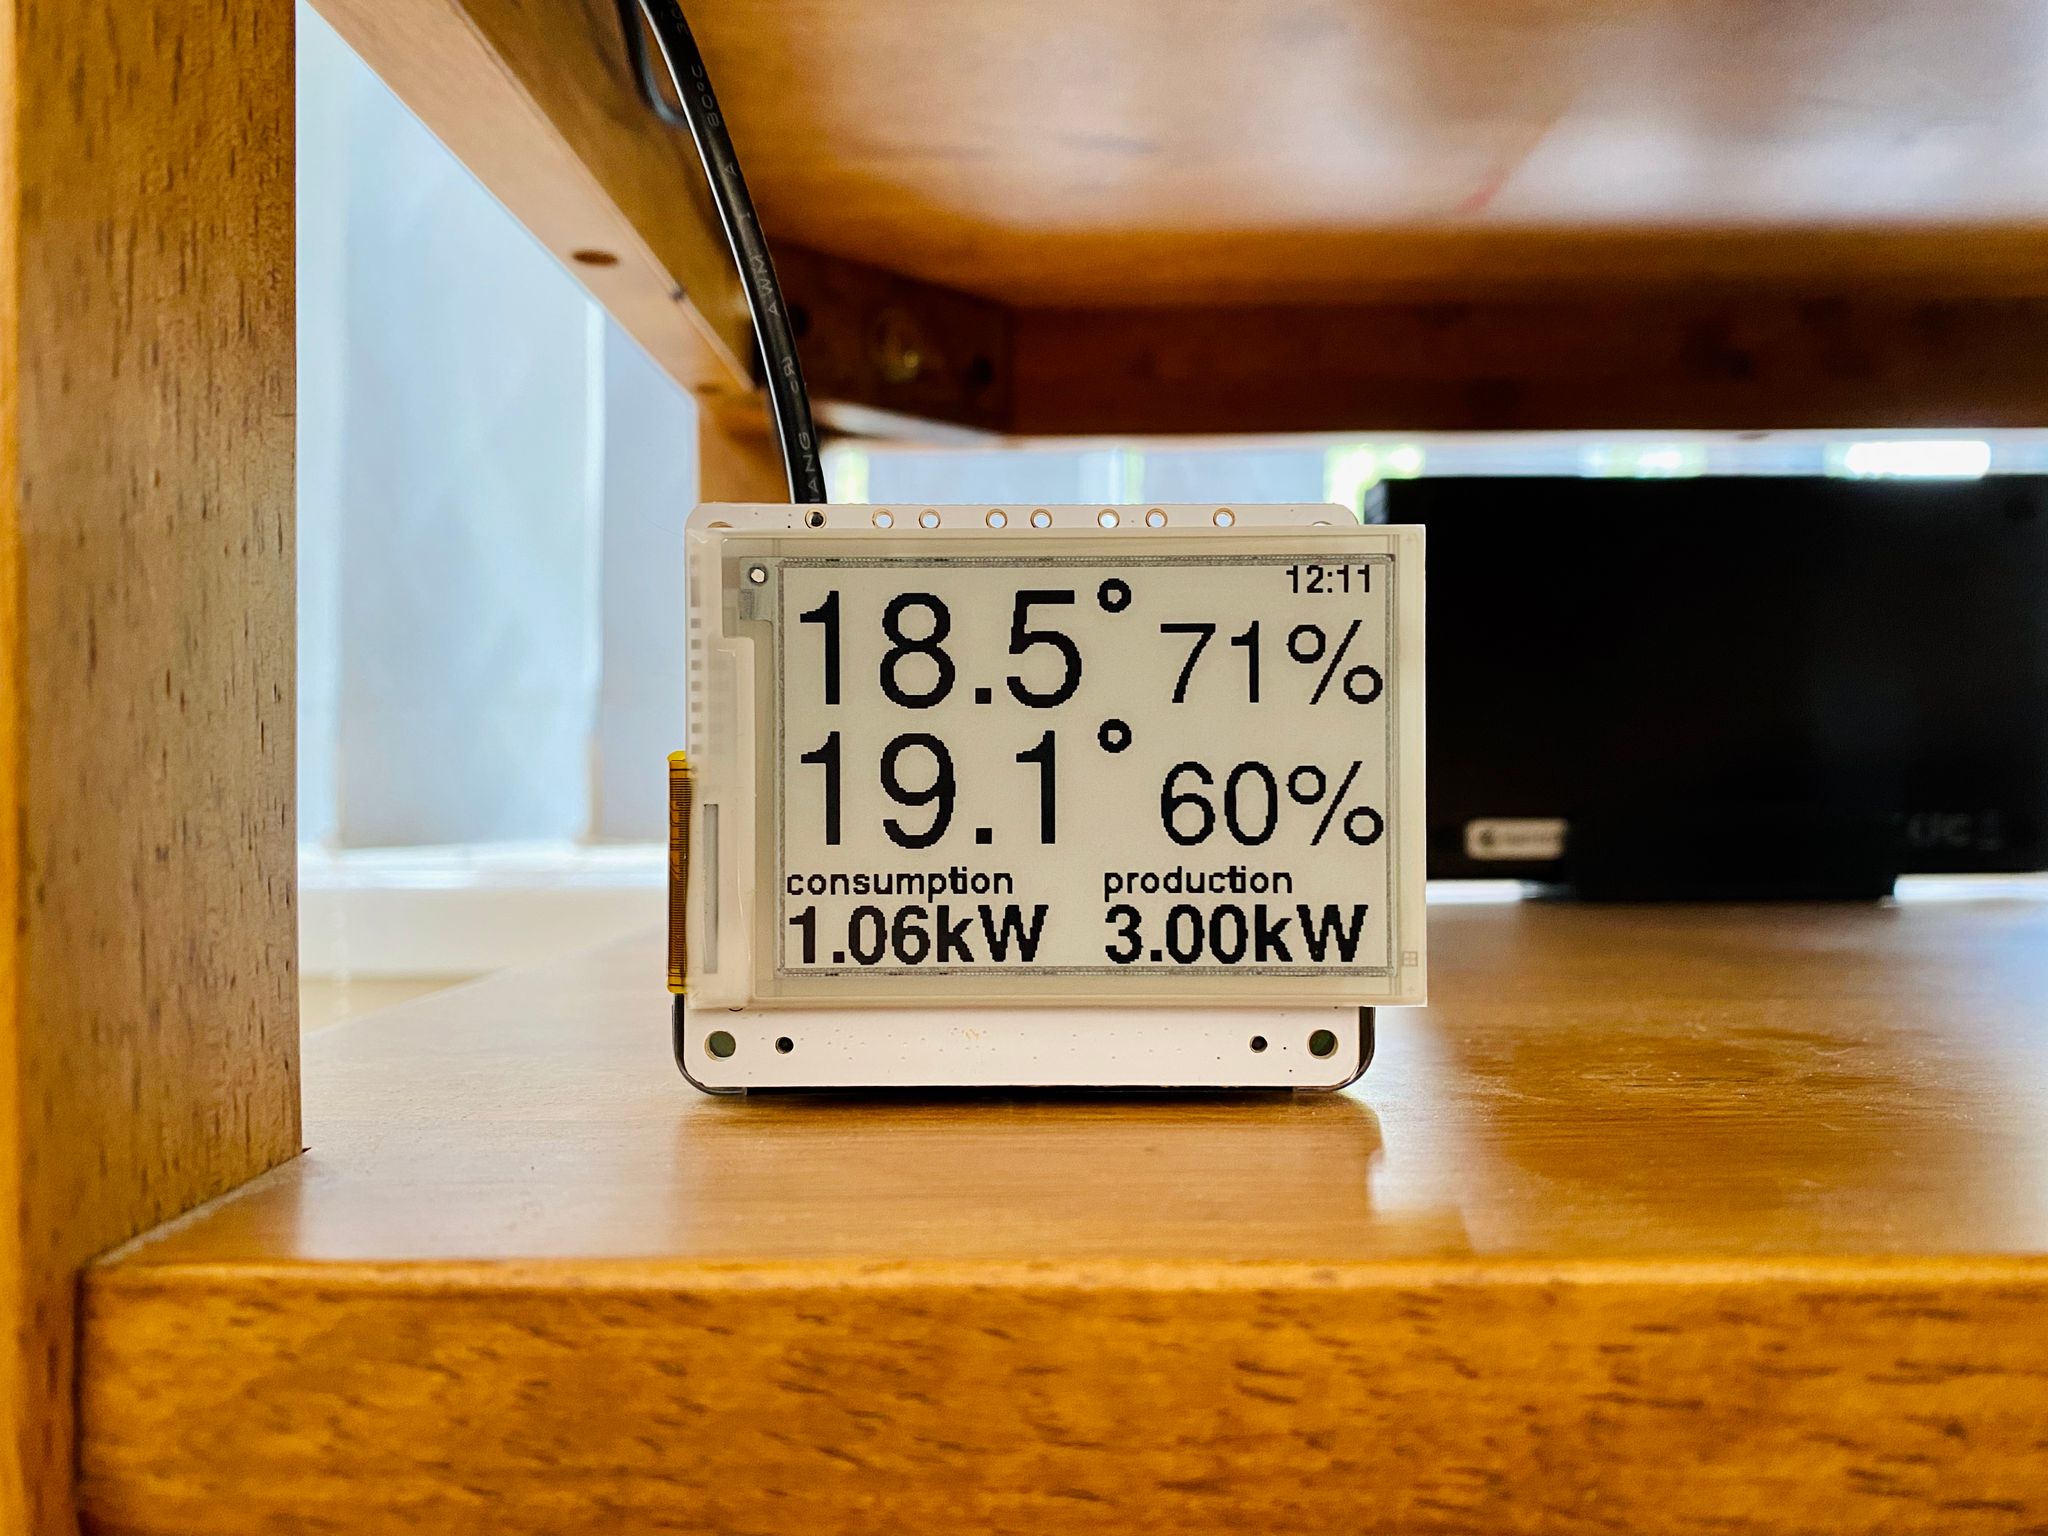
Of course, about a week after ordering the HyperPixel 4, the PaPiRus finally arrived! The 2.7-inch version of the PaPiRus is 264 pixels wide by 176 pixels high, so not exactly high-resolution. There’s actually quite a lot of freedom to tweak the position of the elements on screen pixel-by-pixel, but I quickly discovered that that’s extremely tedious when doing it directly on the Raspberry Pi itself because it takes several seconds for it to contact the required endpoints to pull in the data and then refresh the whole display. As well as writing text, the display can also display (1-bit) bitmap images, so I decided to change tack and instead of using the PaPiRus’s text API I wrote a probably-slightly-overengineered Node.js application that would run on the Raspberry Pi 4B, fetch the data from the outdoor and indoor sensors as well as the Envoy, use the Javascript Canvas API to lay everything out, and then convert it to a bitmap image that the Python script on the Pi Zero W would fetch every minute and then update the display with.
The biggest advantage of this system is that I could run it locally on my regular computer to quickly tweak the positioning without having to wait for the PaPiRus display to refresh each time, and I set it up so I could invert the colours to be white on black instead so I could clearly see the boundaries of the canvas. I put the code up if anyone is interested in poking through it, and the end result looks like this:
Having over-engineered my Node.js solution, the HyperPixel4 display arrived maybe a couple of weeks later! It’s extremely slick-looking, but unfortunately the little plastic nubs that are meant to keep the screen in place in the house aren’t actually big enough to hold it in, and I managed to have the display itself pop out and crack some of the wires that feed the display and it caused all sorts of display weirdness. I emailed the place that makes the HyperPixel display about it and they were super nice and helpful and sent me out a replacement display with no questions asked! While I was waiting for the new one to arrive, the old broken one was partially working enough that I could at least get everything up and running how I wanted it, anyway.
Because using the HyperPixel is the same as if you’d hooked up an HDMI display and were using the Pi as a regular computer, I started from the full-blown Raspbian desktop image, not the Lite one. It was relatively straightforward to get everything going (mostly just installing and configuring the driver from Pimoroni’s GitHub repository), but there were some additional things I needed to do to get everything working as I wanted. I settled on a Node.js backend and React frontend setup (the separate backend was necessary because CORS; I couldn’t hit the Envoy URL directly from the browser on the Pi, so I have to have the Node.js backend pull in the data and then feed it to the React app), both of which are running in a Docker image on the Raspberry Pi 4B.
- By default the HyperPixel4 runs at full brightness, so I followed this to turn it way down, and also to set up a cron job to entirely turn the display off at midnight and turn it back on at 8am.
- To get the Pi to open Chromium full-screen on boot, I followed these instructions.
- To disable the annoying “Restore pages” dialog in Chromium, this on the Raspberry Pi Stack Exchange was helpful.
- Raspbian comes by default with a VNC server installed, just not enabled. To enable it and allow access directly from macOS’s “Connect to Server” dialog in the Finder:
- Run
sudo raspi-config, go to Interface Options > VNC and enable it. - Run
vncpasswd -serviceto set a VNC password (note if it’s longer than eight characters, only the first eight are used when connecting). - Create the file
/etc/vnc/config.d/common.customwith the contents:Authentication=VncAuth - Then Restart the VNC service with
sudo systemctl restart vncserver-x11-serviced
- Run
- And lastly, to disable the Pi from turning the screen off after activity, I followed these steps.
My ~/.config/lxsession/LXDE-pi/autostart ultimately ended up looking like this:
@lxpanel --profile LXDE-pi
@pcmanfm --desktop --profile LXDE-pi
point-rpi
@chromium-browser --start-fullscreen --start-maximized --app=http://fourbee:3003
@xset s off
@xset -dpms
@xset s noblank
@sudo /home/pi/Source/rpi-hardware-pwm/pwm 19 1000000 135000
And the whole setup looks like this:
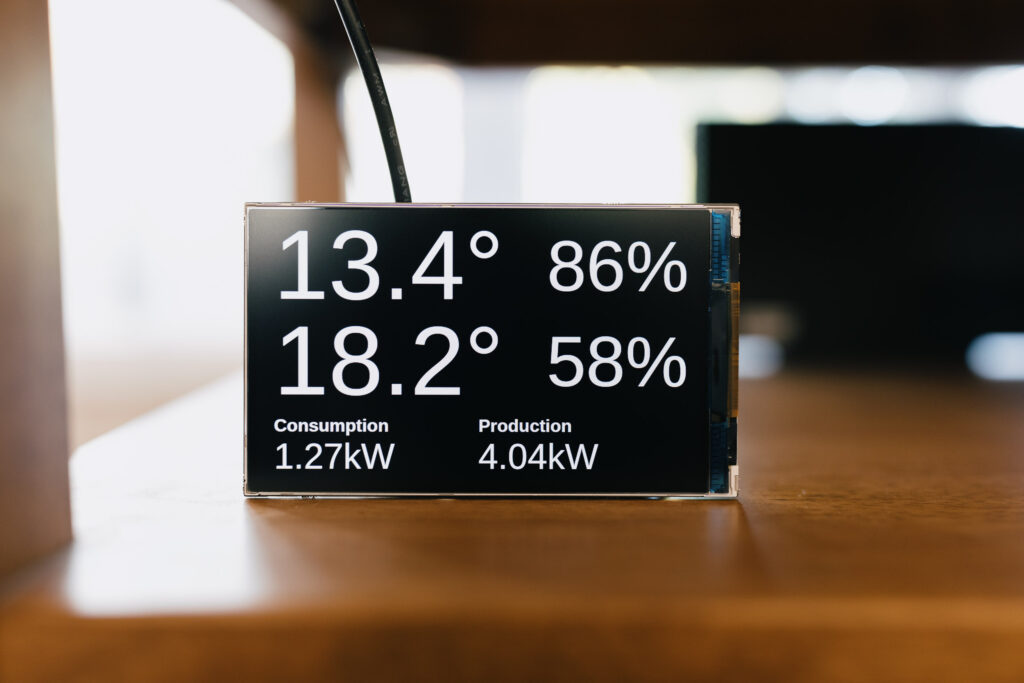
It’s quite the improvement in visibility and I can easily read it from all the way in the kitchen! It updates itself automatically every 30 seconds, and there’s no e-ink full-display-refresh screen-blanking when it does.