A challenge of blog questions
Back in Ye Olden Times on LiveJournal (what I consider to be the forerunner of what social media and blogging has ended up being these days), we’d often come across a quiz and write answers to it, then tag some other friends to do it as well.
I have been tagged by the esteemed @web_goddess on her post and so here I am!
Q: Why did you start blogging in the first place?
The very beginning was probably everything2.com waaay back in mid-2000, it was a site which Slashdot would link to in story summaries, sort of as a precursor to Wikipedia, and was an interesting mix of factual information and whimsical writing. I was 17 and in Year 12 in high school at that point, and as it turns out decidedly not great at writing, and I removed most of my write-ups quite a number of years ago now, mostly because they were crap, but left a few up. I think I just liked writing things and having people talk about it, I don’t know if that would count as blogging though? And I was more interested in the social hangout in #everything on IRC anyway.
After that a bunch of us moved to LiveJournal which is probably far closer to what you’d consider blogging, and it was really just used the same way you’d use social media today: writing about what you were doing or watching on TV or whatever so your friends could follow along.
Q: What platform are you using to manage your blog and why did you choose it? Have you blogged on other platforms before?
I’m currently on a self-hosted WordPress, and have been since the end of 2015 when I imported all of my LiveJournal posts over here, and started using my blog for writing longer form content where Twitter was used for shorter things.
I chose WordPress specifically because it was the only thing I could find that actually had the ability to easily a) import LiveJournal posts and b) import the comments on them as well. Even that didn’t end up going flawlessly (see here and here) but by and large it was a success, and I have all of my posts going back to the very first LiveJournal post I made when getting drunk with friends on IRC. 😅
I started using Tumblr back in 2009, mostly just to post image posts, the sort of thing you’d use Instagram for, and would cross-post them to my Twitter account. (This whole setup ended up evolving, see the “Any future plans for your blog?” question below.)
Q: How do you write your posts? For example, in a local editing tool, or in a panel/dashboard that’s part of your blog?
Just in the standard WordPress editor.
Q: When do you feel most inspired to write?
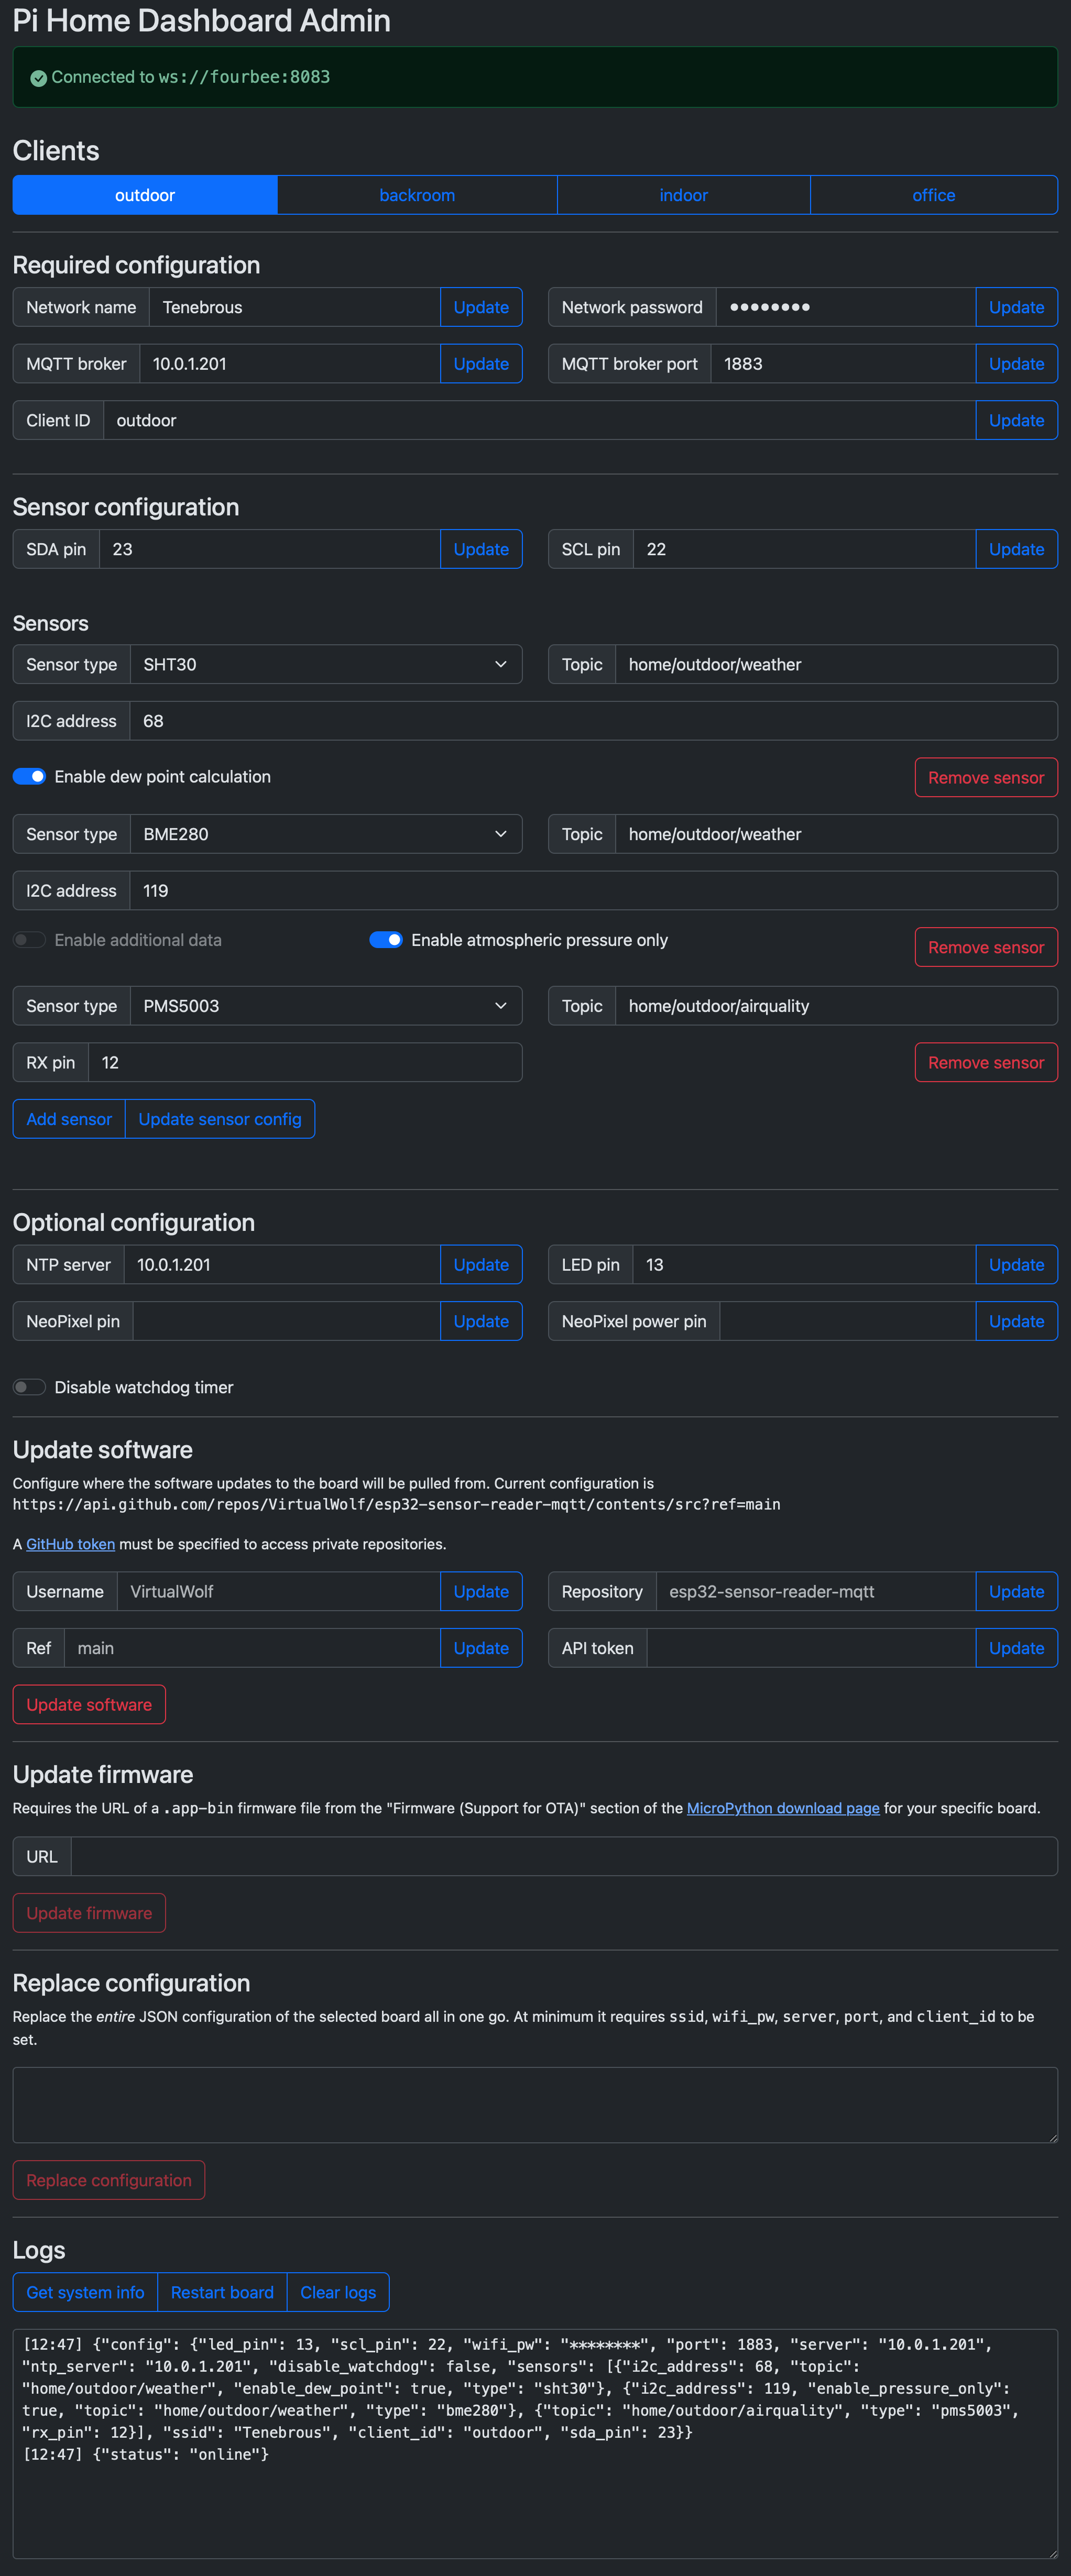
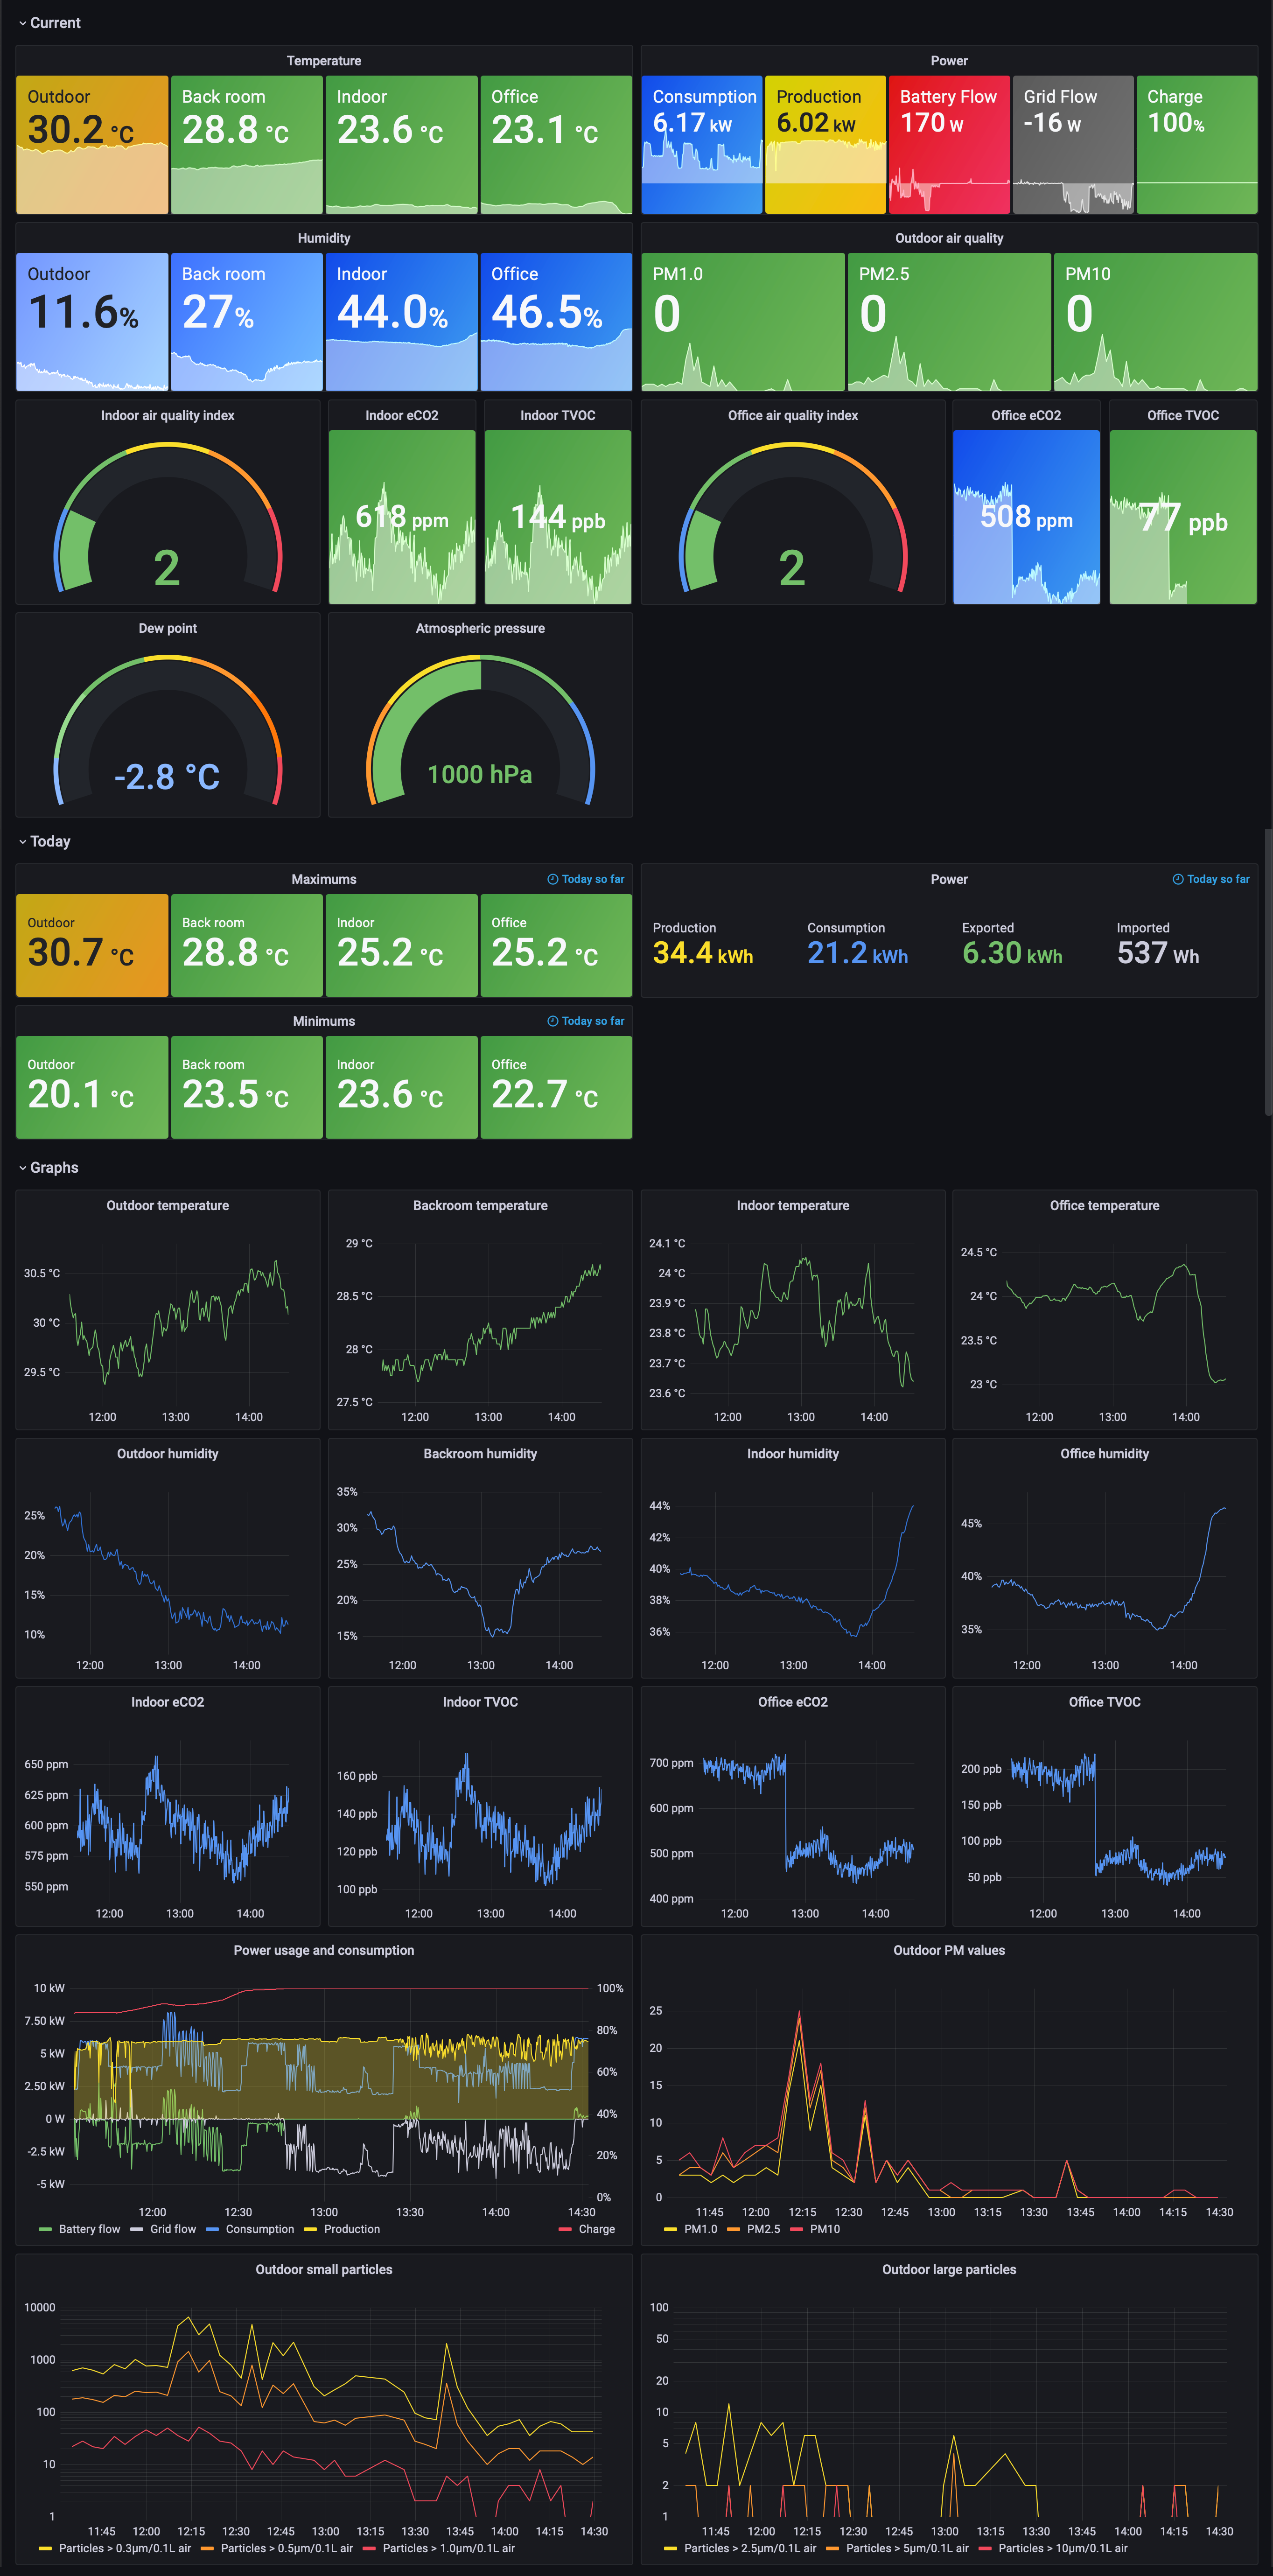
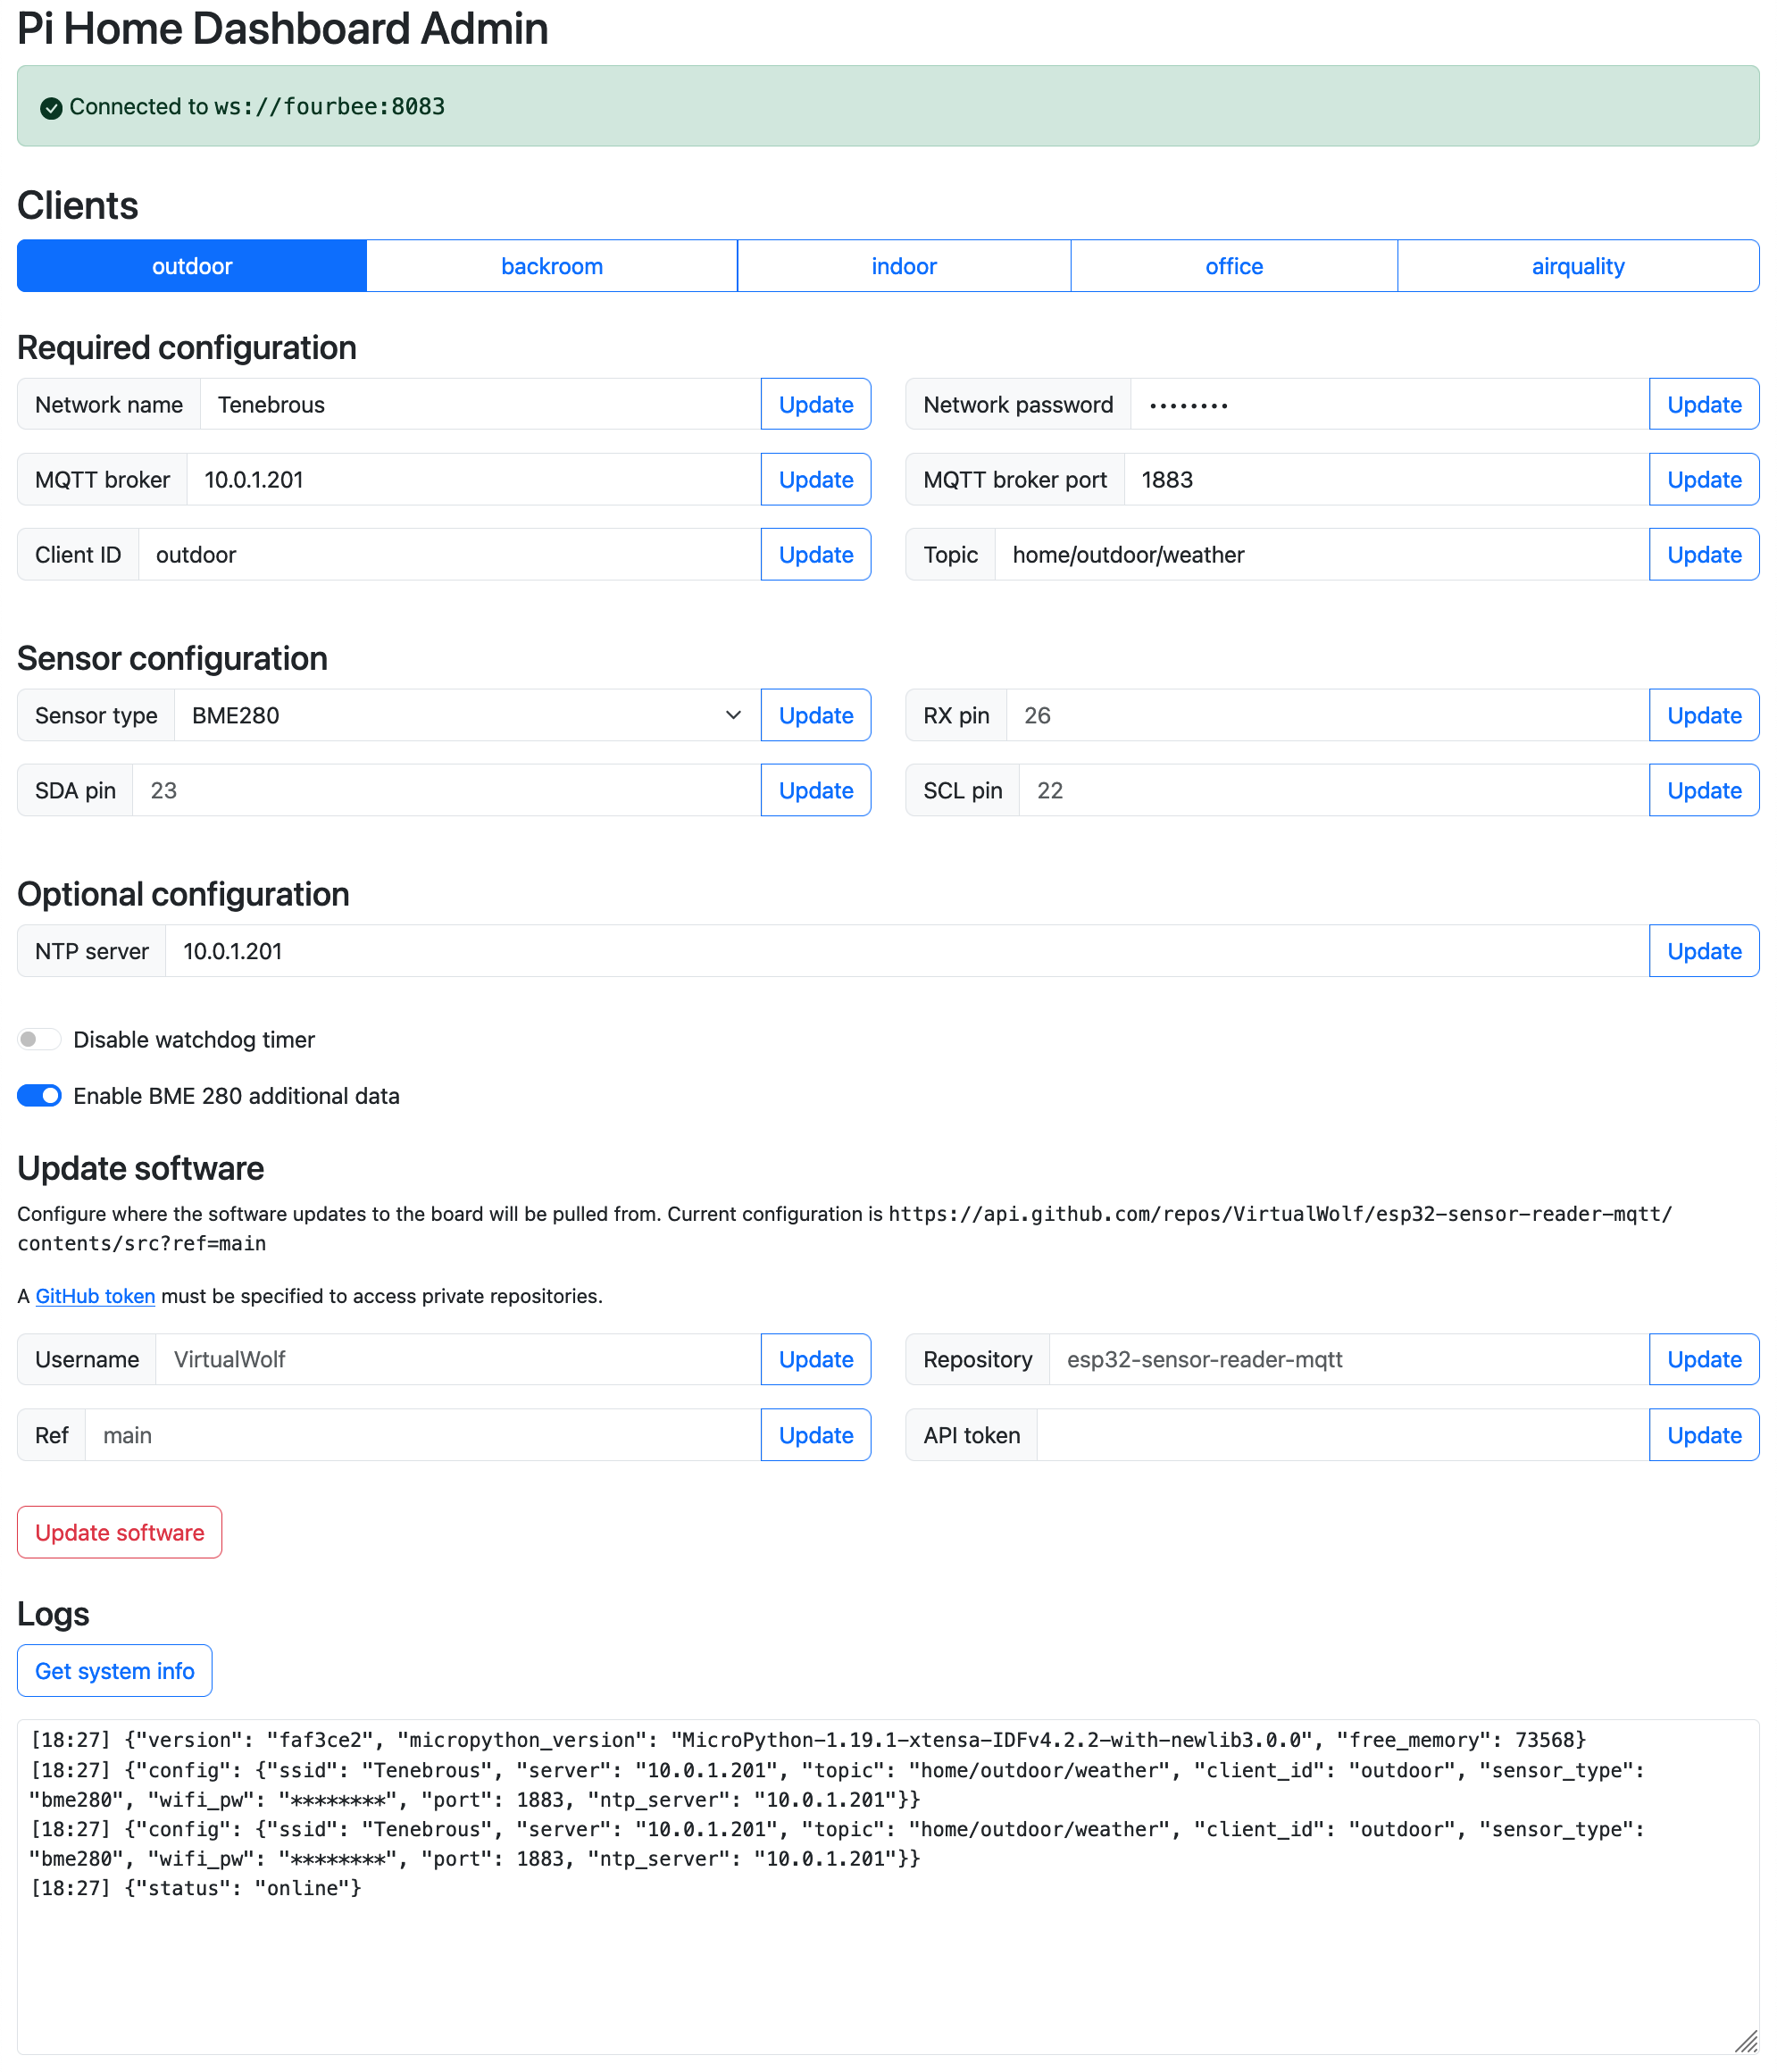
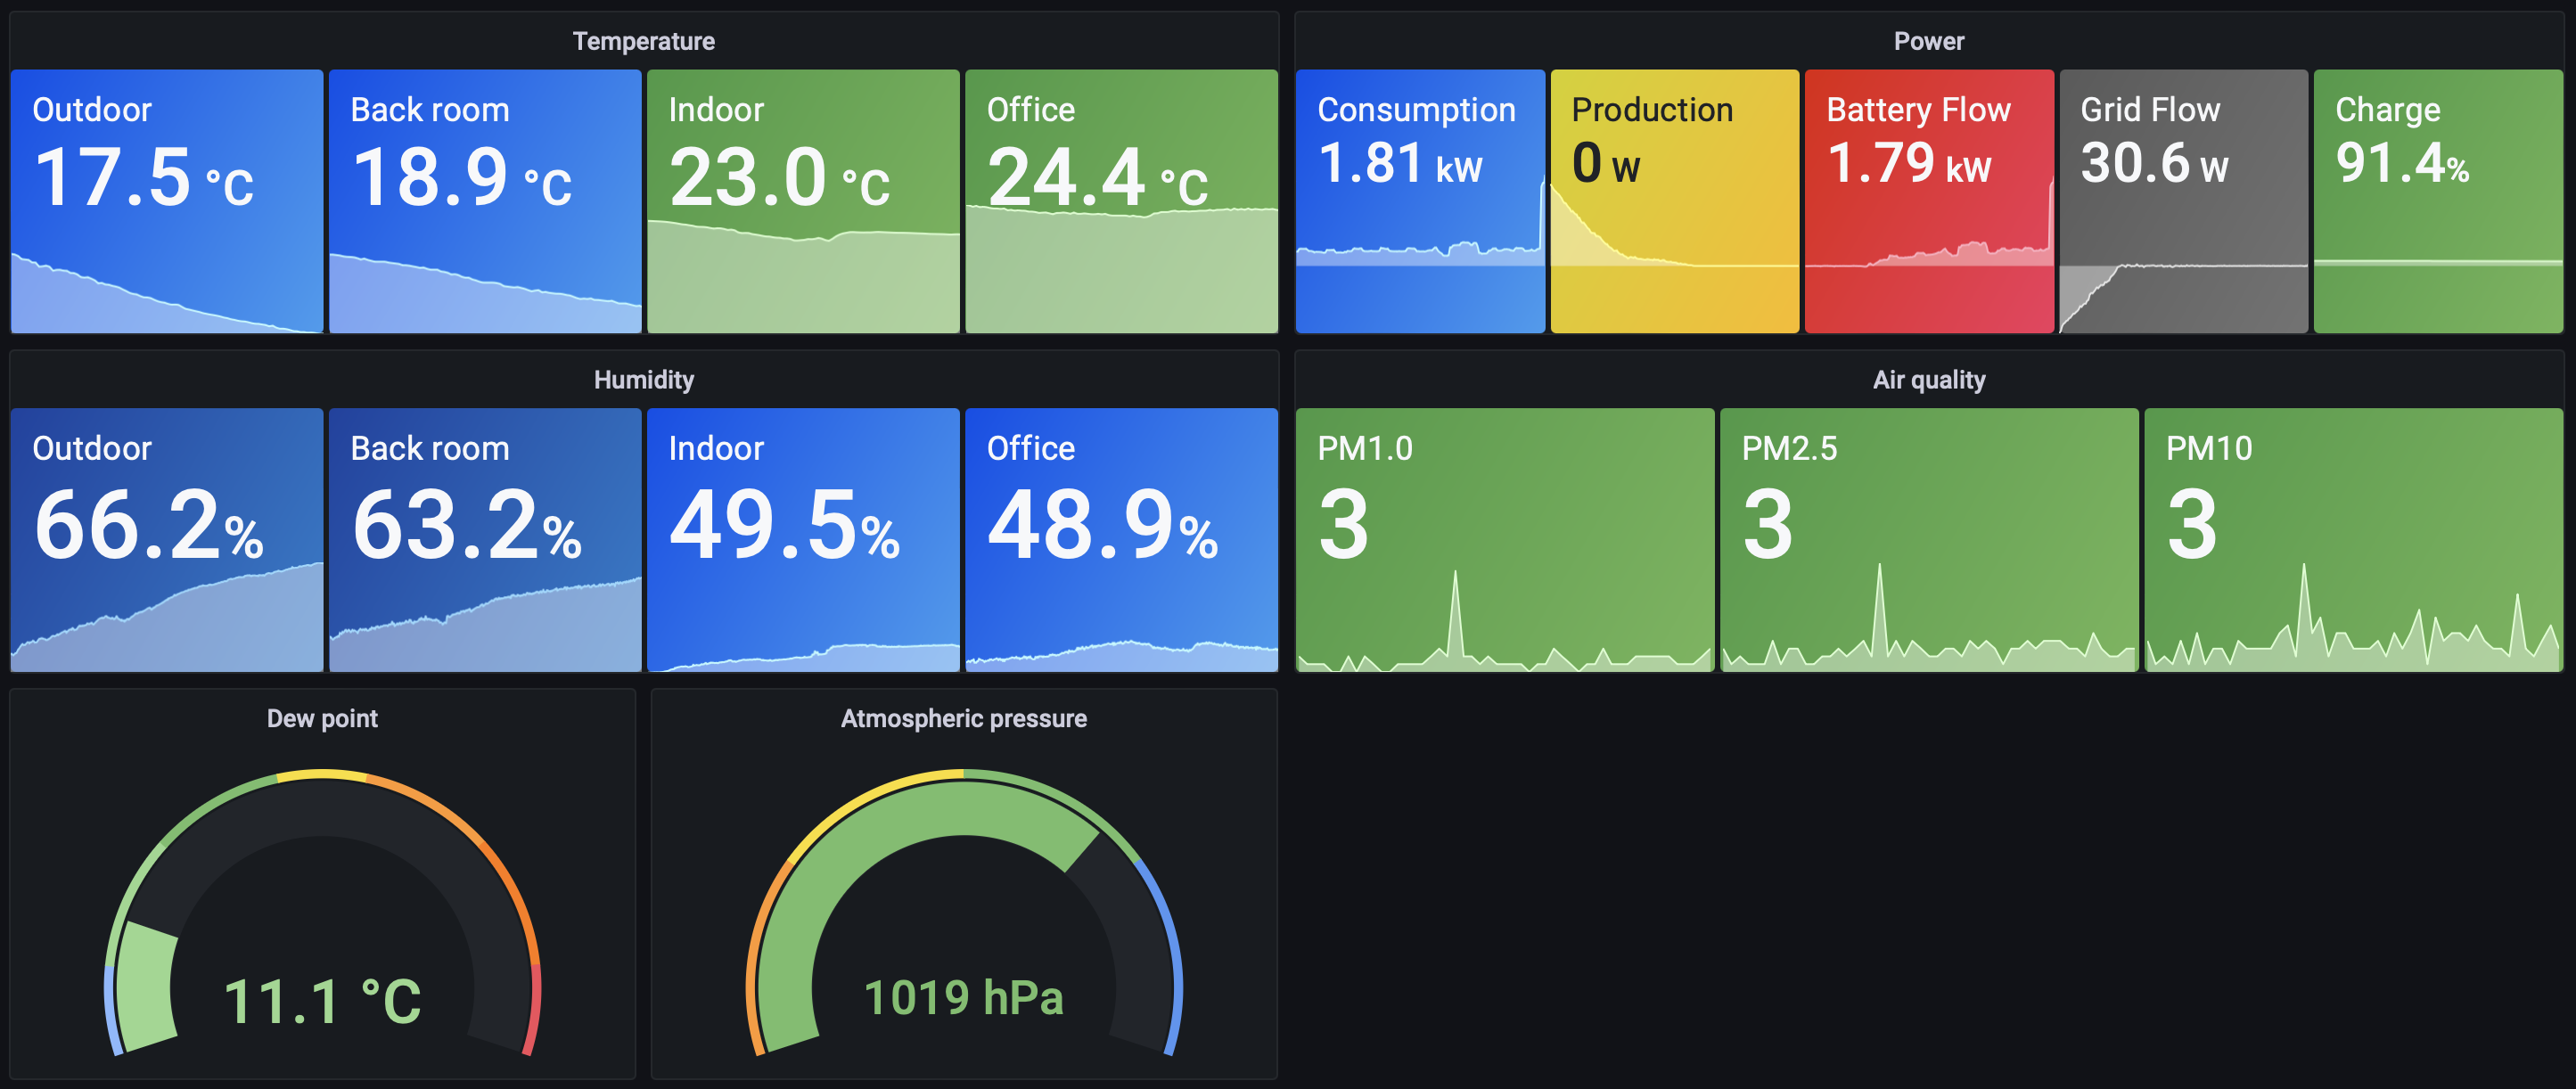
It comes and goes, in the last few years it’s been primarily for documenting my efforts with our home temperature monitoring setup and all the associated gubbins. I’m not sure “inspired” is quite the right word for what I write though. 😛
Q: Do you publish immediately after writing, or do you let it simmer a bit as a draft?
I publish immediately, I’m not writing any deep and thoughtful things for the most part so I don’t feel like there’s a need to simmer.
Q: What’s your favourite post on your blog?
I’d say “favourite” probably corresponds to “most useful for other people” in this case, and by far the two that most hit that are these:
- Installing Linux Mint 19.1 on a Late 2010 MacBook Air
- Fixing a Guitar Hero World Tour/Guitar Hero 5 guitar strum bar
The Linux Mint one ended up with 39 comments on it all up over a period of five years (which IMO shows the value of comments even though it’s unfortunately a requirement these days to install the Akismet Antispam plugin to deal with all the fucking bot spam, sigh). And I got a couple of nice comments on the Guitar Hero one thanking me for it.
Q: Any future plans for your blog? Maybe a redesign, a move to another platform, or adding a new feature?
As well as my blog, I also have a section on my main website which is where all of my shorter posts that end up on Mastodon go. It came about originally because back when I was still on Twitter, my client of choice Tweetbot had an option where you could specify a custom API endpoint to send images to, you’d return a URL and it would post the tweet with a link to that image. Even back then I was thinking it would be good to actually be able to host all my own stuff on my own server, it went “live” as it were at the end of November of 2016 and I’ve pretty much been hacking on that Media section ever since. I also imported all of my Tumblr posts to my website in 2019, then added a Memories feature firstly to the Media section on its own (which I dutifully blogged about) and then to pull in Flickr photos (ditto), then finally pulling in WordPress posts too (which I don’t think I actually blogged about as far as I can see). So now each day I can hit /memories on my website and see all of the LiveJournal/Tumblr/Wordpress posts plus Flickr photos on that day all in one place!
At this point it’s basically a mini CMS, with a custom UI that I wrote for adding and managing posts, it’s got threads and replies and tags and search. I’ve thought about moving my WordPress posts into it too, but given the efforts I went to to get my LiveJournal plus all its comments imported, I’d need to handle all of that too, PLUS somehow adding comments and avoiding spam? Seems like too much hassle.
I have thoroughly enjoyed making new themes for my website though, and they’re all fully switchable still going back to the original “Dark” one I started with in 2012 when the current general design of my website began.
If I narrow the scope down to just WordPress, I’m not really a big fan of the theme I’m using right now (Blogghiamo) and I’d like to be able to completely customise everything, but starting from scratch making my own theme seems like a very large undertaking, and rife with possible footguns, and none of the third-party ones I’ve seen seem to be just a regular blog layout these days, they’re all about e-commerce and so on. So we’ll see on that front. I do try to keep at least the colours in the WordPress theme up to date with what my current “default” website style is.
So yeah, it’s sort of a weird mix between my website and my blog, and will occasionally go to find something and have to check both locations because I’ve forgotten which one I’d posted it on.
However, one really cool thing about sticking with WordPress is the ActivityPub plugin: my blog has its own fediverse account at @blog that you can follow from your Mastodon client of choice, and cooler yet you can reply to posts that that account makes and they show up on the blog post in WordPress as a comment!
Q: Who’s next?
I am going to pick… let’s see… @[email protected], @mike, @heygeorgie, and @liamvhogan!