A musical journey

Sixteen years ago today, I bought my first guitar! It was a Fender Squire in a $400 everything-you-need starter kit, but I never managed to stick with it enough to learn much of anything, barely even the most basic open chords. The learning DVD I bought was boring as hell, the guitar was really heavy and kept going out of tune, and the amplifier it came with sounded awful.

I didn’t get rid of it though, it moved from house to house with us, and it was just sitting in our back room collecting dust when on a lark during the first COVID lockdowns in 2020 I decided to pull it out and maybe have a stab at learning to play again given the sheer richness of learning resources to choose from these days. First thing to do was to get it tuned up, and the very first string I tried to tune immediately snapped. I looked down the neck and realised that it warped to all hell and back, and given I never particularly liked it—in either a nice-to-play or an aesthetic sense—I decided I’d actually splurge a bit and spend more and get a guitar that made me want to pick up and play it.

After a ton of research on learning all about guitar pickups and where the sweet spot is for a guitar that’s properly good in its own right but not unreasonably expensive, I settled on an Epiphone SG Standard in ebony.

A photo of a shiny black electric guitar sitting sitting upright against the wall.

It arrived in mid-June and looked absolutely mint. For actually learning how to play again, I started with Fender Play. It was pretty decent, and absolutely a huge step up from the extraordinarily dry learning DVD I bought in 2007.

Then come mid-2021 we had more lockdowns, even harsher than 2020’s, where we weren’t even allowed to travel more than 5km from our homes. At some point during all this I randomly remembered how much I’d always enjoyed playing the drums in Guitar Hero back in the day, and that a friend had mentioned he had an electronic drum kit from Roland, and I thought, “Why not learn to play the drums too!”

Cue more research, and I settled on Roland’s TD-17KV drum kit.

A photo of an assembled Roland electronic drum kit.

It arrived at the end of July and came with a trial of Melodics, which is a learn-to-play drums app (and also keyboard and also synth pad) where you plug the drum kit into your iPad or computer and it has an almost Guitar Hero-esque system where it scrolls across and you hit the correct pad or cymbal with the particular hand at the right time.

A screenshot of the iPad app "Melodics". It's showing a pattern of notes to hit on the drums, right/left/right/right/left/right/left/left on the hi-hat and snare, so you end up doing in groups of three, but for the kick drum it's on every second note.

It works really well, but while I didn’t want an actual in-person teacher, I felt like I needed something a bit more than just learning from the app. I discovered this drum teacher who’s based in the UK, Mike Barnes, and he puts out a ton of great videos on his YouTube channel, they’re really clear and he does them all in one single take rather than that thing that so many people on YouTube do where they’ll edit out every little bit of silence or gap. He’s got a Buy Me A Coffee page too where you can subscribe for a monthly fee and he’ll send you notations of the stuff he puts up on YouTube, works with you for a practice plan, and you can email him with questions or to get feedback on things you’re working on. I signed up to that in mid-2022 and it’s been really good, highly recommended if you’re learning drums!

On the drum kit itself, I’ve since replaced the stock hi-hat pedal and cymbal with a VH-11 on a proper acoustic hi-hat stand, and it physically moves open and closed and you get a much better sense of how to manipulate the pedal to get the sound you want.

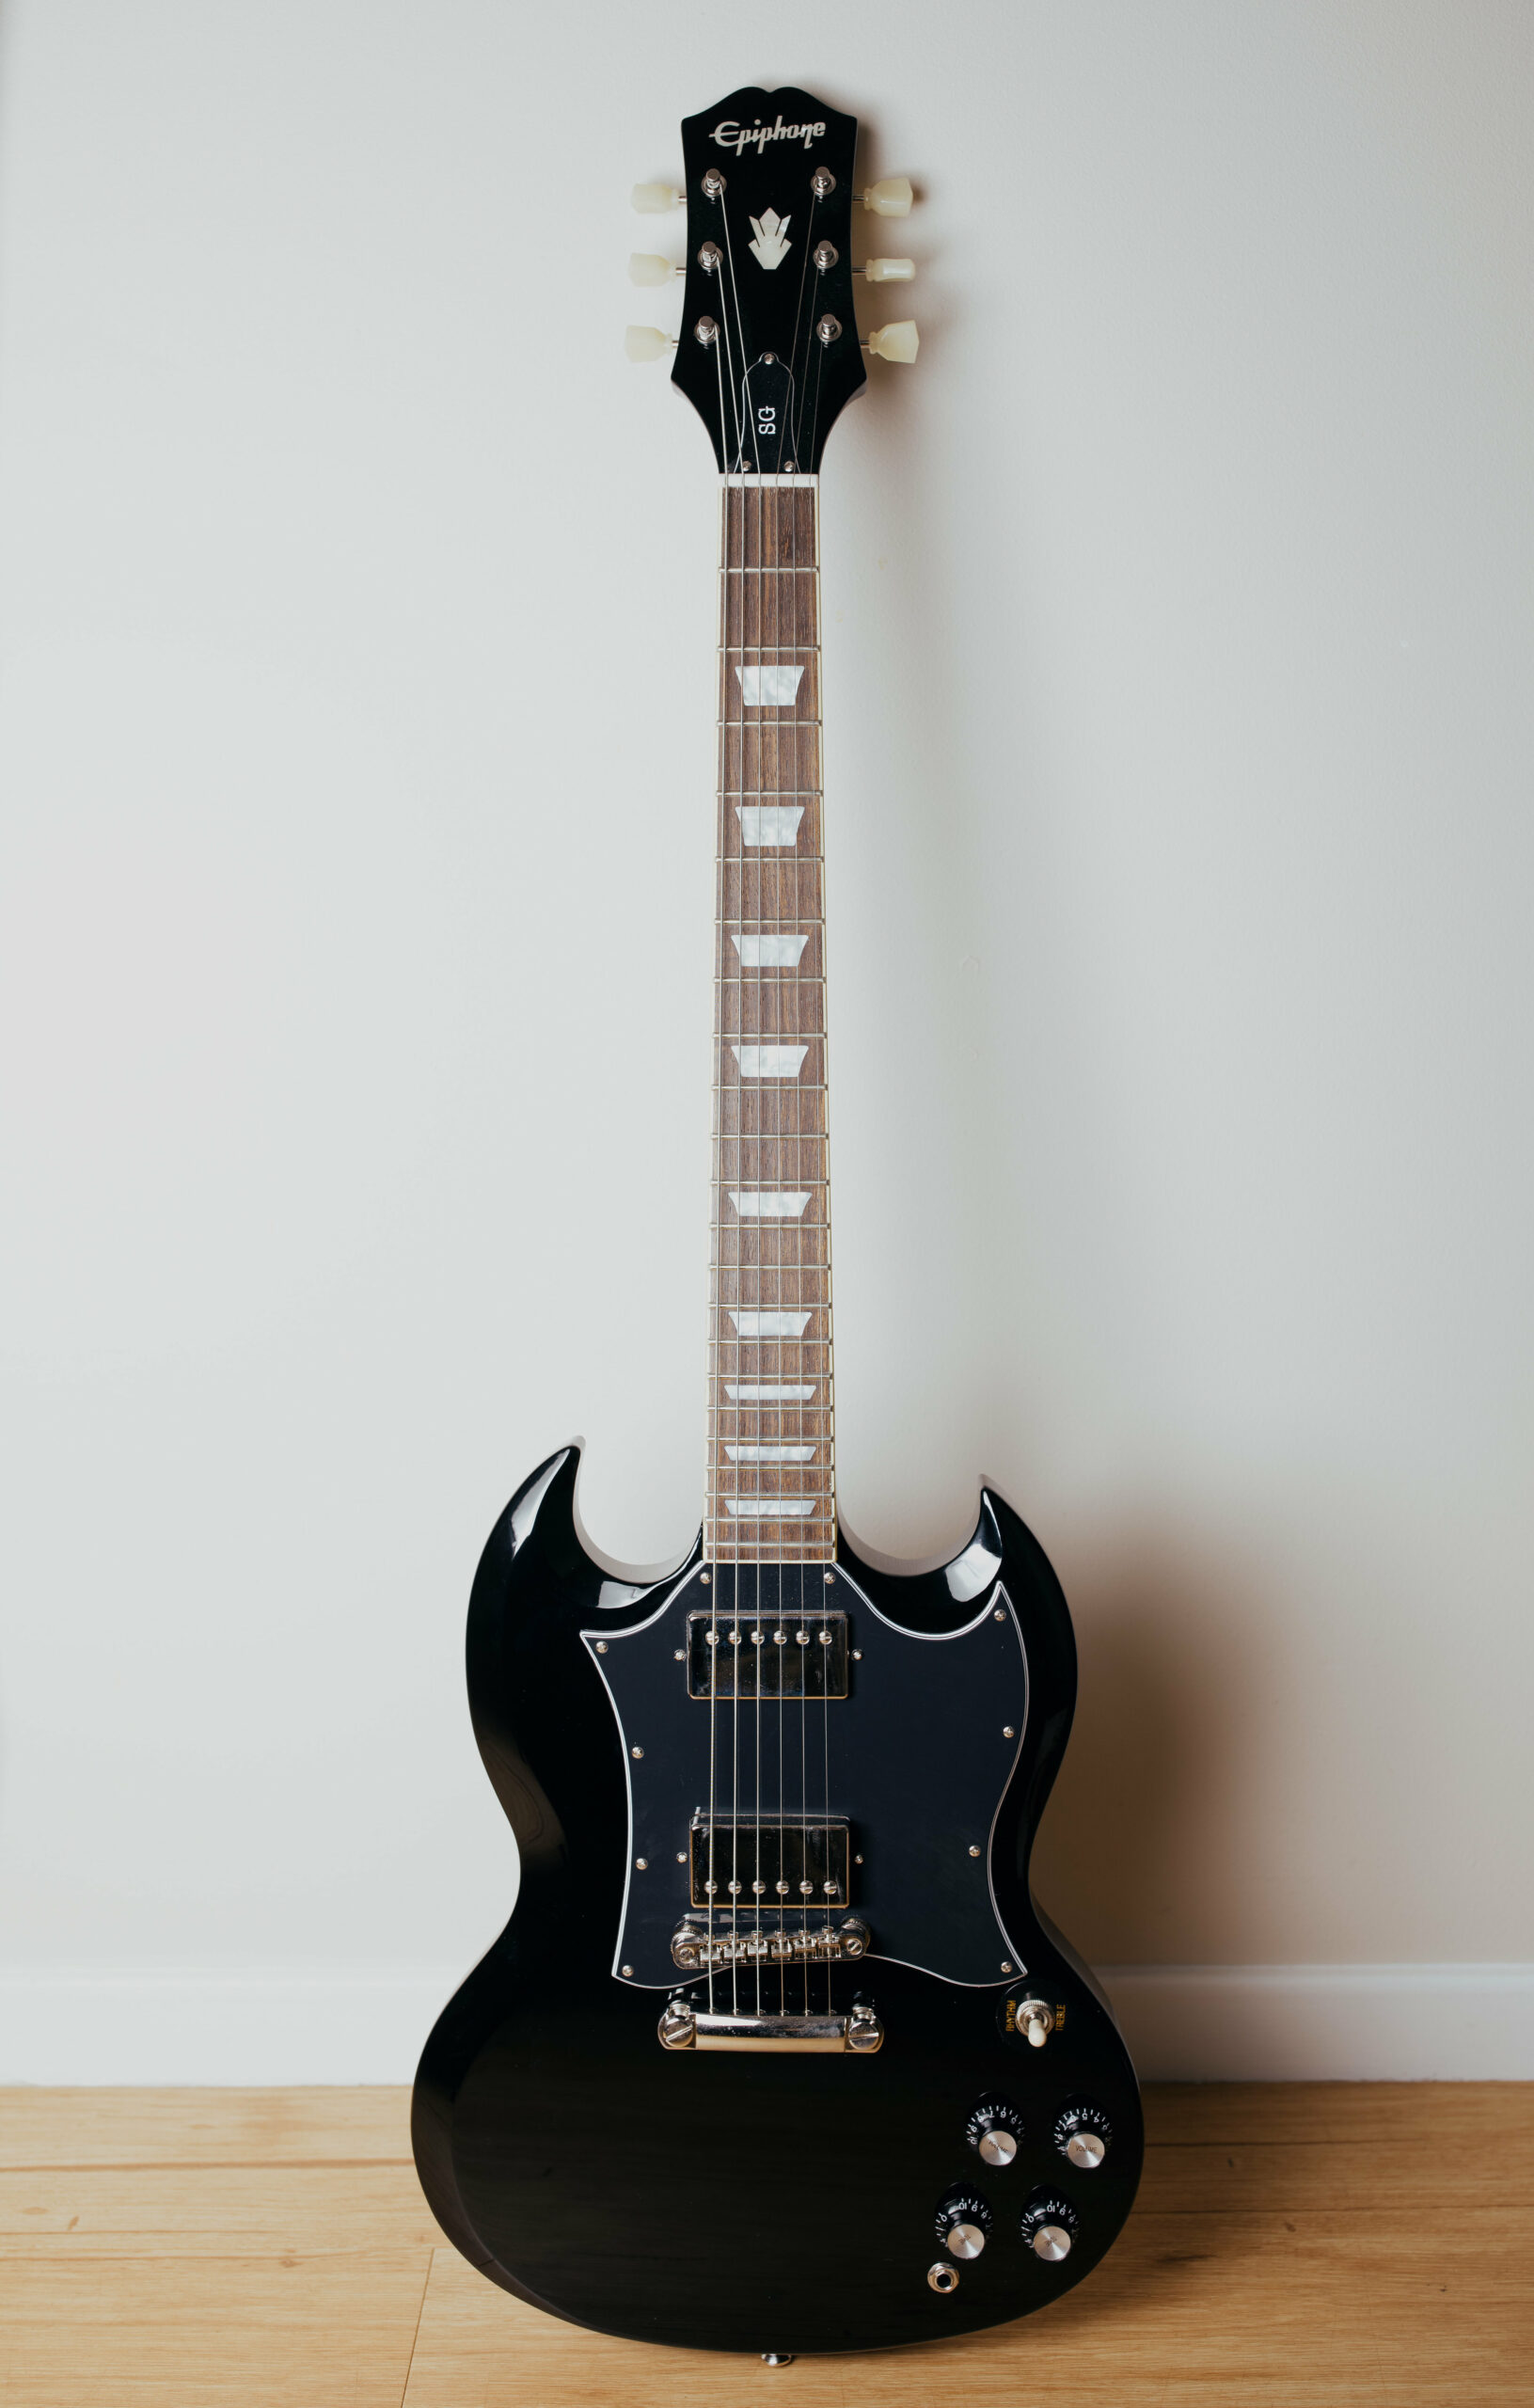
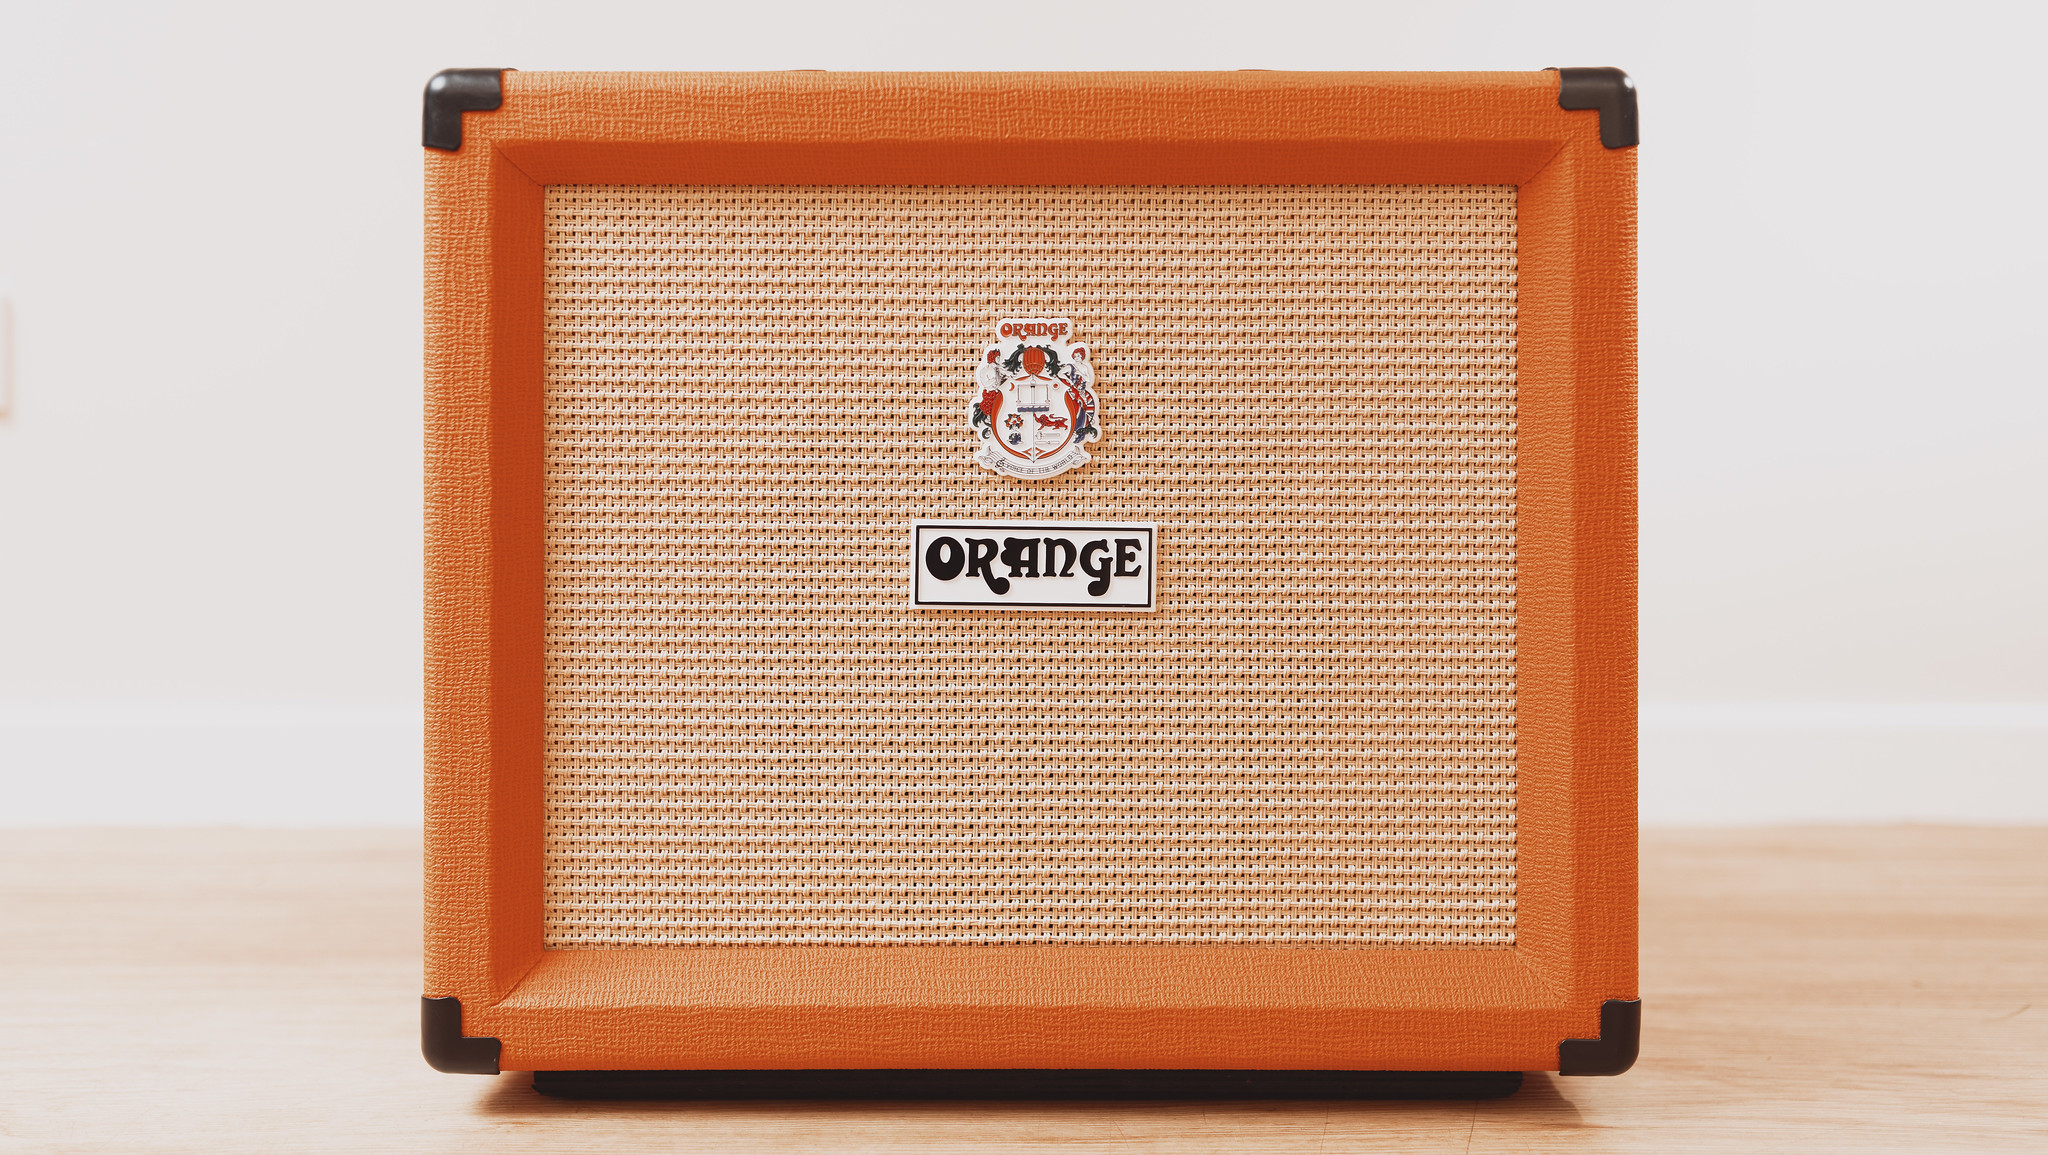
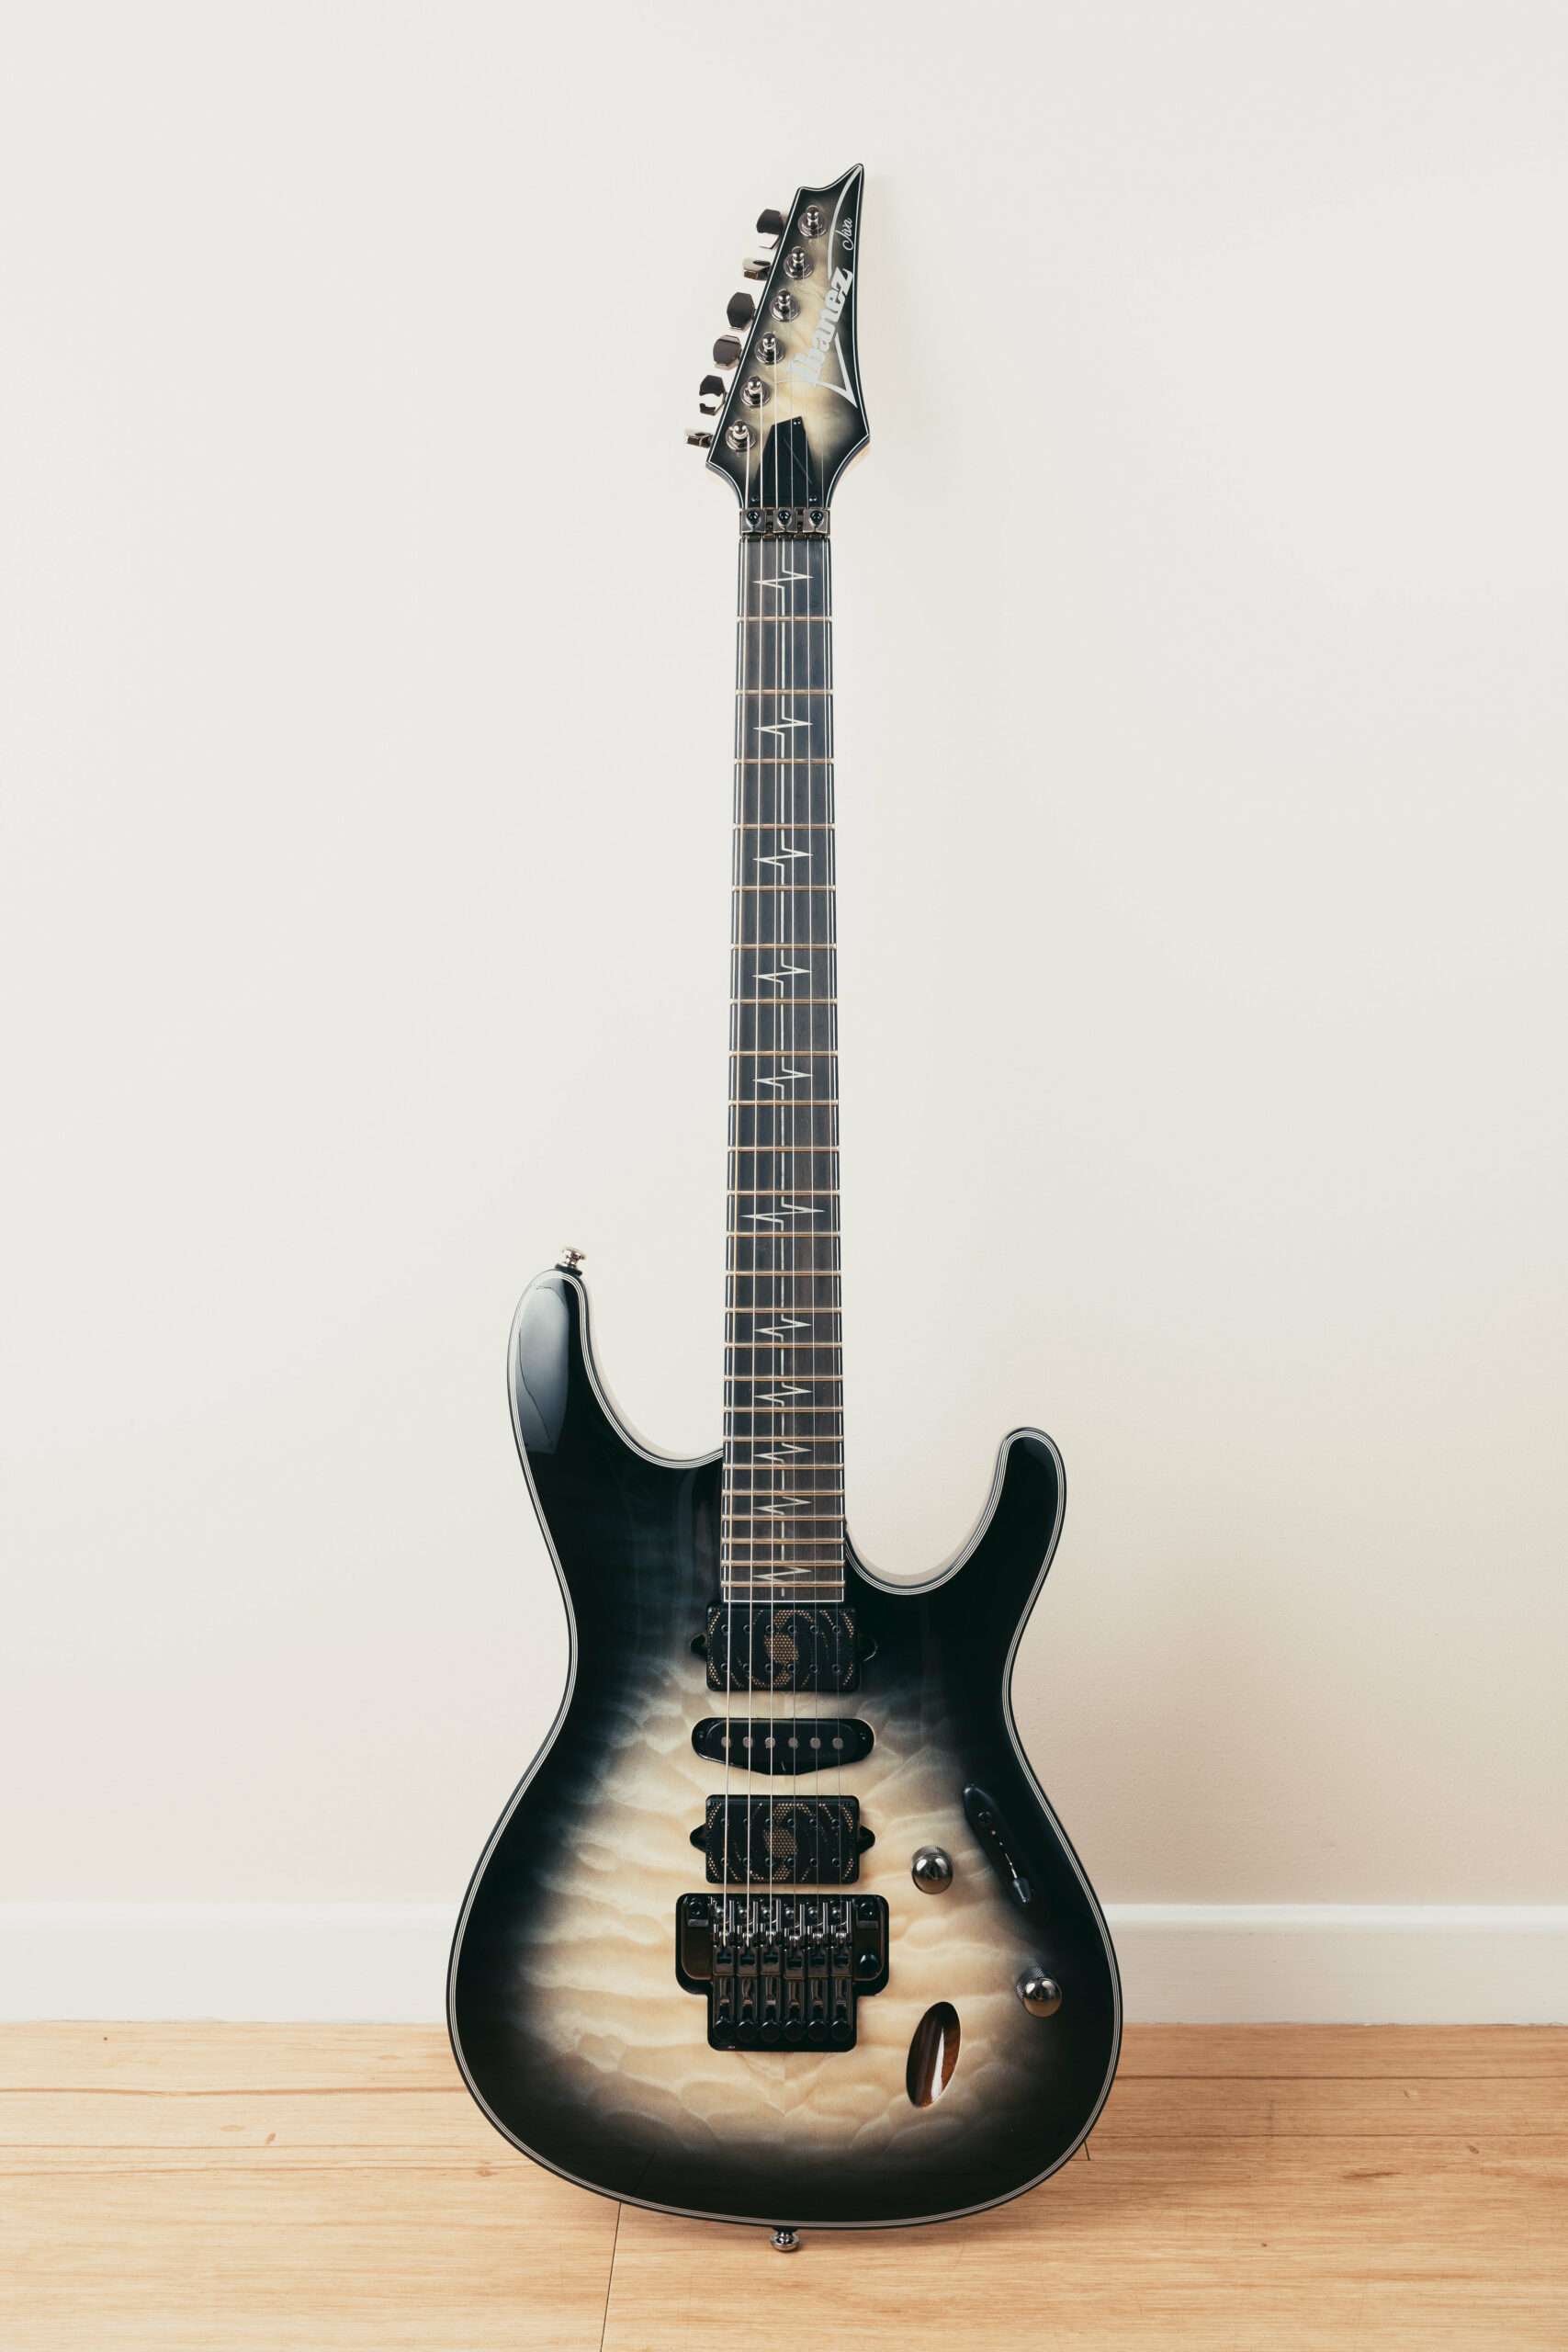
I was thoroughly enjoying learning all this new stuff, and at the end of July 2022 I bought a for-real guitar amplifier with vacuum tubes, the extremely eye-catching Orange Rocker 15 Combo, and in August bought some guitar pedals and decided to treat myself to a new guitar. Nothing was wrong with the old one but I wanted some more variety. I did a bunch more research and became completely obsessed with Nita Strauss‘ signature Ibanez JIVA10 guitar, the amount of different tones you can get out of it thanks to the two custom humbucker pickups and the middle single coil is brilliant, and it looks so pretty to boot. 😍

Also at the start of August that year I ditched Fender Play and signed up for Guitar Zero 2 Hero, which is a course by this Aussie guy based in Melbourne.

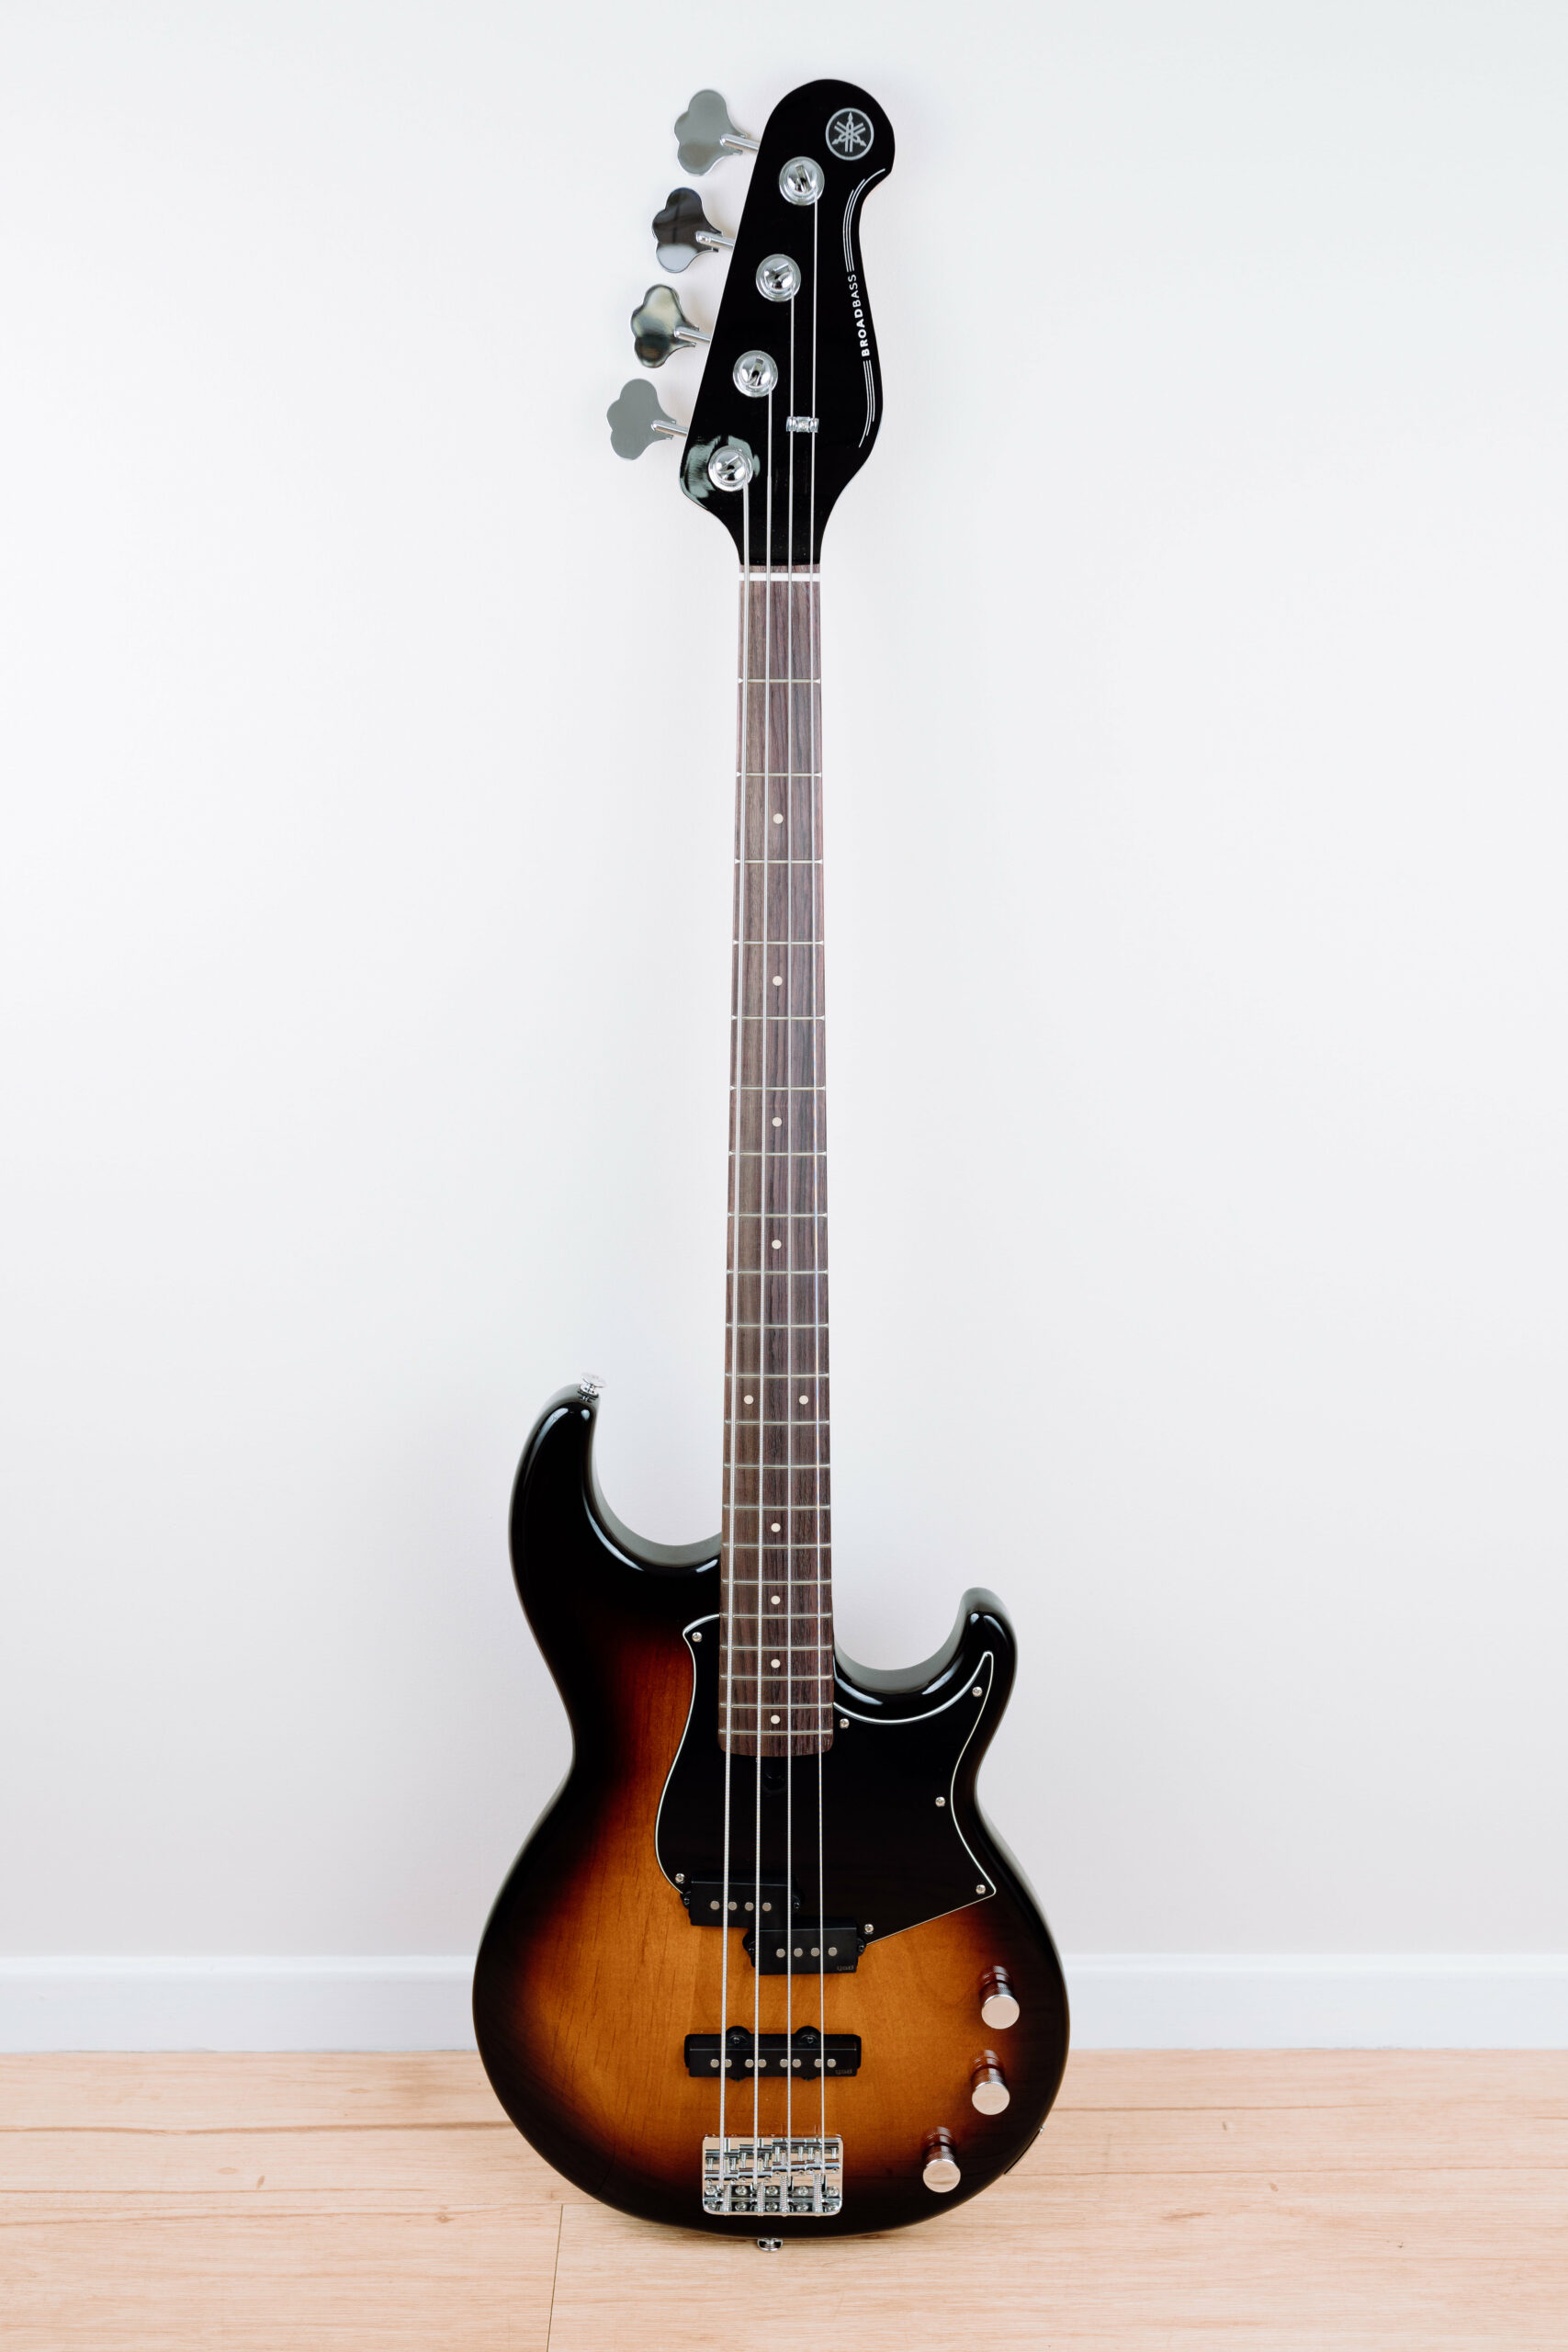
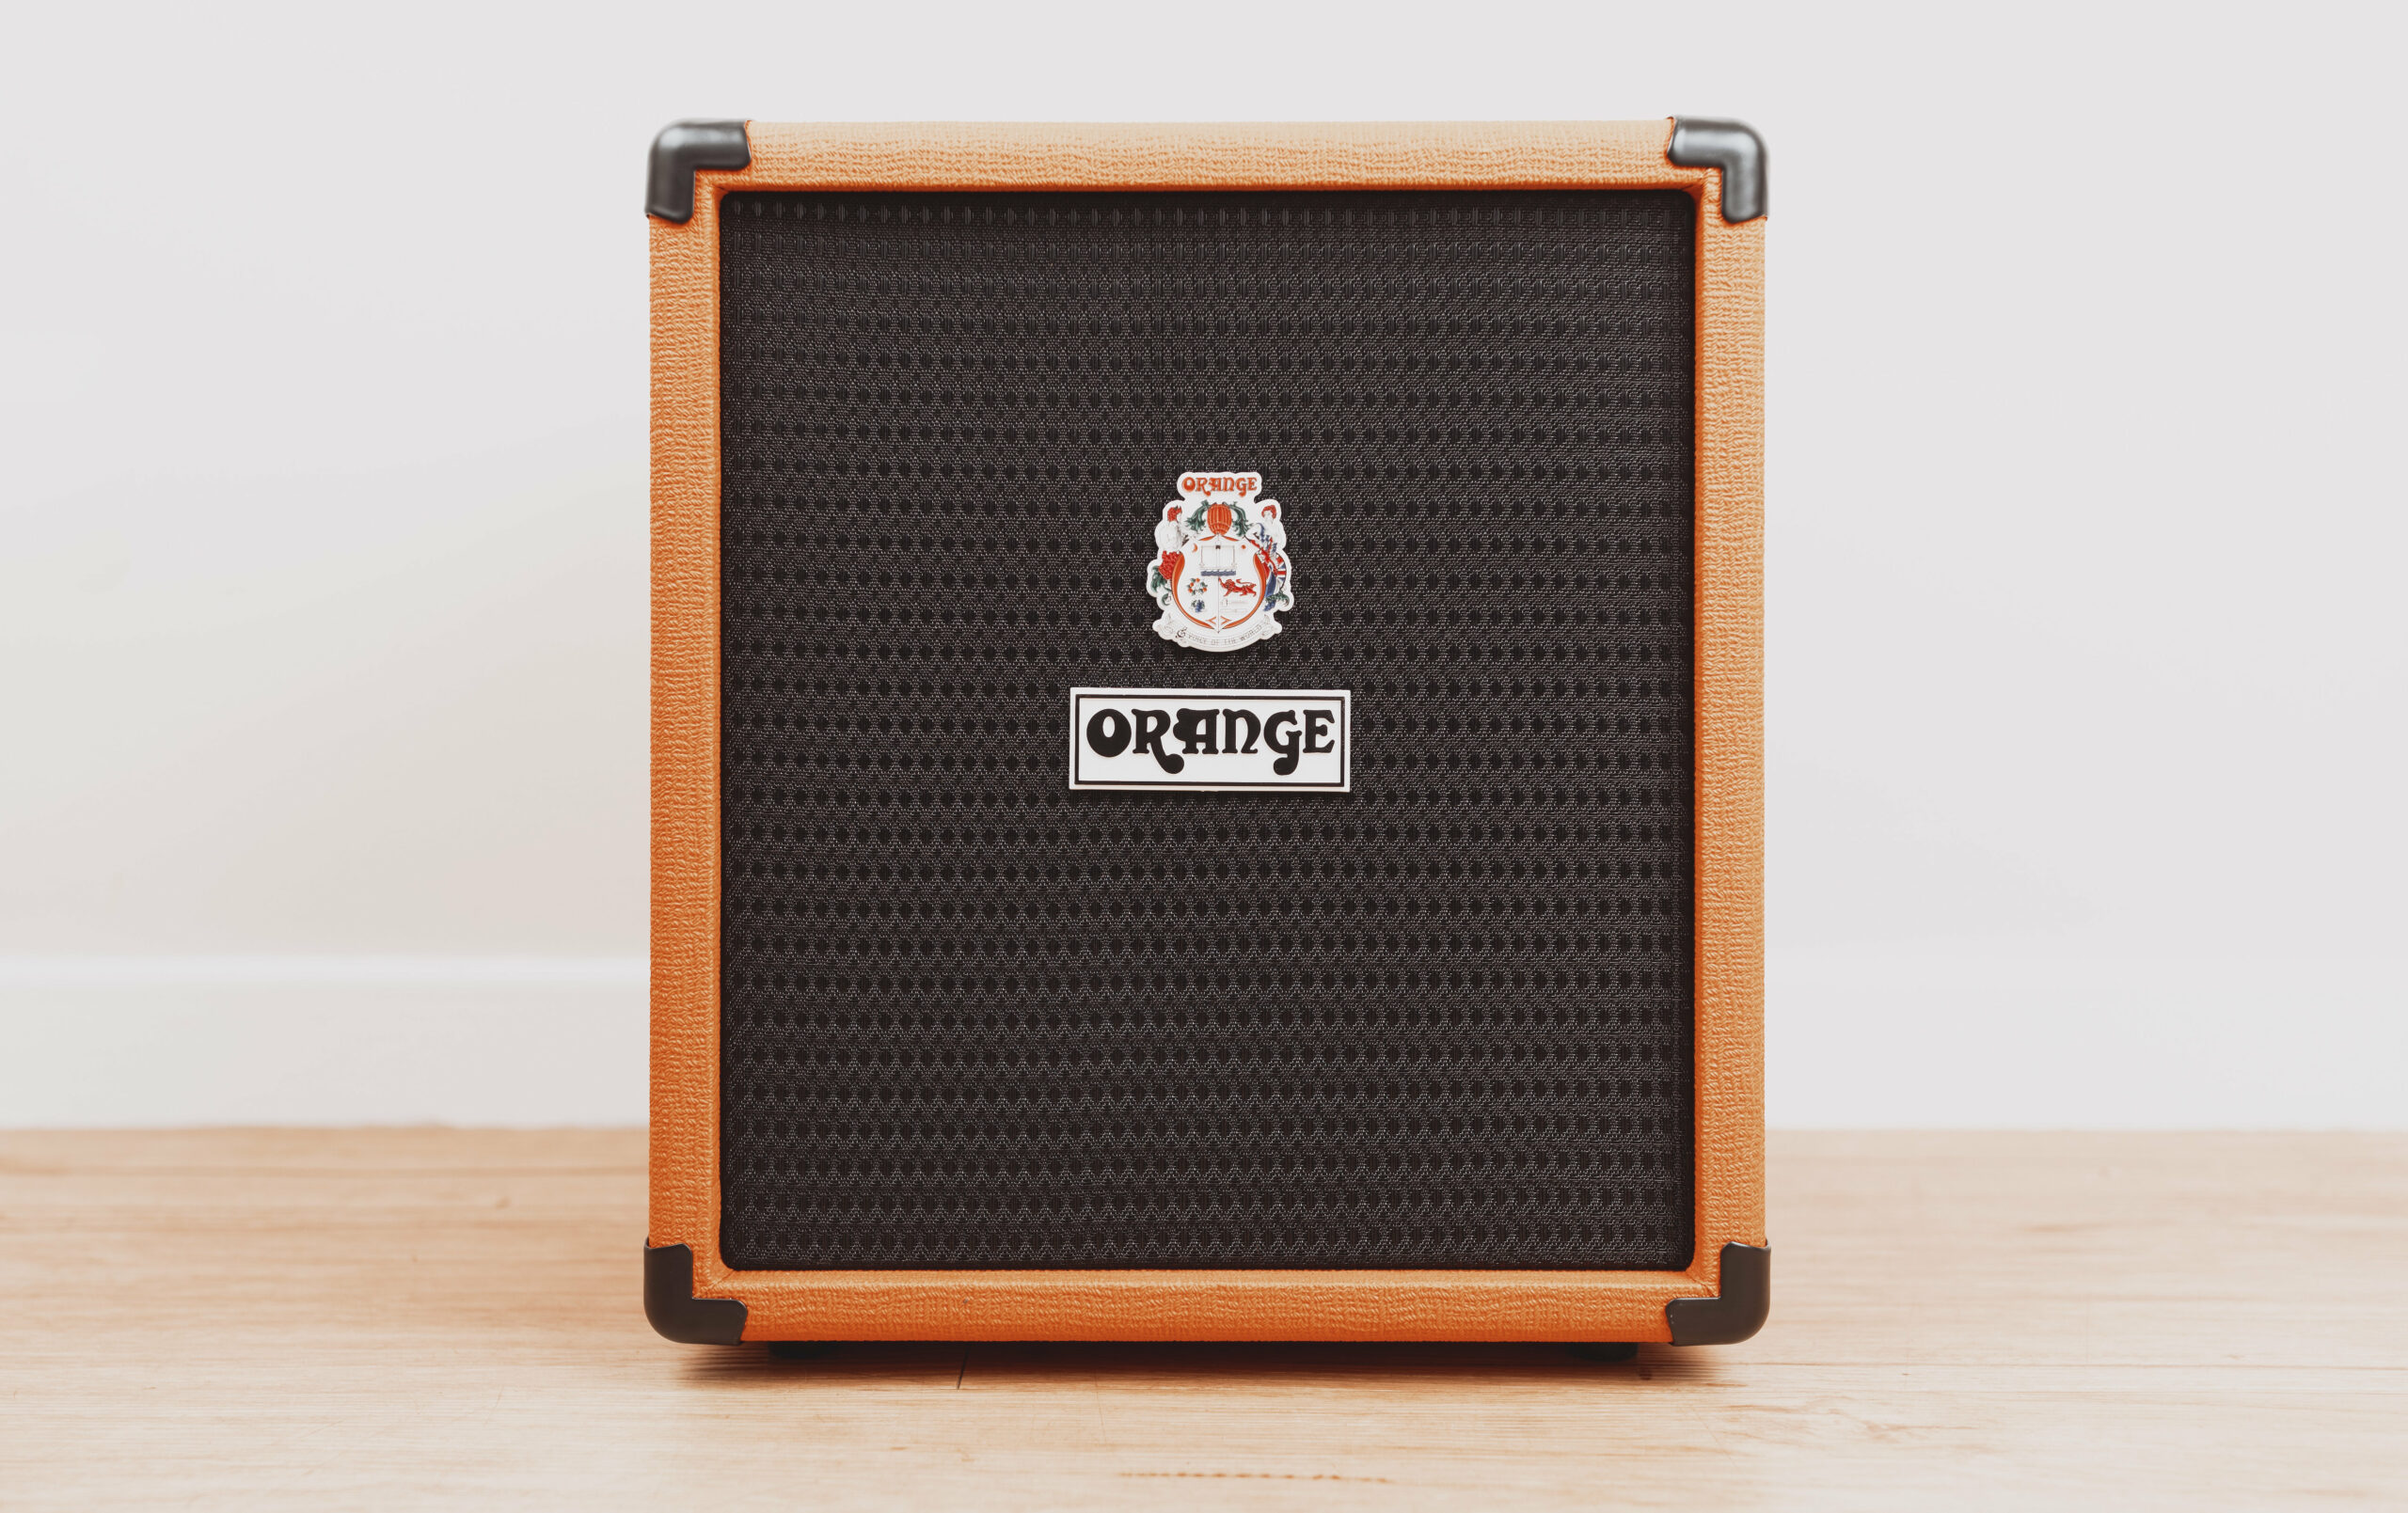
For my 40th birthday this year, I decided to keep expanding my musical repertoire and bought a bass guitar and amplifier! A friend of mine had mentioned that he had bought a bass and was learning to play which is what inspired me. Cue another bunch of research and I landed on the extremely handsome Yamaha BB-434 bass and another Orange amplifier.

A photo of a Yamaha BB-343 bass guitar propped up against the wall. The body fades from black around the edges into a dark rich orange/red wood in the middle
A photo of an Orange Crush Bass 25 bass guitar amp. It has a black mesh on the front with the rest of it being the customary bright orange colour

I’d seen many recommendations for the “Beginner to Badass” course at bassbuzz.com so I signed up for that and can confirm it’s excellent. You get a really good feeling of progress and learning as you go through the course and it makes you want to keep playing more, and the guy that produces it gives a really good indication of when you should continue to the next course versus getting stuck in one lesson and losing motivation.

I actually ended up realising that I wasn’t feeling that sense of progress or learning from the Guitar Zero 2 Hero course and was kind of stuck in the mud and hadn’t been playing it. So I ditched that one and found multiple recommendations from people on the bassbazz.com forums saying the closest thing to the Beginner to Badass course for guitar is Justin Guitar (which weirdly is another Aussie guy). I’ve only been doing it since the end of September this year, but it’s very promising so far and I’m getting more of a feeling of progress. In the almost three and a half years years since I bought my guitar I still haven’t managed to get anywhere beyond basic open chords and a couple of power chords from the Fender Play course, but I’m feeling more motivated now to actually stick with it and learn, and I think the Justin Guitar course is helping.

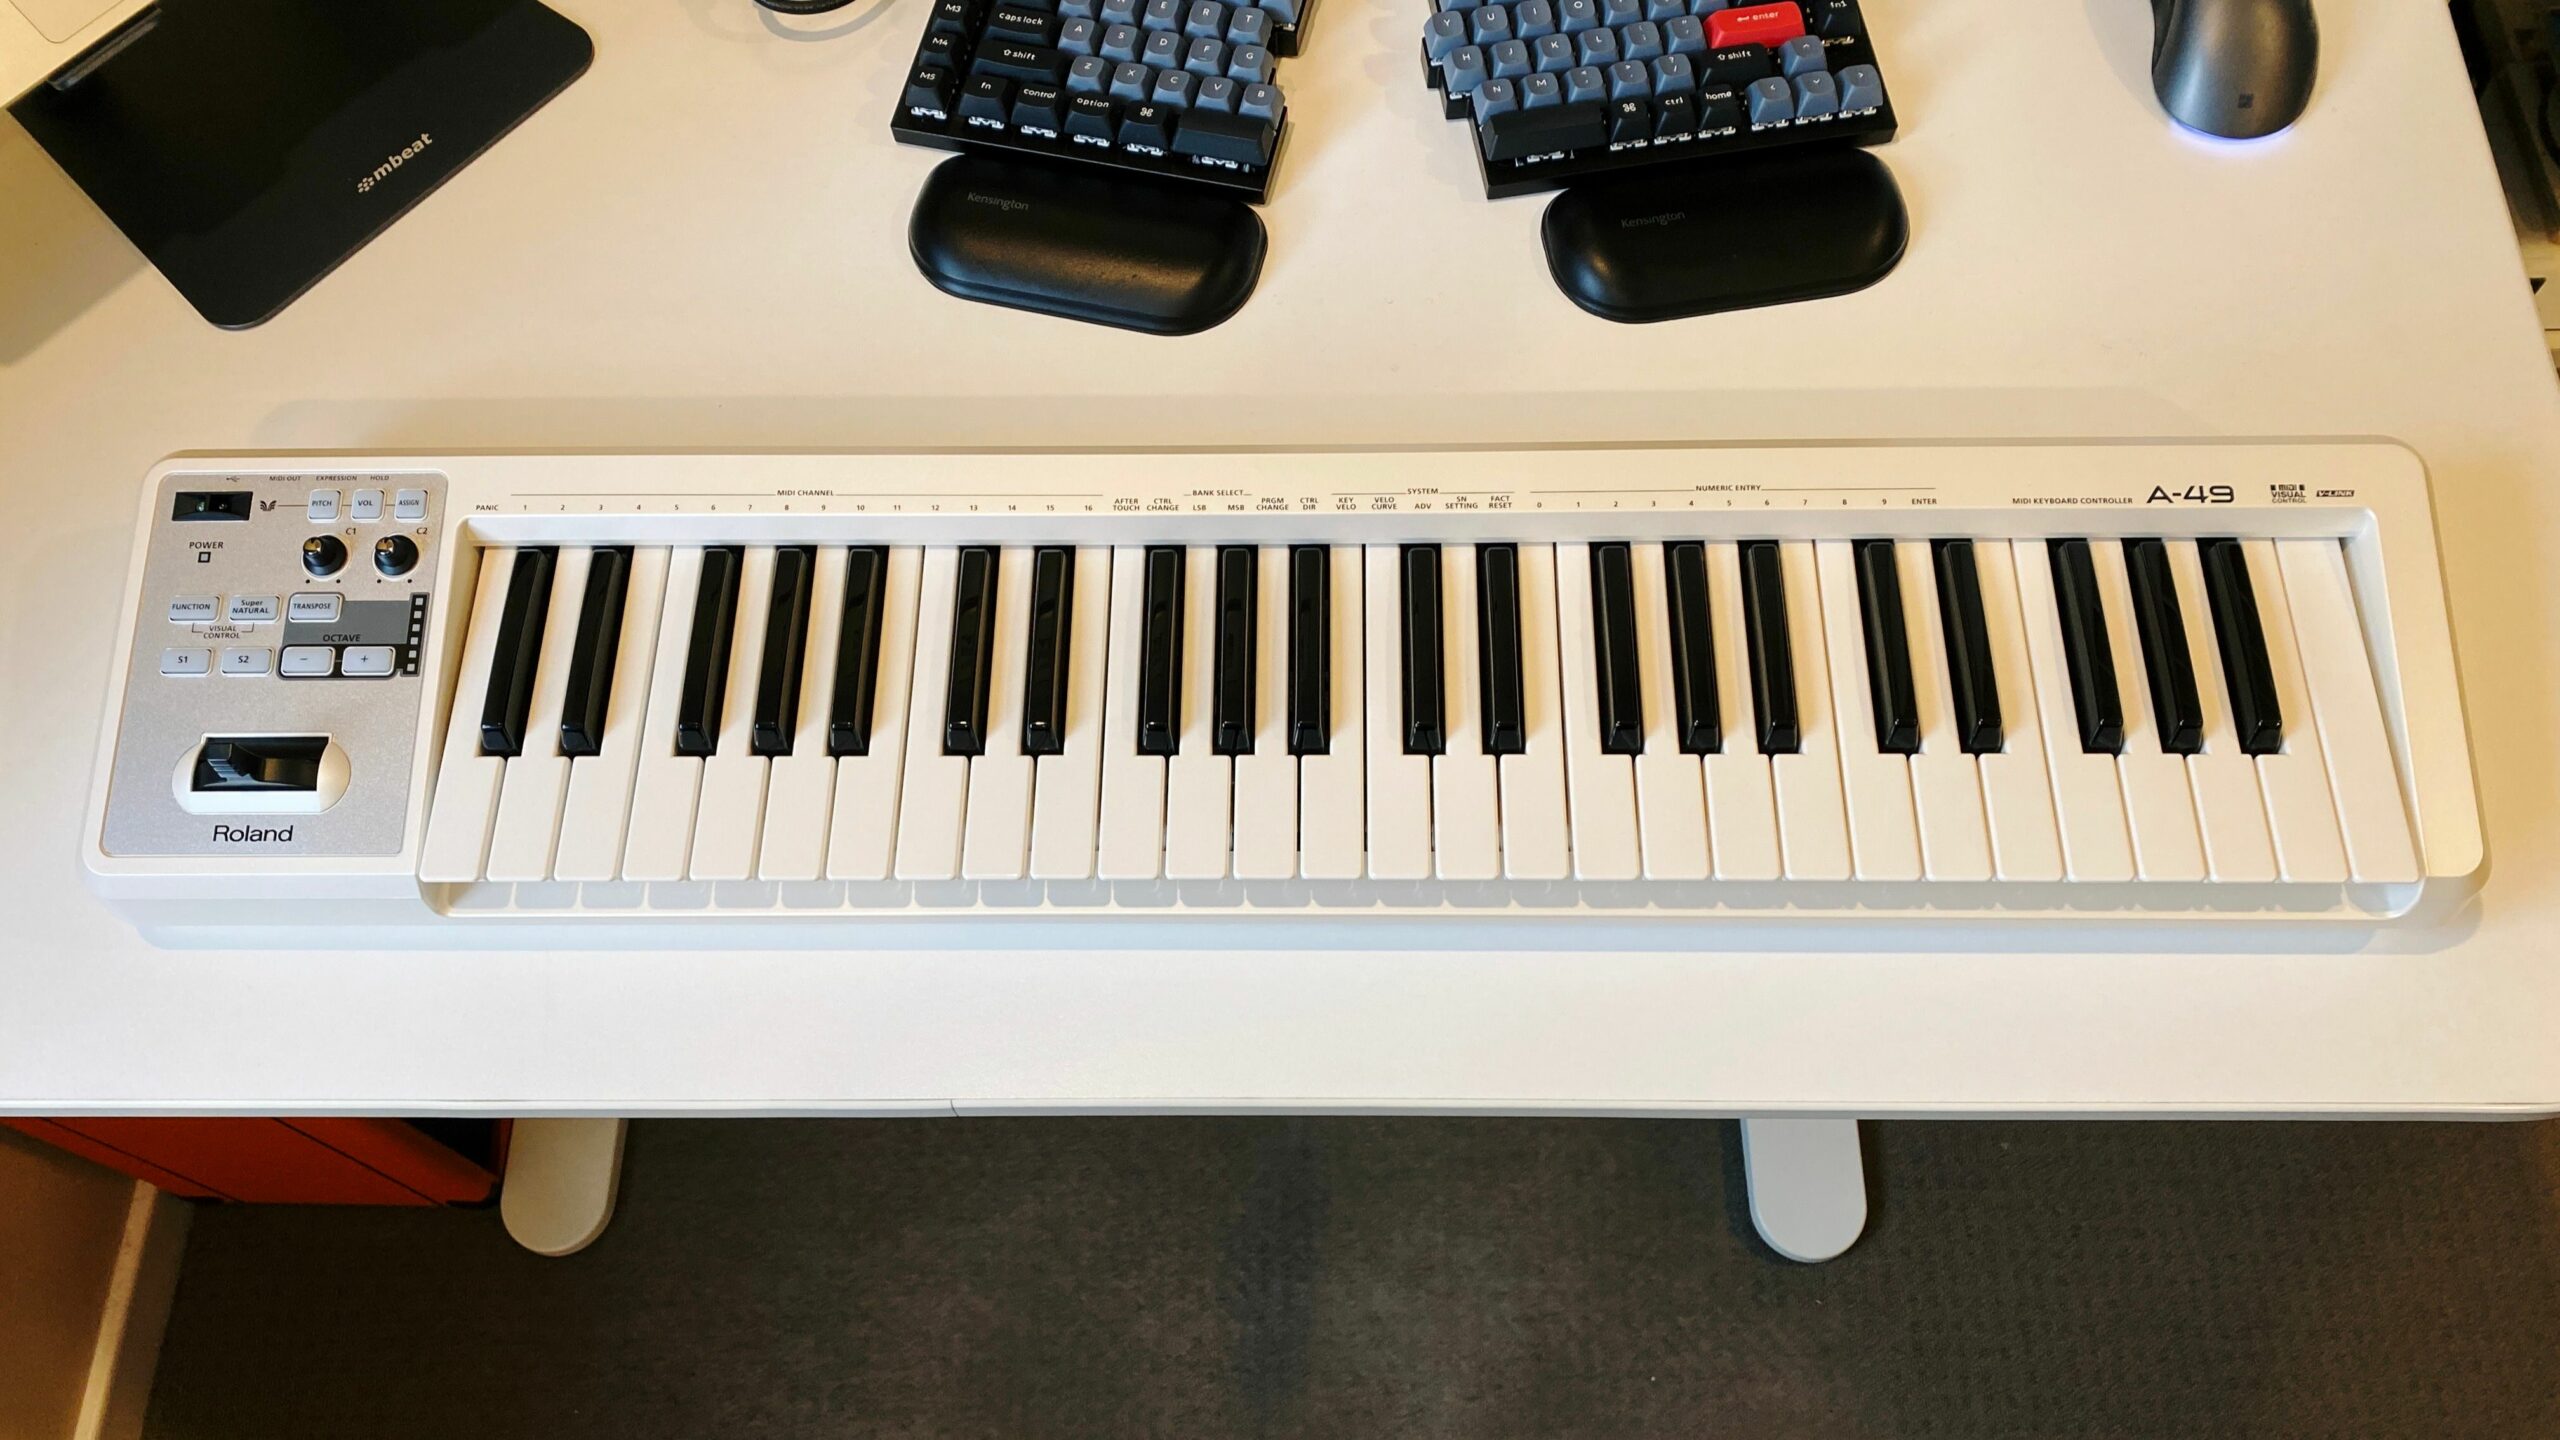
And then finally, because I’m already subscribed to Melodics and it also includes a keyboard course, I bought a MIDI keyboard at the end of last month as well. 😅

A photo of a Roland A-49 MIDI keyboard in white sitting on my (also white) desk. As the name suggests it has 49 keys, and has a number of buttons and knobs on the left hand side.

I actually bought one waaaay back in 2004 but in a similar vein to what happened with my original guitar, never stuck with it due to a lack of good learning resources.

In terms of how well I’m going with things, I’d say I’m far and away best at the drums. Melodics has definitely gamified things and you get “streaks” for practising for just five minutes a day each day, so during my lunch break I’ll go out to the back room where the drum kit is and get my at-least five minutes done. I also discovered this guy Jack Curtis who makes drumless backing tracks, they all come with both regular versions and ones with a click track, and they’re such fun to play along with, so between that and Melodics, all up I’ll probably be playing drums for a good 30-40 minutes every day and I think it definitely shows.

At the start of this year I recorded myself playing along to one of Jack Curtis’ tracks and even between then and now I can see I’ve come quite a lot further again. I need to get around to recording myself playing some more of those, maybe even that same song, but the latest highlight has been playing the drums on this collaboration with some friends. 😁

In terms of guitar, it’s been less good, though I’ve made a few recordings. This one from May of 2022 really clearly shows how not-great I was at keeping in time, I recorded another in December which was a fair bit better, and added bass to it in April of this year. Finally, this from May is better again, playing single notes rather than chords but really only from a single string at a time.

My current goal is to really stick with learning the guitar and get past the basic open chords and be able to properly do justice to the JIVA10 I bought. I started again from the very beginning with Justin Guitar just to be sure I covered everything, and he’s got a separate music theory course that I think I’ll start on as well, and will hopefully report back with good news! 😛

Back to the office for a week

Back to the office for a week

My workplace has leant heavily into remote-first work since COVID hit and we’ve hired a ton of people outside of the usual places where we have physical offices (Sydney in Australia, Mountain View in the US, etc.), and even for those of us who were regularly in the office pre-COVID, working from home is the norm now. A side-effect of that is that we don’t have nearly as much connection between coworkers especially for people who can’t come into the office even if they wanted to, so as a result we have “Intentional Togetherness” events for teams every six months or a year—I forget the cadence—where we’ll actually fly everyone in the team over from wherever it is they are and hold a whole bunch of in-person workshops and collaboration and just generally hang out.

One of my coworkers does the same job I do but is based over in Austin in Texas and we flew him out as well, plus people from New Zealand, Brisbane, Melbourne, and probably other places I’ve missed. I’d never met the Austin guy in person for obvious reasons, and it was really nice seeing everyone else in person too. He actually arrived on Thursday morning last week and so I went into the office on Thursday and Friday, plus all of this week. There was lots of going out for coffee and figuring out what we’d get for lunch and all the usual things you do when you’re in the office plus just generally chatting. I posted the highlights (which are 95% food-related) here.

My commute is a fifteen minute walk to the train station then an hour on the train (thankfully the office is right next to the station), and pre-COVID when I’d be in the office every single day we’d get up at 7:10am to get the 8:00am train to be in the office a bit past 9am, and wouldn’t get home again until past 7pm. There was no way in hell I was going back to doing that again so instead for this week I’d get up at my usual working-from-home time of 8:15am, start work a bit before 9am, then walk to the station and catch the 9:37am train and work from the train while I was commuting. Bar the post-work events we had, I was also getting the 4:50pm train home and working for the last hour on it to avoid peak hour.

Even with those changes compared to the pre-COVID commute, it’s now Friday evening as I type this, and I am absolutely wiped out. My social battery is not nearly at as high a capacity as it was pre-COVID and looking back at what my commute and hours used to be, I can’t believe I used to do that five days a week. And outside of the social battery aspect, this has felt like the longest seven days I’ve had for a long time (and I had a weekend in between the first two days I was in the office and this week). I know some people hate working from home for all sorts of reasons, but man, personally I would never go back to having to be in an office every day. Going in once in a while to see people or to play things after work, absolutely. But every day? Hard nope.

Conveniently this weekend is a long weekend because Monday is the Labour Day public holiday, so I’ll have an extra day to recharge!

Ten years of house!

Today marks ten years since we moved into our house!

This is the second-longest I’ve lived in any one place, when I was born we were living in a very small house and just before my 10th birthday we moved to where my parents still are to this day. After that, I moved out of home when I was 24, so only another four years here and it’ll be the longest I’ve lived anywhere!

It’s funny looking at the old photos and comparing them to now (apologies for the dreadful quality, these are upscaled from the really tiny real estate photos).

Before
Today
Before
Today

I blogged about the move a few days after we’d first moved in and how we turned the “office” that was the garage back into an actual garage, and since then we have:

We also want to redo the whole backyard and back room there, but that’s a massive project and is going to be a number of years down the track yet.

Phew!

Replacing the hard disk in a PowerBook G3 “Pismo”, and other fun with Mac OS 9

Replacing the hard disk in a PowerBook G3 “Pismo”, and other fun with Mac OS 9

I posted nearly five years ago about my shiny new Power Mac G4 and how much I was enjoying the nostalgia. Unfortunately the power supply in it has since started to die, and the machine will randomly turn itself off after an increasingly short period of time. Additionally, I’d forgotten just how noisy those machines were, and how hot they ran! I’ve bought a replacement power supply for it, but it involves rearranging the output pins from a standard ATX PSU to what the G4 needs, and that’s so daunting that I still haven’t tackled it yet. I decided to go back to the trusty old PowerBook G3, as I’ve since gotten a new desk and computer setup that has much more room on it, and having a much more compact machine has been very helpful.

One thing I was a bit concerned about was the longevity of the hard disk in it and I started investing the possibility of putting a small SSD into it. Thankfully such a thing is eminently possible by way of a 128GB mSATA SSD and an mSATA to IDE adapter! I followed the iFixit guide — though steps 6 through to 11 were entirely unnecessary — and now have a shiny new and nearly entirely silent PowerBook G3 (though it’s disconcerting at just how quiet it is given it’s an old machine… I realised I’m so subconsciously used to hearing the clicking of the hard disk).

A photo of a black PowerBook G3 sitting on a desk, booted to the Mac OS 9 desktop. The machine is big and chunky, but also has subtle curves to it, and the trackpad is HILARIOUSLY tiny compared to modern Macs.

I even had the original install discs from the year 2000 when mum first bought this machine, and they worked perfectly (though a few years ago I’d had to replace the original DVD drive with a slot-loading one because the original one died and it stopped reading discs entirely).

One I had it up and running, another sticking point is actually getting files onto it. As I mentioned in my previous post, Macintosh Repository has a whole ton of old software and if you load it up with a web browser from within Mac OS 9 it’ll load without HTTPS, but even so it’s pretty slow. Sometimes it’s nicer just to do all the searching and downloading from a fast modern machine and then transfer the resulting files over.

Mac OS 9 uses AFP for sharing files, and the AFP server that used to be built into Mac OS X was removed a few versions ago. Fortunately there’s an open-source implementation called Netatalk, and some kindly soul packed it all up into a Docker container.

I also stumbled across a project called Webone a while ago, which acts essentially as an SSL-stripping proxy that you run on a modern machine and point your old machine’s web browser to for its proxy setting. Old browsers are utterly unable to do anything with the modern web thanks to newer versions of encryption in HTTPS, but this lets you at least somewhat manage to view websites, even if they often don’t actually render properly.

Both Netatalk and Webone required a bit of configuration, and I rather than setting them up and then forgetting how I did so, I’ve made a Git repository called Mac OS 9 Toolbox with docker-compose.yml files and setup for both projects in them, plus a README so future-me knows what I’ve done and why. 😛 In particular getting write permissions to write from the Mac OS 9 machine to the one running Netatalk was tricky.

I also included a couple of other things in there too, and will continue to expand on it as I go. One thing is how to convert the PICT format screenshots from Mac OS 9 into PNG, since basically nothing will read PICTs anymore. It also includes a Mastodon client called Macstodon:

A screenshot of a multi-pane Mac OS 9 application showing the Mastodon Home and Local Timelines and Notifications at the top, and the details of a selected toot at the bottom.

And also the game Escape Velocity: Override (which I’m very excited to note is getting a modern remaster from the main guy who worked on the original):

A screenshot of a top-down 2D space trading/combat game with quite basic graphics. A planet is in the middle of the screen along with several starships of various sizes.

I mentioned both the Marathon and Myth games in my previous post, but those actually run quite happily on modern hardware since Bungie was nice enough to open-source them many years ago. Marathon lives on with Aleph One, and Myth via Project Magma.

More fun with temperature sensors: ESP32 microcontrollers and MicroPython

More fun with temperature sensors: ESP32 microcontrollers and MicroPython

I’ve blagged previously about our temperature/humidity sensor setup and how they’re attached to my Raspberry Pis, and they’ve been absolutely rock-solid in the three-and-a-half years since then. A few months ago, a colleague at work had mentioned doing some stuff with an ESP32 microcontroller and just recently I decided to actually look up what that was and what one can do with it, because it sounded like it might be a fun new project to play with!

From Wikipedia: ESP32 is a series of low-cost, low-power system on a chip microcontrollers with integrated Wi-Fi and dual-mode Bluetooth.

So it’s essentially a tiny single-purpose computer that you write code for and then flash that code onto the board, rather than like with the Raspberry Pi where it has an entire Linux OS running on it. It runs at a blazing fast 240MHz and has 320KB of RAM. The biggest draw for me was that it has built-in wifi so I could do networked stuff easily. There’s a ton of different boards and options and it was all a bit overwhelming, but I ended getting two of Adafruit’s HUZZAH32s which come with the headers for attaching the temperature sensors we have already soldered on. Additionally, they have 520KB of RAM and 4MB of storage.

Next up, I needed to find out how to actually program the thing. Ordinarily you’d write in C like with an Arduino and I wasn’t too keen on that, but it turns out there’s a distribution of Python called MicroPython that’s written explicitly for embedded microcontrollers like the ESP32. I’ve never really done much with Python before, because the utter tyre fire that is the dependency/environment management always put me off (this xkcd comic is extremely relevant). However, with MicroPython on the ESP32 I wouldn’t be having to deal with any of that, I’d just write the Python and upload it to the board! Additionally, it turns out MicroPython has built-in support for the DHT22 temperature/humidity sensor that I’ve already been using with the Raspberry Pis. Score!

There was a lot of searching over many different websites trying to find how to get all this going, so I’m including it all here in the hopes that maybe it’ll help somebody else in future.

Installing MicroPython

At least on macOS, first you need to install the USB to UART driver or your ESP32 won’t even be recognised. Grab it from Silicon Labs’ website and get it installed.

Once that’s done, follow the Getting Started page on the MicroPython website to flash the ESP32 with MicroPython, substituting /dev/ttyUSB0 in the commands for /dev/tty.SLAB_USBtoUART.

Using MicroPython

With MicroPython, there’s two files that are always executed when the board starts up, boot.py which is run once at boot time and is generally where you’d put your connect-to-the-wifi-network code, and main.py which is run after boot.py and will generally be the entry point to your code. To get these files onto the board, you can use a command-line tool called ampy, but it’s a bit clunky and also not supported anymore.

However, there is a better way!

Setting up the development environment

There are two additional tools that make writing your Python code in Visual Studio Code and uploading to the ESP32 an absolute breeze.

The first one is micropy-cli, which is a command-line tool to generate the skeleton of a VSCode project and set it up for full autocompletion and Intellisense of your MicroPython code. Make sure you add the ESP32 stubs first before creating a new micropy project.

The second is a VSCode extension called Pymakr. It gives you a terminal to connect directly to the board and run commands and read output, and also gives you a one-click button to upload your fresh code, and it’s smart enough not to re-upload files that haven’t changed.

There were a couple of issues I ran into when trying to get Pymakr to recognise the ESP32 though. To fix them, bring up the VSCode command palette with Cmd-Shift-P and find “Pymakr > Global Settings”. Update the address field from the default IP address to /dev/tty.SLAB_USBtoUART, and edit the autoconnect_comport_manufacturers array to add Silicon Labs.

Replacing the Raspberry Pis with ESP32s

After I had all of that set up and working, it was time to start coding! As I mentioned earlier I’ve not really done any Python before, so it was quite the learning experience. It was a good few weeks of coding and learning and iterating, but in the end I fully-replicated my Pi Sensor Reader setup with the ESP32s, and with some additional bits besides.

One of the things my existing Pi Sensor Reader setup did was to have a local webserver running so I could periodically hit the Pi and display the data elsewhere. Under Node.js this is extremely easily accomplished with Express, but using MicroPython the options were more limited. There are a number of little web frameworks that people have written for it, but they all seemed quite overkill.

I decided to just use raw sockets to write my own, though one thing I didn’t appreciate until this point was how Node.js’s everything-is-asynchronous-and-non-blocking makes doing this kind of thing very easy, you don’t have to worry about a long-running function causing everything else to grind to a halt while it waits for that function to finish. Python has a thing called asyncio but I was struggling to get my head around how to use it for the webserver part of things until I stumbled across this extremely helpful repository where someone had shown an example of how to do exactly that! (I even ended up making a pull request to fix an issue I discovered with it, which I’m pretty stoked with).

One of the things I most wanted to do was to have some sort of log file accessible in case of errors. With the Raspberry Pi I can just SSH in and check the Docker logs, but once the ESP32s were plugged into power and running, you can’t easily do a similar thing. I ended up writing the webserver with several endpoints to read the log, clear it, reset the board, and view and clear the queue of failed updates.

The whole thing has been uploaded to Codeberg with a proper README of how it works, and they’ve been running connected to the actual indoor and outdoor temperature sensors and posting data to my website for just under a week now, and it’s been absolutely flawless!

(Update October 2021: The dodgy HTTP setup described in this post has been replaced by a much more elegant MQTT one, and all my development efforts have been put towards the MQTT version of my sensor reader code.)

Powering our house with a Tesla Powerwall 2 battery

I posted back in March about our our shiny new solar panels and efforts to reduce our power usage, and as of two weeks ago our net electricity grid power usage is now next to zero thanks to a fancy new Tesla Powerwall 2 battery!

A photo of a white Tesla Powerwall 2 battery and Backup Gateway mounted against a red brick wall inside our garage.
A side-on view of a white Tesla Powerwall 2 battery mounted against a red brick wall.

We originally weren’t planning on getting a battery back when we got our solar panels — and to to be honest they still don’t make financial sense in terms of a return on investment — but we had nine months of power usage data and I could see that for the most part the amount of energy the Powerwall can store would be enough for us to avoid having to draw nearly anything whatsoever from the grid*.

* Technically this isn’t strictly true, keep reading to see why.

My thinking was, we’re producing stonking amounts of solar power and are feeding it back to the grid at 7c/kWh, but have to buy power from the grid after the sun goes down at 21c/kWh. Why not store as much as possible of that for use during the night?

The installation was done by the same people who did the solar panels, Penrith Solar Centre, and as before, I cannot recommend them highly enough. Everything was done amazingly neatly and tidily, it all works a treat, and they fully cleaned up after themselves when they were done.

We have 3-phase power and the solar panels are connected to all three phases (⅓ of the panels are connected individually to each phase) and the Powerwall has only a single-phase inverter so is only connected to one phase, but the way it handles everything is quite clever: even though it can only discharge on one phase, it has current transformers attached to the other two phases so it can see how much is flowing through there, and it’ll discharge on its phase an amount equal to the power being drawn on the other two phases (up to its maximum output of 5kW anyway) to balance out what’s being used. The end result is that the electricity company sees us feeding in the same amount as we’re drawing, and thanks to the magic of net-metering it all balances out to next to zero! This page on Solar Quotes is a good explanation of how it works.

The other interesting side-effect is that when the sun is shining and the battery is charging, it’s actually pulling power from the grid to charge itself, but only as much as we’re producing from the solar panels. Because the Enphase monitoring system doesn’t know about the battery, it gives us some amusing-looking graphs whereby the morning shows exactly the same amount of consumption as production up until the battery is fully-charged!

We also have the Powerwall’s “Backup Gateway”, which is the smaller white box in the photos at the top of this post. In the event of a blackout, it’ll instantaneously switch over to powering us from the battery, so it’s essentially a UPS for the house! Again, 3-phase complicates this slightly and the Powerwall’s single-phase inverter means that we can only have a single phase backed up, but the lights and all the powerpoints in the house (which includes the fridge) are connected to the backed-up phase. The only things that aren’t backed up are the hot water system, air conditioning, oven, and stove, all of which draw stupendous amounts of power and will quickly drain a battery anyway.

We also can’t charge the battery off the solar panels during a blackout… it is possible to set it up like that, but there needs to be a backup power line going back from a third of the solar panels back to the battery, which we didn’t get installed when we had the panels put in in February. There was a “Are you planning on getting a battery in the next six months” question which we said no to. 😛 If we’d said yes, they would have installed the backup line at the time; it’s still possible to install it now, but at the cost of several thousand dollars because they need to come out and pull the panels up and physically add the wiring. Blackouts are not remotely a concern here anyway, so that’s fine.

In the post back in March, I included three screenshots of the heatmap of our power usage, and the post-solar-installation one had the middle of the day completely black. Spot in the graph where we had the battery installed!

We ran out of battery power on the 6th of November because the previous day had been extremely dark and cloudy and we weren’t able to fully charge the battery from the solar panels that day (it was cloudy enough that almost every scrap of solar power we generated went to just powering the house, with next to nothing left over to put into the battery), and the 16th and 17th were both days where it was hot enough that we had the aircon running the whole evening after the sun went down and all night as well.

Powershop’s average daily use graph is pretty funny now as well.

And even more so when you look all the way back to when we first had the smart meter installed, pre-solar!

For monitoring the Powerwall itself, you use Tesla’s very slick app where you can see the power flow in real time. When the battery is actively charging or discharging, there’s an additional line going to or from the Powerwall icon to wherever it’s charging or discharging to or from.

You can’t tell from a screenshot of course, but those on the lines connecting the Solar to the Home and Grid icons animate in the direction that the power is flowing.

It also includes some historical graph data as well, but unfortunately it’s not quite as nice as Enphase’s, and doesn’t even have a website, you can only view it in the app. There’s a website called PVOutput that you can send your solar data to, and we have been doing that via Enphase since we got the solar panels installed, but the Powerwall also has its own local API you can hit to scrape the power usage and flows, and battery charge percentage. I originally found this Python script to do exactly that, but a) I always struggle to get anything related to Python working, and b) the SQLite database that it saves its data into kept intermittently getting corrupted, and the only way I’d know about it is by checking PVOutput and seeing that we hadn’t had any updates for hours.

So, I wrote my own in TypeScript! It saves the data into PostgreSQL, so far it’s been working a treat and it’s all self-contained in a Docker container. The graphs live here, and to see the power consumption and grid and battery flow details, click on the right-most little square underneath the “Prev Day” and “Next Day” links under the graph. Eventually I’m going to send all this data to my website so I can store it all there, but for the moment PVOutput is working well.

It also won’t shock anybody to know that I updated my little Raspberry Pi temperature/power display to also include the battery charge and whether it’s charging or discharging (charging has a green upwards arrow next to it, discharging has a red downwards arrow).

My only complaint with the local API is that it’ll randomly become unavailable for periods of time, sometimes up to an hour. I have no idea why, but when this happens the data in the Tesla iPhone app itself is still being updated properly. It’s not a big deal, and doesn’t actually affect anything with regards to battery’s functionality.

Overall, we’re exceedingly happy with our purchase, and it’s definitely looking like batteries in general are going to be a significant part of the electrical grid as we move to higher and higher percentages of renewables!

Visualising Git repository histories with Gource and ffmpeg

First, a disclaimer: this is entirely based on a blog post from a co-worker on our internal Confluence instance and I didn’t come up with any of it. 😛

Gource is an extremely cool tool for visualising the history of a Git repository (and other source control tools) via commits, and it builds up an animated tree view. When combined with ffmpeg you can generate a video of that history!

On a Mac, install Gource and ffmpeg with Homebrew:

$ brew install gource ffmpeg

Then cd into the repository you’re visualising, and let ‘er rip!

$ gource -1280x720 \
    --stop-at-end \
    --seconds-per-day 0.2 \
    -a 1 \
    -o - \
    | ffmpeg -y \
    -r 60 \
    -f image2pipe \
    -vcodec ppm \
    -i - \
    -vcodec libx264 \
    -preset fast \
    -crf 18 \
    -threads 0 \
    -bf 0 \
    -pix_fmt yuv420p \
    -movflags \
    +faststart \
    output.mp4

Phew! The main options to fiddle with are the resolution from gource (1280x720 in this case), and the crf setting from ffmpeg (increase the number to decrease the quality and make a smaller file, or lower the number to increase the quality and make a larger file).

I ran it over my original website repository that started its life out as PHP in 2011 and was moved to Perl:

And then my Javascript website that I started in 2016 and subsequently moved to TypeScript:

How cool is that?!

I also ran it over the codebase of the main codebase at work that powers our internal PaaS that I support and it’s even cooler because the history goes back to 2014 and there’s a ton of people working on it at any given time.

Fixing a Guitar Hero World Tour/Guitar Hero 5 guitar strum bar

Kristina and I had a date night last night in which we ate trashy food and then took the Xbox 360 out of storage and fired up Guitar Hero: Warriors of Rock. It was an excellent time except that my Guitar Hero World Tour guitar had stopped registering downward strums, and only upwards strums worked.

I figured I’d pull it apart today and see what was up, and thanks to this guide I figured it out, and am documenting it here for posterity (my problem wasn’t one of the ones described in that guide, but it was very handy to see how to disassemble the thing in the first place).

Tools needed for disassembly

  • Philips-head #0 and #1 screwdriver
  • Torx T9 screwdriver

Process

Firstly the neck needs to be removed, and the “Lock” button at the back towards the base of the guitar set to its unlocked position.

Next, the faceplate needs to be removed. This can be done by just getting a fingernail or a flathead screwdriver underneath either of the top bits of the body, pointed to with a arrow here, and gently prying it away from around the edges.

After that, there’s twelve Torx T9 screws to remove, circled in red, and another four Philips-head #0 ones, marked in green.

Once they’re all out, you can gently separate the front of the guitar where all the electronics live from the back of it.

Next there’s four Philips-head #1 screws to remove to get the circuit board that contains the actual clicky-switches away from the strum bar itself. Leave the middle two alone as they attach the guides for the springs of the strum bar.

After this, it’s a bit of a choose-your-own-adventure, as what you do next really depends on what’s wrong with the strum bar. On the underside of the circuit board above are the switches, it’s definitely worth making sure they both click nice and solidly when you press on them directly. If they don’t, it’s apparently possible to source exact replacements (“275-016 SPDT Submini Lever Switch 5A at 125/250VAC”) and fix it with a bit of soldering, but thankfully this wasn’t necessary in my case.

In the next image, undoing the Philips-head #1 screws circled in blue will allow you to take the strum bar assembly itself out and give it a re-lubricating (don’t use WD40, use actual proper lubricating grease) to make it rock back and forth a bit more smoothly. Another improvement you can make is adding a couple of layers of electrical tape to the areas I’ve circled in red. They’re where the strum bar physically hits the inside of the case, and the electrical tape can dampen the noise a bit.

What the strum bar problem ultimately ended being in my case is that the middle indented section where the switch rests against the strum bar to register a downstroke had actually worn away and could no longer press the switch in far enough to click. My solution, circled in green, was to chop a tiny piece of plastic from a Warhammer 40,000 miniature sprue and glue it—with the same plastic glue I use for assembling plastic miniatures—to the strum bar. Then I reassembled everything and it’s as good as new!

A bread update!

I blogged back in October last year about how I’d started making my own bread from scratch, and I haven’t stopped! I still haven’t graduated to sourdough yet (my one attempt was poorly timed in retrospect, it was right in the middle of everyone panic-buying flour and things around when coronavirus was really becoming a thing, and I didn’t want to waste a whole bunch of flour), but I’ve settled into a delicious routine with the “Saturday Overnight White Bread” recipe. I’m using 20% whole wheat flour, have bumped the water from 780mL to 790mL, and use a full quarter teaspoon of yeast (the recipe says “a scant quarter”). It’s at the point where I don’t even need to look at the recipe, I’ve got the timings and measurements totally memorised.

As well, Kristina bought me a pair of proofing baskets for Christmas last year, and MAN do they make a difference! They help keep the shape of the loaf and also wick moisture from the surface of it, which makes the crust come out even better. Feast your eyes on these beauties.

A photo of two golden brown loaves of bread sitting on a cooling rack.
A photo of two brown loaves of bread sitting on a cooling rack.

My associated lunches have been excellent as well, they’re primarily either cheese and tomato toasties with a recent addition of capsicum, or mushrooms cooked in a frying pan with garlic, sage, and rosemary, sitting on top of thickly-sliced tomato (also cooked in a frying pan) with crumbled up sharp cheddar cheese on top.

A photo of two cheese and tomato toasties sitting on a plate, with diced capsicum on top.
A photo of two slices of homemade bread sitting on a plate, topped with thick slices of tomato with mushrooms on them, and small pieces of crumbled up cheddar cheese atop it all.

Beanie has gotten to know the exact sound of a knife cutting through bread, because whenever I start he’s over into the kitchen like a shot waiting for crumb fallout and also the tiny useless end-piece we always give him.

Apple Watch, one year on: fitter and healthier than ever

I blogged last year about getting an Apple Watch and the 23rd of this month marked a full year of owning it! I’m extremely pleased to say that I’m now fitter, healthier, and stronger than I’ve ever been in my entire life. 💪🏻 I’ve also closed all three activity rings on every single day since I bought the Watch!

I mentioned in that post that I was down to 70kg, after that (but prior to COVID) I hit 69kg, which I haven’t been since I was in my very early 20s. After we started working from home full-time in mid-March, I settled into a really good exercise routine: during the week I finish work around 5:30pm, then on every day but Monday and Friday I’ll go for a burn on the elliptical while watching an episode of something on Netflix (Saturdays and Sundays are also elliptical time, but at whatever point I feel like doing it during the day). It’s amazing how quickly time passes when you’re not concentrating on the fact that you’re exercising. I’d started watching Star Trek: The Next Generation prior to COVID, but went through the episodes much more quickly after it, and finally finished it last month.

Fun side note, I thought I’d watched way more episodes than it turns out I have… as I was making my way through the episodes, I’d remembered seeing the pilot episode before, then a random smattering of maaaaybe five to ten episodes in the middle, and then the series finale, but that was it. It was pretty fun to watch the progression of the series, and I think at this point I enjoy Star Trek more than I do Star Wars. After I finished TNG, I took a brief Trek break to watch Warrior Nun (IMDB’s blurb says “After waking up in a morgue, an orphaned teen discovers she now possesses superpowers as the chosen Halo Bearer for a secret sect of demon-hunting nuns.” HIGHLY recommended, I loved it), and have now started watching Star Trek: Deep Space Nine. I’m only a few episodes in, but again, I’ve definitely seen the first episode before but none of the other four I’ve watched thus far.

The elliptical has its own calorie counter in it, I have no idea how accurate it is because it doesn’t take into account your weight, and the Apple Watch doesn’t take into account the fact that I’ve got the incline on the elliptical at 14 degrees and the resistance set to 14 out of 22, but regardless it’s a hell of a workaround. After a typical 45-minute episode of a TV show, the elliptical says I’ve burnt around 650-700 calories, and the Apple Watch says 425-450 calories.

On Mondays and Fridays, instead of using the elliptical I do some weight training. I bought a pair of neoprene-coated 4kg dumbbells and have been doing twelve of each of the exercises from this article, three times each. I really like that Women’s Health Magazine article because it’s not pretentious and just says “Hey if you want some toned arms, do these things.” Pretty much all the ones aimed at men that I found were all of the “RARRRR GET RIPPPPPED BROOOO” which I just… just, no. 😑

As a result of all of this, I’ve actually gained weight and am now 71kg, but it’s all muscle mass, aw yiss. I’ve never actually had properly visible muscles, so this is a new look for me. 😛

On the odd occasion that I’m feeling a bit pooped-out for whatever reason, rather than using the elliptical or doing weight training, I’ll just go for a brisk walk on the treadmill and listen to part of a podcast. (Speaking of podcasts, I’ve basically entirely stopped listening to them except for when I’m occasionally using the treadmill… my commute into the city was my podcast listening time, and with that gone, I just don’t really do it anymore).

My primary use for the Apple Watch is still definitely fitness, but I’ve also really enjoyed the little notification buzz you get on your wrist when you get an iMessage or SMS. It’s totally unobtrusive and as someone who leaves all of their devices muted at all times, it means I don’t actually miss messages that need a timely reply, but if it’s not important I can just ignore it. The other handy thing I’ve found is using Siri to set custom timers. I don’t have any of the “always listening” Siri stuff on on any of my devices, but I have the Watch set to activate Siri when you hold the digital crown in for a couple of seconds. It’s super-handy when I’m timing my bread-making or barbecuing to just say “Set a timer for four minutes”, or whatever non-standard time it is, rather than having to futz around pressing things.

A year on, the Apple Watch is still one of my favourite gadgets and I’m keen to see what sort of additions Apple makes to it in the coming years!