And now for something completely different: Anzac biscuits!

And now for something completely different: Anzac biscuits!

A disclaimer up front: I can’t claim any credit whatsoever for this recipe, my co-worker Rachel posted about it at work and I asked if she minded if I re-posted the recipe here!

With Anzac Day just past, another thing from this time of year is Anzac biscuits:

The Anzac biscuit is a sweet biscuit, popular in Australia and New Zealand, made using rolled oats, flour, sugar, butter (or margarine), golden syrupbaking soda, boiling water, and (optionally) desiccated coconut. Anzac biscuits have long been associated with the Australian and New Zealand Army Corps (ANZAC) established in World War I.

As mentioned above, my co-worker Rachel posted her own recipe that’s based as closely as possible on the really early Anzac biscuit recipes, and I made them last night and they’re amazing.

There’s two recipes, one is the pre-1920s version without coconut, and the other is with coconut and more sugar. I made the pre-1920s one as Kristina can’t eat coconut. The method is identical, just the ingredients differ.

I should also point out that they should go a lot flatter than in the picture above, but I cheated and microwaved the butter and golden syrup in the microwave rather than heating it on the stove, so the mixture didn’t stay warm and it didn’t end up spreading.

Ingredients

  • 1 cup plain flour (all purpose flour)
  • 1 cup rolled oats (not steel cut or quick oats)
  • 1 cup sugar (part white sugar, part soft brown sugar)
  • 3/4 cup desiccated coconut
  • 115g salted butter
  • 1 tablespoon golden syrup
  • 1.5 teaspoons bicarbonate of soda
  • 2 tablespoons of boiling water

Pre-1920s recipe without coconut

  • 1 cup plain flour
  • 2 cups rolled oats
  • 1/2 cup sugar
  • 115g salted butter
  • 2 tablespoons golden syrup
  • 1 teaspoon bicarbonate of soda
  • 2 tablespoons of boiling water

Method

  1. Preheat your oven to 170˚ degrees (no fan).
  2. Combine dry ingredients in a bowl.
  3. Melt butter and golden syrup slowly in a small saucepan.
  4. In a jug, dissolve bicarb soda in boiling water.
  5. Pour boiling water and bicarb into the butter and syrup. It will foam up. Add it immediatley to the dry ingredients.
  6. Mix everything together just enough to combine. The mixture should be sticky. Don’t let it get cold.
  7. Roll into teaspoon sized balls, and place on a baking sheet, spaced at least 10cm apart – they will spread a lot.
  8. Bake for 8-10 minutes. Your oven time may vary.
  9. Remove from oven, and cool on the baking sheet for a few minutes.
  10. Transfer to wire rack to cool.
  11. Store in an airtight container. They’ll keep for months.

Digital archeology: recovering ClarisWorks drawing files

Three years ago I posted about how I’d gone back and recovered all my old websites I’d published over the years and packed them up into a Docker image, and last year I’d idly mused that I should go back and recover the multitude of websites that I’d designed but never actually uploaded anywhere. I finally got around to doing that over the weekend, and they’re all up on archive.virtualwolf.org! Some are the original HTML source, some are just the Photoshop mockups, but that now contains the almost sum total of every single website I’d created (and there’s a lot of them). The only one missing is the very very first one… The Dire Marsh news updates are from early 1998, but I’d copied most of the layout from the previous site as evidenced by the (broken) visitor at the left that says “<number> half-crazed Myth fanatics have visited this site since 21/12/97”.

Prior to building way too many websites, I’d been introduced to the Warhammer 40,000 and Dune universes when I was 13 and had immediately proceed to totally rip them off get inspired and write my own little fictional universe along the same lines. This was all in 1996 and very early 1997, I even still have all the old files sitting in my home folder with the original creation dates and everything, but didn’t have anything that could open them as they were a combination of ancient Microsoft Word writings — old enough that Pages didn’t recognise them — and ClarisWorks drawing documents — ClarisWorks had a vector-based drawing component to it as well as word processing. I ended up going down quite the rabbit hole in getting set up to bring them forwards into a modern readable format, and figured I’d document it here in case it helps anyone in future.

Running Mac OS 9 with SheepShaver

The very first hurdle was getting access to Mac OS 9 to begin with. I originally started out with my Power Mac G4 that I’ve posted about previously but unfortunately it seems like the power supply is on the way out, and it kept shutting down (people have apparently had success resurrecting these machines using ATX power supplies but I haven’t had a chance to look into it yet). Fortunately, there’s a Mac OS 9 emulator called SheepShaver that came to the rescue.

  1. Download the latest SheepShaver and the “SheepShaver folder” zip file from the emaculation forums.
  2. You need an official “Mac OS ROM” file that’s come from a real Mac or been extracted from the installer. Download the full New World ROMs archive from Macintosh Repository, extract it, rename the 1998-07-21 - Mac OS ROM 1.1.rom file to Mac OS ROM and drop it into the SheepShaver folder.
  3. Download the Mac OS 9.0.4 installer image from Macintosh Repository (SheepShaver doesn’t work with anything newer).
  4. Follow the SheepShaver setup guide to install Mac OS 9 and set up a shared directory with your Mac. Notes:
    • It defaults to assigning 16MB of RAM to the created virtual machine, be sure to increase it to something more than 32MB.
    • Disable the “Update hard disk drivers” box in the Options sections of the Mac OS 9 installer or the installer will hang (this is mentioned in the setup guide but I managed to miss it the first time around).
    • When copying files from the shared directory, copy them onto the Macintosh HD inside Mac OS 9 directly, not just the Desktop, or StuffIt Expander will have problems decompressing files.

Recovering ClarisWorks files

This was the bulk of the rabbit hole, and if you’re running macOS 10.15, you’ve got some additional rabbit hole to crawl through because the software needed to pull the ClarisWorks drawing documents into the modern era, EazyDraw Retro (scroll down to the bottom of the page to find the download link), is 32-bit only which means it doesn’t run under 10.15, only 10.14 and earlier.

Step 1: Convert ClarisWorks files to AppleWorks 6

  1. Download the archive of QuickTime installers and install QuickTime 4.1.2, which is required to install AppleWorks 6.
  2. Download the AppleWorks 6 installer CD image (it has to be added in SheepShaver’s preferences as a CD-ROM device) and install it.
  3. Open each of the ClarisWorks documents in AppleWorks, you’ll get a prompt saying “This document was created by a previous version of AppleWorks. A copy will be created and ‘[v6.0]’ will be added to the filename”. Click OK and save the copy back onto the shared SheepShaver drive with a .cwk file extension.

Step 2: Install macOS 10.14 inside a virtual machine

This entire step can be skipped if you haven’t upgraded to macOS 10.15 yet as EazyDraw Retro can be run directly.

Installing 10.14 inside a virtual machine requires a bootable disk image of the installer, so that needs to be created first.

  1. Download DosDude1’s Mojave patcher and run it (you’ll likely need to right-click on the application and choose Open because Gatekeeper will complain that the file isn’t signed).
  2. Go into the Tools menu and choose “Download macOS Mojave” to download the installer package, save it into your Downloads folder.
  3. Open Terminal.app and create a bootable Mojave image with the following commands:
    1. hdiutil create -o ~/Downloads/Mojave -size 8g -layout SPUD -fs HFS+J -type SPARSE
    2. hdiutil attach ~/Downloads/Mojave.sparseimage -noverify -mountpoint /Volumes/install_build
    1. sudo ~/Downloads/Install\ macOS\ Mojave.app/Contents/Resources/createinstallmedia --volume /Volumes/install_build
    2. hdiutil detach /Volumes/Install\ macOS\ Mojave
    3. hdiutil convert ~/Downloads/Mojave.sparseimage -format UDTO -o ~/Downloads/Mojave\ Bootable\ Image
    4. mv ~/Downloads/Mojave\ Bootable\ Image.cdr ~/Downloads/Mojave\ Bootable\ Image.iso

Once you’ve got the disk image, fire up your favoured virtual machine software and install Mojave in it.

Step 3: Convert AppleWorks 6 files to a modern format

The final part to this whole saga is the software EazyDraw Retro which can be downloaded from their Support page. It has to be the Retro version because the current one doesn’t support opening AppleWorks documents (I’m guessing whatever library they’re using internally for this is 32-bit-only and can’t be updated to run on Catalina or newer OSes going forwards, so they dropped it in new versions of the software). It can export to a variety of formats, and has its own .eazydraw format that the non-Retro version can open.

Unfortunately EazyDraw isn’t free, but you can get a temporary nine-month license for US$20 (or pay full price for a non-expiring license if you’re going to be using it for anything else except this). It did work an absolute treat though, it was able to import every one of my converted AppleWorks 6 documents and I saved them all out as PDFs. There were a few minor tweaks required to some of the text boxes because the fonts were different between the original ClarisWorks document and the AppleWorks one and there were some overlaps between text and lines, but that was noticeable as soon as I’d opened them in AppleWorks and wasn’t the fault of EazyDraw’s conversions.

Converting Aldus SuperPaint files

There were only two of my illustration files that were done in anything but ClarisWorks, and they were from Aldus SuperPaint. Version 3.5 is available from Macintosh Repository and pleasingly it’s able to export straight to TIFF so I could convert them under current macOS from that straight to PNG. There were some minor tweaks required there as well, but it was otherwise quite straightforward.

Converting Microsoft Word files

All my non-illustration text documents were written with Microsoft Word 5.1 or 6, but the format they use is old enough that Pages under current macOS doesn’t recognise it. I wouldn’t be surprised if the current Word from Office 365 could open them, but I don’t have it so I went the route of downloading Word 6 from Macintosh Repository which can export directly out to RTF. TextEdit under macOS opens them fine and from there I saved them out as PDF.

History preserved!

Following the convoluted process above, I was able to convert all my old files to PDF and have chucked them into the Docker image at archive.virtualwolf.org as well (start at the What, even more rubbish? section), so you can marvel at my terrible fan fiction world-building skills!

I’m not deluding myself into thinking that this is any sort of valuable historical record, but it’s my record and as with the websites, it’s fun to look back on the things I’ve done from the past.

Ten years of Atlassian

Today marks ten years to the day that I started at Atlassian! I blogged LiveJournaled at the end of the first week back in 2010 but looking back on it, it didn’t quite capture the brain-dribbling-out-my-ears aspect of when I started. Jira was — and still is, really — a complicated beast, and attempting to wrap my head around how all the different schemes interrelate was something else, especially when everything was called a <something> scheme!

I started doing support for Jira Studio at the beginning of 2011 — where we would host the products ourselves versus what I was doing when I first started, supporting Jira Server which is running on the customer’s own hardware—, was promoted to senior support engineer in 2014, and then left the customer support wing of the company entirely nearly three years ago and started doing support for our internal PaaS (platform as as service)!

I’m still in that same “Shield” role, still doing a good amount of coding on the side, and have been rewriting vast swathes of our internal documentation which has been received extremely positively. (We have very clever developers at work, but writing clear and end-user-focused documentation is not their strong suit. 😛) The coding has been primarily on the internal tool I mentioned in this post — except we’re now using Slack instead of Stride — and there’s been an increasing number of teams adopting it internally, and I’m actually getting feature requests!

Granted I’ve worked at exactly three companies in my entire career, but I honestly can’t imagine being anywhere else. Here’s to another ten years!

HomePod, Docker on Raspberry Pi, and writing Homebridge plugins

Apple announced the HomePod “smart speaker” in 2017, and started shipping them in early 2018. I had zero interest the smart speaker side of things — I’d never have Google or Amazon’s voice assistants listening to everything I say, and despite trusting Apple a lot more with privacy compared to those two companies, the same goes for Siri — but the praise for the sound quality definitely piqued my interest, especially having set up shairplay-sync on the Raspberry Pi as an AirPlay target and enjoying the ease of streaming music to a good set of speakers. For AU$499 though, I wasn’t going to bother as the setup for the stereo system in our home office did a reasonable enough job. It consisted of an amplifier that was sitting next to my desk, going into an audio switchbox that sat next to my computer and could be switched between the headphone cable attached to my computer, and one that snaked across the floor to the other side to Kristina’s desk so she could plug into it, with the speakers were sitting on the bookshelves on opposite sides of the room (you can see how it looked in this post, the speakers are the black boxes visible on the bottom shelves closest to our desks).

Fast-forward to last week, and someone mentioned that JB Hi-Fi were having a big sale on the HomePod and it was only AU$299! The space behind my desk was already a rat’s nest of cables, and with the standing desk I’ve ordered from IKEA I was wanting to reduce the number of cables in use, and being able to get rid of a bunch of them and replace it with a HomePod, I decided to get in on it (it’s possible to turn the “Listen for ‘Hey Siri'” functionality off entirely).

It arrived on Tuesday, and to say I’m impressed with the sound quality is a bit of an understatement, especially given how diminutive it is. It has no trouble filling the whole room with sound, the highs are crystal clear, and if the song is bassy enough you can feel it through the floor! It shows up just as another AirPlay target so it’s super-easy to play music to it from my phone or computer. I took a photo of our new setup and you can see the HomePod sitting on the half-height bookshelf right at the bottom-left of the frame (the severe distortion is because I took the photo on our 5D4 with the 8-15mm Fisheye I borrowed from a friend, which requires turning lens corrections on to avoid having bizarrely-curved vertical lines, which in turn distorts the edges of the image quite a bit).

The setup and configuration of the HomePod is done via Apple’s Home app, which uses a framework called HomeKit to do all sorts of home automation stuff, and the HomePod is one of the devices that can work as the primary “hub” for HomeKit. I have no interest in home automation as such, but a selling point of the HomeKit is that’s a lot more secure than random other automation platforms, and one of the things it supports is temperature sensors. Someone wrote a Node.js application called Homebridge that lets you run third-party plugins and even write your own ones to appear and interact with in HomeKit, so I decided I’d see if I could hook up the temperature sensors that are attached to the Raspberry Pi(s)!

I’d ordered a 4GB Raspberry Pi 4B last month because I wanted to have a bit more grunt than the existing Pi 3B — which only has 1GB RAM — and to start using Docker with it, and it arrived on the 1st of this month. With that up and running inside in place of my original Raspberry Pi 3B, I moved the Pi 3B and the outside temperature sensor much further outside and attached it to our back room that’s in the backyard, because the previous position of the sensor underneath the pergola and next to the bricks of the house meant that in summer the outdoor temperatures would register hotter than the actual air temperature, and because the bricks absorb heat throughout the day, the temperatures remain higher for longer too.

Installing and configuring Homebridge

Next step was to set up Homebridge, which I did by way of the oznu/docker-homebridge image, which in turn meant getting Docker — and learning about Docker Compose and how handy it is, and thus installing it too! — installed first:

  1. Install Docker — curl -sSL https://get.docker.com | sh
  2. Install Docker Compose — sudo apt-get install docker-compose
  3. Grab the latest docker-homebridge image for Raspberry Pi — sudo docker pull oznu/homebridge:raspberry-pi
  4. Create a location for your Homebridge configuration to be stored — mkdir -p ~/homebridge/config

Lastly, write yourself a docker-compose.yml file inside ~/homebridge

version: '2'
services:
  homebridge:
    image: oznu/homebridge:raspberry-pi
    restart: always
    network_mode: host
    volumes:
      - ./config:/homebridge
    environment:
      - PGID=1000
      - PUID=1000
      - HOMEBRIDGE_CONFIG_UI=1
      - HOMEBRIDGE_CONFIG_UI_PORT=8080

Then bring the Homebridge container up by running sudo docker-compose up --detach from ~/homebridge. The UI is accessible at http://<address-of-your-pi>:8080 and logs can be viewed with sudo docker-compose logs -f.

The last step in getting Homebridge recognised from within the Home app is iOS is to open the Home app, tap the plus icon in the top-right and choose “Add accessory”, then scan the QR code that the Homebridge UI displays.

Writing your own Homebridge plugins

Having Homebridge recognised within the Home app isn’t very useful without plugins, and there was a lot of trial and error involved here because I was writing my own custom plugin rather than just installing one that’s been published to NPM, and I didn’t find any single “This is a tutorial on how to write your own plugin” pages.

Everything is configured inside ~/homebridge/config, which I’ll refer to as $CONFIG from now on.

Firstly, register your custom plugin so Homebridge knows about it by editing $CONFIG/package.json and editing the dependencies section to add your plugin. It has to be named homebridge-<something> to be picked up at all, I called mine homebridge-wolfhaus-temperature and so my $CONFIG/package.json looks like this:

{
  "private": true,
  "description": "This file keeps track of which plugins should be installed.",
  "dependencies": {
    "homebridge-dummy": "^0.4.0",
    "homebridge-wolfhaus-temperature": "*"
  }
}

The actual code for the plugin needs to go into $CONFIG/node_modules/homebridge-<your-plugin-name>/, which itself is a Node.js package, which also needs its own package.json file located at $CONFIG/node_modules/homebridge-<your-plugin-name>/package.json. You can generate a skeleton one with npm init — assuming you have Node.js installed, if not, grab nvm and install it — but the key parts needed for a plugin to be recognised by Homebridge is adding the keywords and engine sections into your package.json:

{
  "name": "homebridge-wolfhaus-temperature",
  "version": "0.0.1",
  "main": "index.js",
  "keywords": [
    "homebridge-plugin"
  ],
  "engines": {
    "homebridge": ">=0.4.53"
  }
}

index.js is your actual plugin code that will be run when Homebridge calls it.

Once I got this out of the way, the last bit was a LOT of trial and error to actually get the plugin working with Homebridge and the Home app on my iPhone. The main sources of reference were these:

After several hours work, I had not the nicest code but working code (Update 2020-04-12 — moved to ES6 classes and it’s much cleaner), and I’ve uploaded it to GitHub.

The final bit of the puzzle is telling Homebridge about the accessories, which are the things that actually show inside the Home app on iOS. For this, you need to edit $CONFIG/config.json and edit the accessories section to include your new accessories, which will use the plugin that was just written:

{
    "bridge": {
        "name": "Traverse",
        [...]
    },
    "accessories": [
        {
            "accessory": "WolfhausTemperature",
            "name": "Outdoor Temperature",
            "url": "http://pi:3000/rest/outdoor"
        },
        {
            "accessory": "WolfhausTemperature",
            "name": "Indoor Temperature",
            "url": "http://fourbee:3000/rest/indoor"
        }
    ],
    "platforms": []
}

The url is the REST endpoint that my pi-sensor-reader runs for the indoor and outdoor sensors, and the name needs to be unique per accessory.

Homebridge needs restarting after all these changes, but once you’re done, you’ll have two new accessories showing in Home!

They initially appear in the “Default Room”, you can add an “Indoor” and “Outdoor” room to put them into by tapping on the Rooms icon in the bottom bar, then tapping the hamburger menu at the top-left, choosing Room Settings > Add Room, then long-pressing on the temperature accessory itself and tapping the settings cog at the bottom-right and selecting a different room for it to go into.

What’s next?

As part of doing all this, I moved all of my public Git repositories over to GitHub where they’re more likely to be actually seen by anybody and will hopefully help someone! I also updated my pi-sensor-reader to use docker-compose, and fully-updated the README to document all the various options.

Next on the Homebridge front is going to be tidying up the plugin code — including moving to async/await — and adding the humidity data to it!

A very DIY weekend

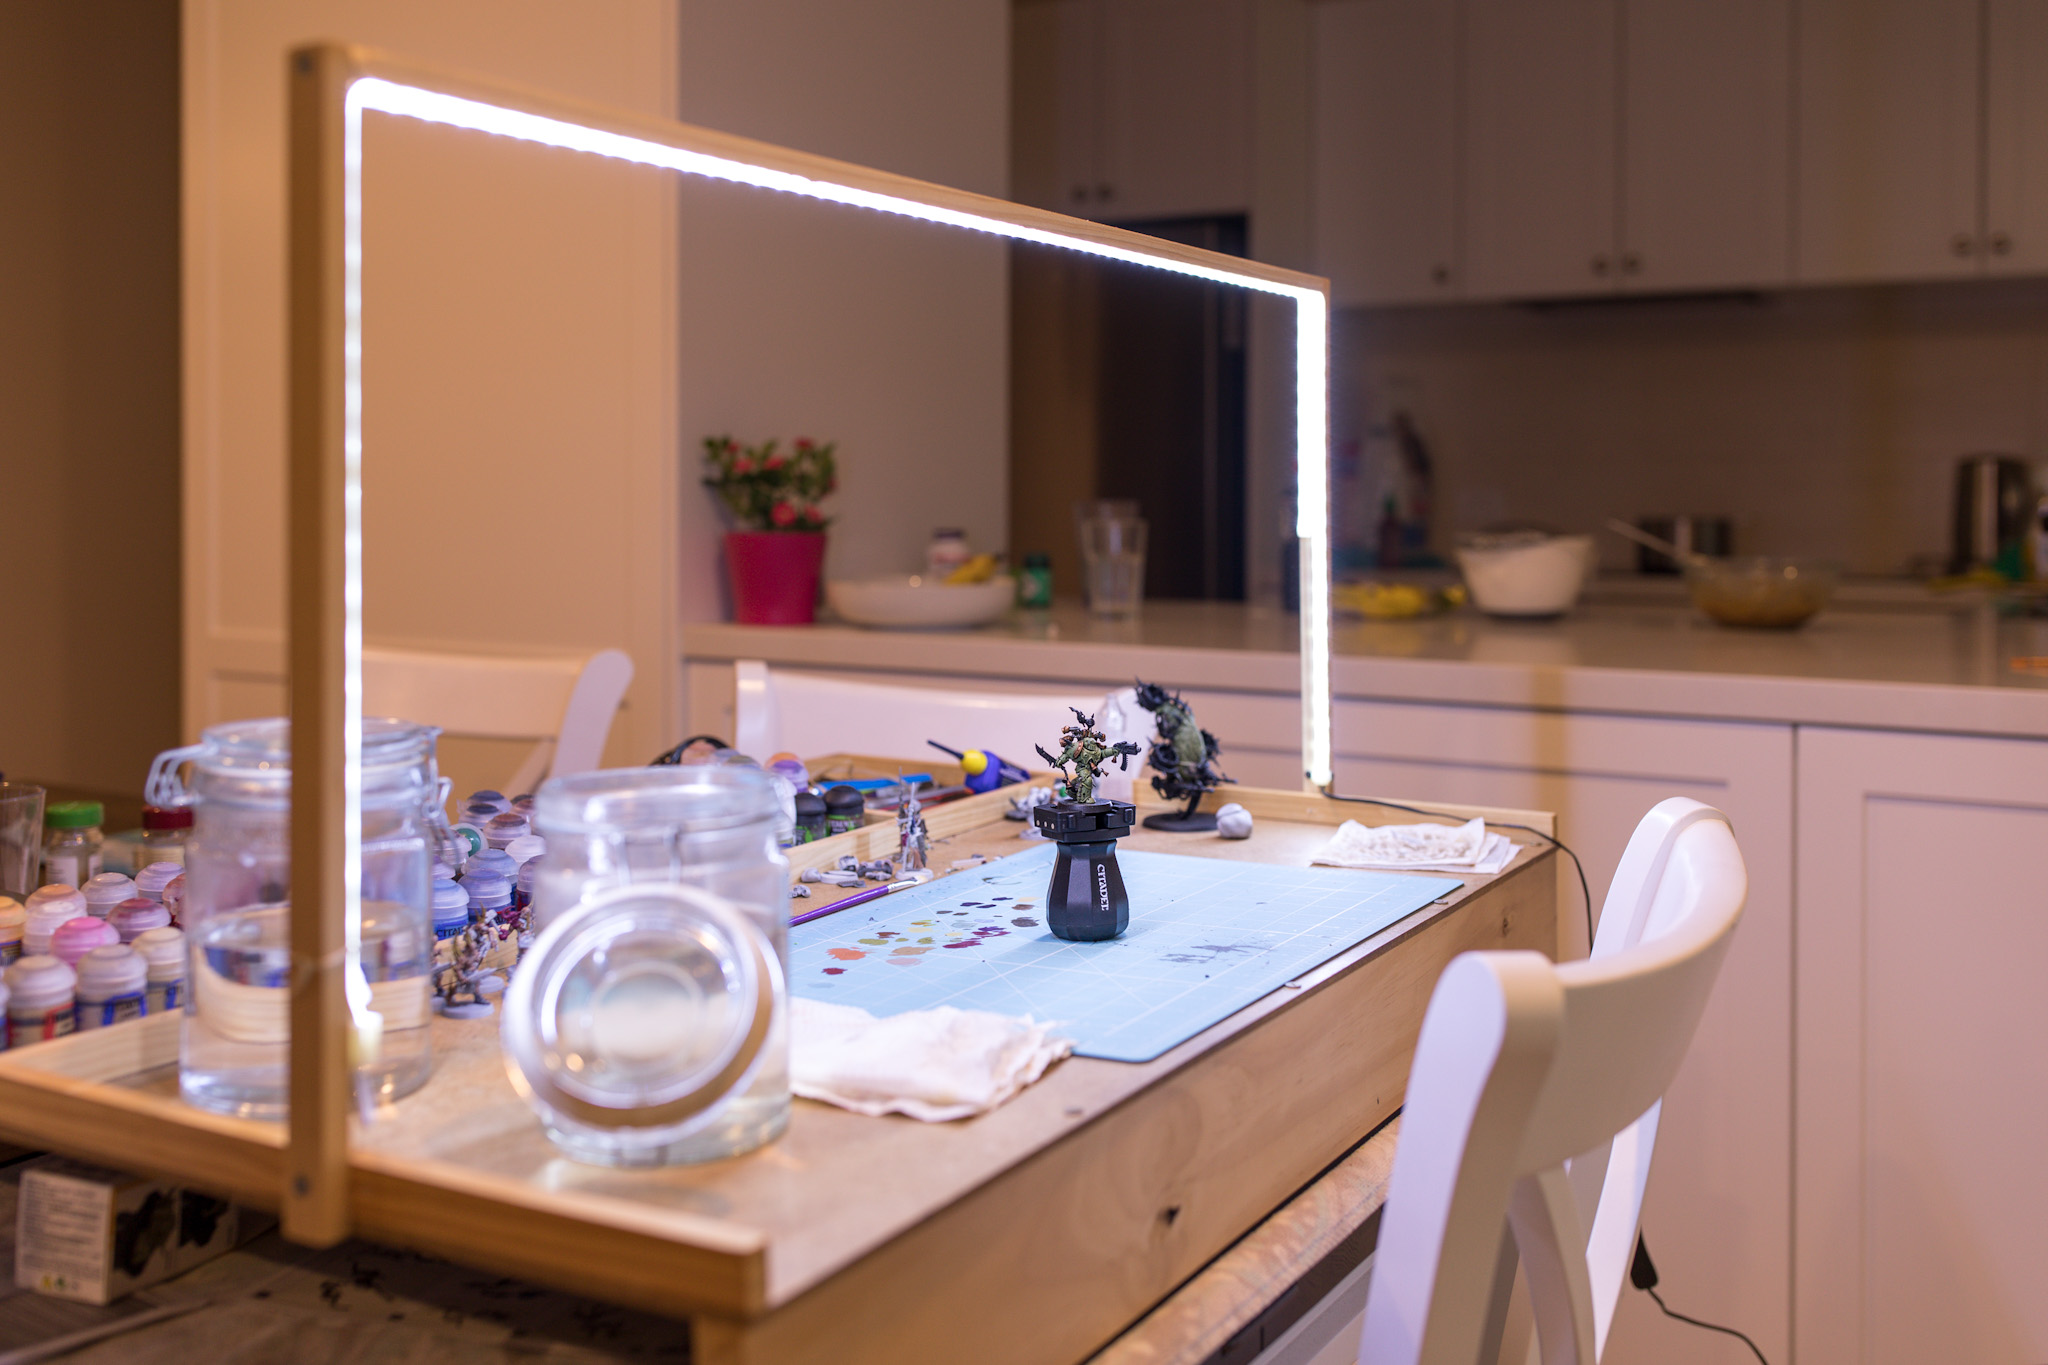
All this coronavirus business has meant that we’ve been doing a lot of not going anywhere for the past couple of weeks. Both Kristina and I are lucky enough to be able to work our regular jobs entirely from home which is fantastic, and the lack of commuting means that we’ve got lots more time in our days. I finally got around to putting together the Tau and Space Marines that come in the Kill Team box set I got back in September, and have started painting them. I’d noticed when I was painting the ungors from the Beastgrave box that the new arch lighting on my painting table still wasn’t quite sufficient, and with the additional painting I’m doing, decided I should get around to doing something about it.

All of my miniature stuff lives in the back room and I’ll bring it inside as necessary, and yesterday started with me being annoyed that the door handle on the outside of the room was nearly falling off because the holes that the screws go into were worn out and the screws didn’t actually hold anything in (and also that to lock the deadbolt you had to lift the door slightly because it’s out of alignment with the hole). I drilled out the holes in the actual metal door handle itself to fit newer and larger screws in, and also filed down the plate that the deadbolt goes into so the door doesn’t need lifting anymore when you lock it, so now the door is like a normal door and you don’t have to fight with it when locking and unlocking it.

Also yesterday, Kristina decided to trim the horrible trees that we have growing in the narrow garden bed next to the pergola, and I decided to follow suit by pulling out all the weeds and grasses that’d grown there and generally trying to make it tidier. We were going to get mulch from Bunnings to prevent the weeds from getting a foothold and generally to improve how the garden bed looks, but I got carried away and also ended up removing all the dead leaves that were sitting against the bottom of the back room walls, and so was totally exhausted. Today we did hit up Bunnings, and while we were there I figured I’d do something about the lighting for my painting table so I also picked up some more wood for the arch, plus another set of strip lights and a power board, as well as a circular saw because I’m sick of manually hacking at pieces of wood when I’m chopping them!

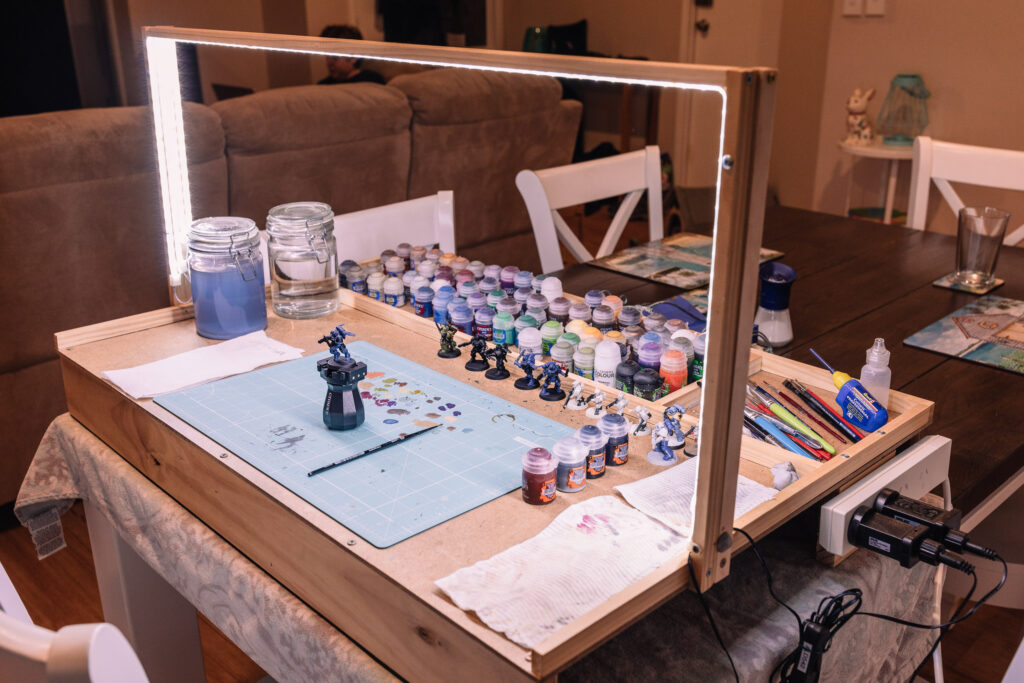
I’ve not used a circular saw before, it’s delightfully fast to chop the wood of course but it was a little tricky because the pieces of wood I use for the arch on my table are quite narrow and it’s difficult to work out specifically where the blade is going to be cutting; I’m sure some more practice will help. I also attached another piece of wood to the side of it so I could mount the power board there and have both the strip lights plugged into that, and just turn it on and off at the wall.

Behold!

A photo of a DIY wooden "table" sitting on a dining table, with a square arch over the top of it with LED strip lights all along the inner surface of it. There's lots of Games Workshop paint pots and miniatures on it.

I also generally tightened everything up and attached the two arches together so they’d stop being knocked forwards if I bumped into them. It’s very much even brighter than before, so much so that the ceiling light above the dining table doesn’t really bring anything to the party anymore — previously I’d found that I was still needing to use it if I didn’t have the miniature I was painting totally centred under the arch.

Reducing our power usage: Powershop, heat pump hot water, and solar panels

Ever since we moved into our house almost seven years ago now we’d been slowly making the place more energy efficient and reducing our power usage. First were double-glazed windows, then a new roof, then replacing all the light globes with LED ones, and slowly but surely replacing our various appliances with newer ones (the fridge was replaced shortly after we had our kitchen redone and used over a third less power than the old one, we got a dryer as well that uses a heap less power than trying to dry things in the combination washer/dryer, and a new air conditioner just before summer of 2018 to replace the ancient and increasingly-creaky one). Despite power bills going up at a fairly absurd rate over the past decade, we actually didn’t see much of an increase at all thanks to us being able to steadily use less power over time.

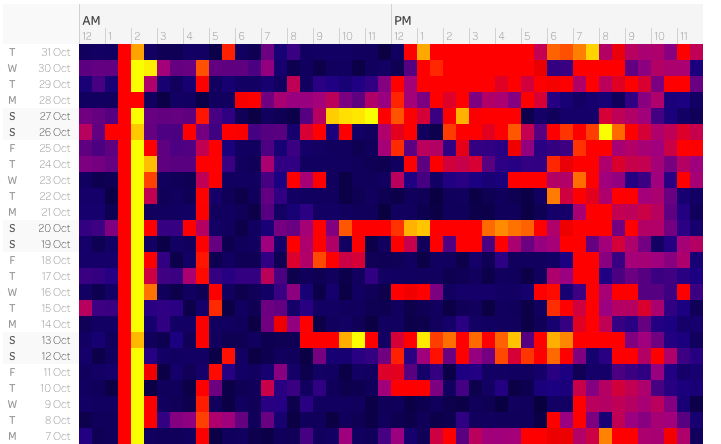
There’s an electricity company called Powershop that a few people at work use and are very happy with, and all their power is 100% carbon offset. We switched over to them in mid-September last year, and got our power meter upgraded — for free — to a smart meter in early October. The data from the meter is really fascinating, you can view it right on Powershop’s site and they give you a heat map of half-hour blocks throughout the whole day where you can see specifically when and how much power you’re using. A snapshot from part of October looked like this:

Brighter means more power being used, darker means less. You can clearly see the weekends during the day when we had the air conditioning on, and that much brighter section around 1:30-2:00am every night is the hot water system coming on. It was using 3-4 kilowatt-hours of power each and every night, and even though it’s on the off-peak pricing and thus not costing us a heap, it’s still pretty damn inefficient. I had a close look at the system and it had a manufacturing date of 2002, so we decided it was probably time to replace it anyway. I did a bunch of research and settled on a heat pump hot water system from a company called Sanden. Heat pumps work on the same general principle as refrigerators but in the exact opposite direction, they bring in the warm ambient air from outside to heat up the water. As a result, a heat pump hot water system can use 20% of the power of a regular hot water system. We got it installed in mid-December and it looks like a regular hot water system hooked up to an air conditioning unit!

A photo of our heat pump hot water system, which is comprised of a standard-looking hot water water tank with what looks like a small air conditioning compressor next to it.

(The scale is a bit off in this photo, I had to use the ultra-wide lens in my iPhone to get all of it in the shot as I was hard up against the fence. The photo was taken from about waist height, and the water tank comes up to about shoulder height or so). One neat thing this with system is that it’s absurdly quiet, they quote only 37 decibels when it’s running.

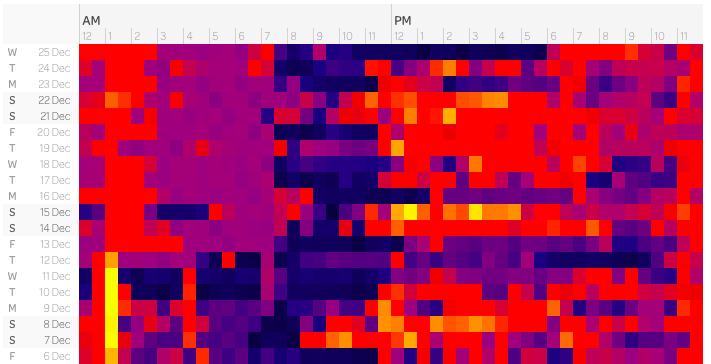
You can very clearly see the drop in power usage when after we got it installed, no more bright line! (The extended purple section in the wee hours of the morning is because that’s right when we had a spate of hot days and the air conditioner had to run more than normal overnight).

I worked out that the new system was using between 1 and 1.5kWh of power depending on what the outside temperature was (remember that it uses ambient air to heat the water, so warmer ambient air equals less power needed), which is a pretty nice improvement over the old system.

After all of this, we also decided to invest in a solar power system! There’s a fantastic website called Solar Quotes that has a ton of good info and will contact up to three installers for you to organise them to come out and give quotes. We ended up going with Penrith Solar Centre who were fantastic, and the system was installed on the 20th of last month, and it looks very handsome.

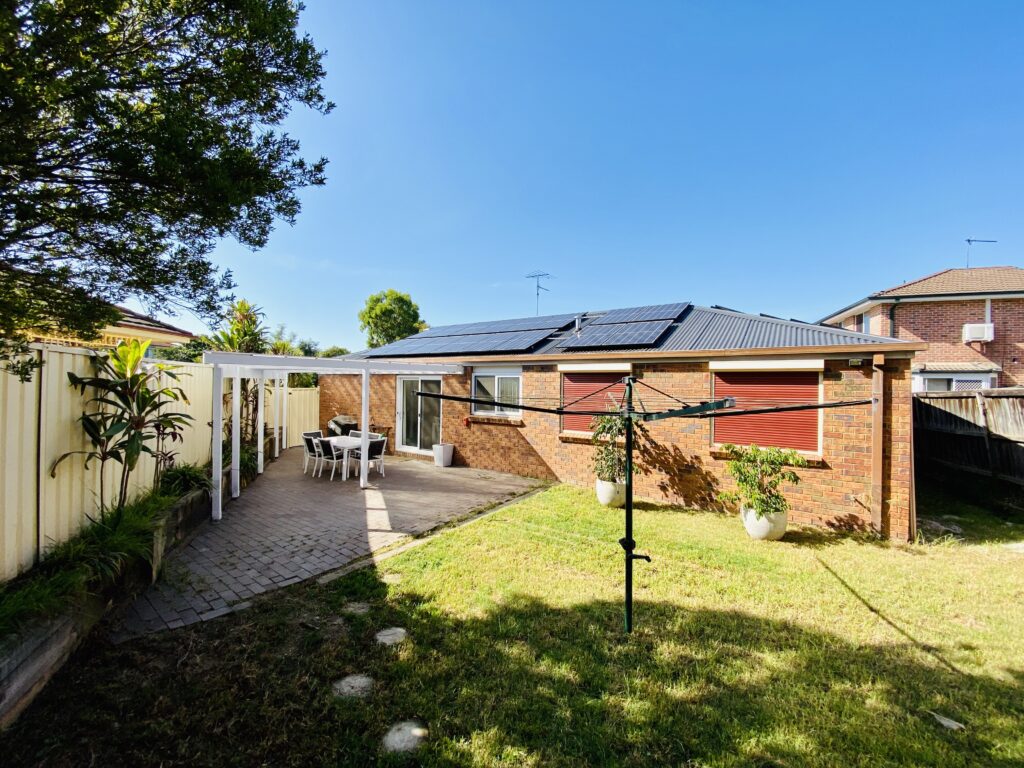
A photo of our backyard and house with solar panels on the roof.

(You can also see we also had our pergola redone too, which was a bit of a shit-show and dragged on for way longer than it should have. You can see in the photo that we had it shortened a fair chunk as it was far larger than it needed to be, so now we have significantly more space for renovating our back yard when we eventually get around to doing that).

The total solar setup is 22 Hanwha Q-Cells panels — sixteen on the north-facing expanse and six on the western side — plus Enphase IQ7+ micro-inverters, and we also get Enphase’s Envoy consumption monitoring setup so we can see in real-time how much power we’re using versus how much we’re exporting back to the grid! The monitoring includes panel-level monitoring of each individual panel so if anything goes wrong with one of them, it’s immediately obvious and the solar installers can immediately see which one needs fixing or replacing.

The Envoy system took a bit of time to be activated but even before that we were able to get a sense of how much our usage had changed via Powershop’s usage heat map. You can clearly see the day the solar was installed because all the days after that have big black sections where we were using no power from the grid at all:

The day at the top there, the 1st of March, we were doing all of the clothes washing — so using the washing machine and the dryer — as well as having the oven on for lunch, the dishwasher running, and the the air conditioner on for most of the day, and yet only used 11.46kWh for the day, compared to what would normally be more like 30-35kWh.

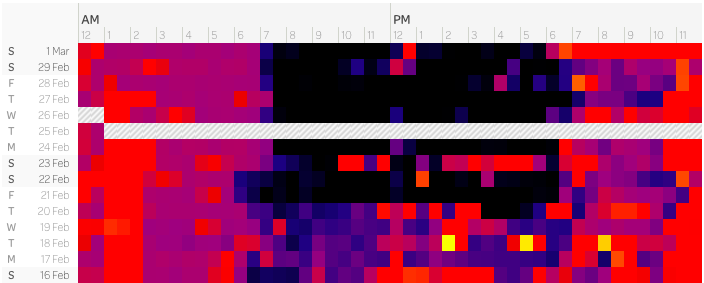
Powershop also have the inverse of the usage heat map if you have solar, which is the feed-in heat map, showing how many kilowatt-hours you’ve sent back to the grid.

The especially bright yellow blocks in the middle on the 28th are just a bit under 3kWh! You can also see on the 26th of February when the clouds came over after lunch.

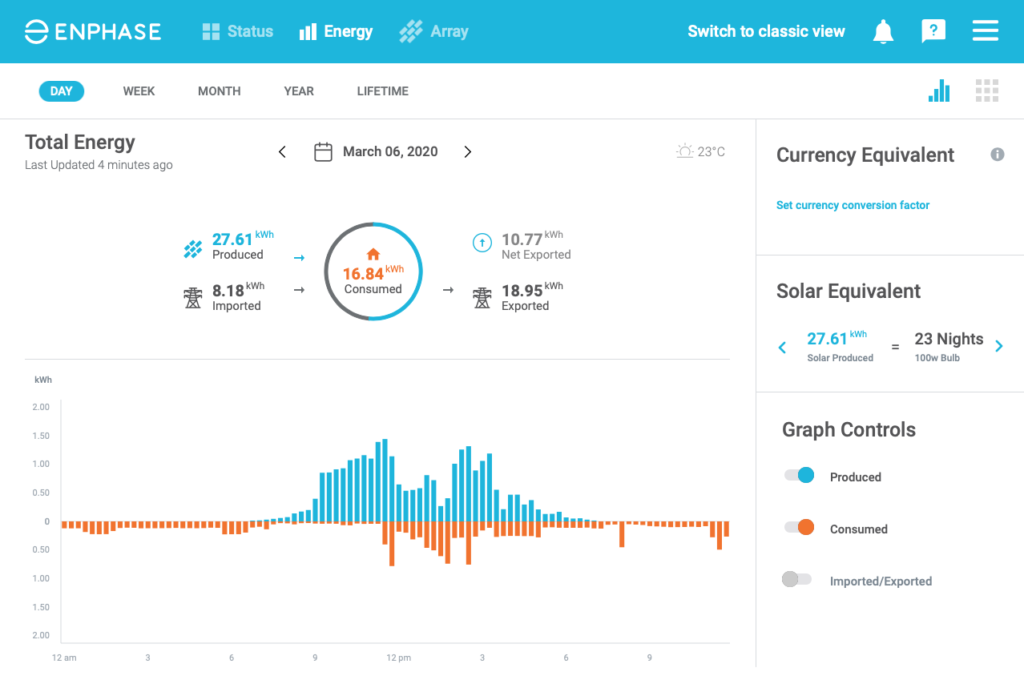
The Envoy system gives us essentially what Powershop’s heat maps do, but in real-time, and it also monitors each individual solar panel so if anything breaks with one of them or we see that it’s producing way less power, we immediately have the knowledge of which panel it is which makes Penrith Solar Centre’s job far easier if they need to come out and fix something. You also get consumption versus generation graphs in 15-minute increments as well! The blue is how much we’re producing from the solar panels and the orange is how much we’ve used. It took me a bit to work out what the circle at the top meant, but it means in total we’ve consumed 16.84kWh all up, and of that, the section of the circle is how much we consumed directly from the solar panels, whereas the grey portion is power imported from the grid.

Now that we’re generating a bunch of our own power, the other thing I wanted to do was to have our hot water run off the solar panels in the middle of the day, instead of using off-peak in the wee hours of the morning, especially since heat pump systems work best when the ambient temperature is warmer… not super useful in the middle of winter at 1am! Fortunately the Sanden system we have comes with a block-out timer so you can explicitly set when you want it to be running. I had the Penrith Solar people swap the hot water over to the regular non-off-peak meter and I configured the block-out timer so the system only comes on in the middle of the day when we’re producing power from our solar panels (and conveniently when the ambient temperature is at it highest so it needs to use even less power).

I’ll be very interested to see how this goes during winter, our power usage is generally less — we don’t use the air conditioner’s heating function because it dries everything out too much, but instead just use oil-filled radiant heaters — but from talking to people at work, the solar panels also generate only about 30% of the electricity compared to the height of summer thanks to the shorter days and lower sun.

A trip to New Zealand’s North Island (Te Ika-a-Māui)

A trip to New Zealand’s North Island (Te Ika-a-Māui)

On Monday last week we woke up at arse o’clock in the morning to catch a flight to Auckland! We’d been to Queenstown two years ago but hadn’t seen the North Island yet.

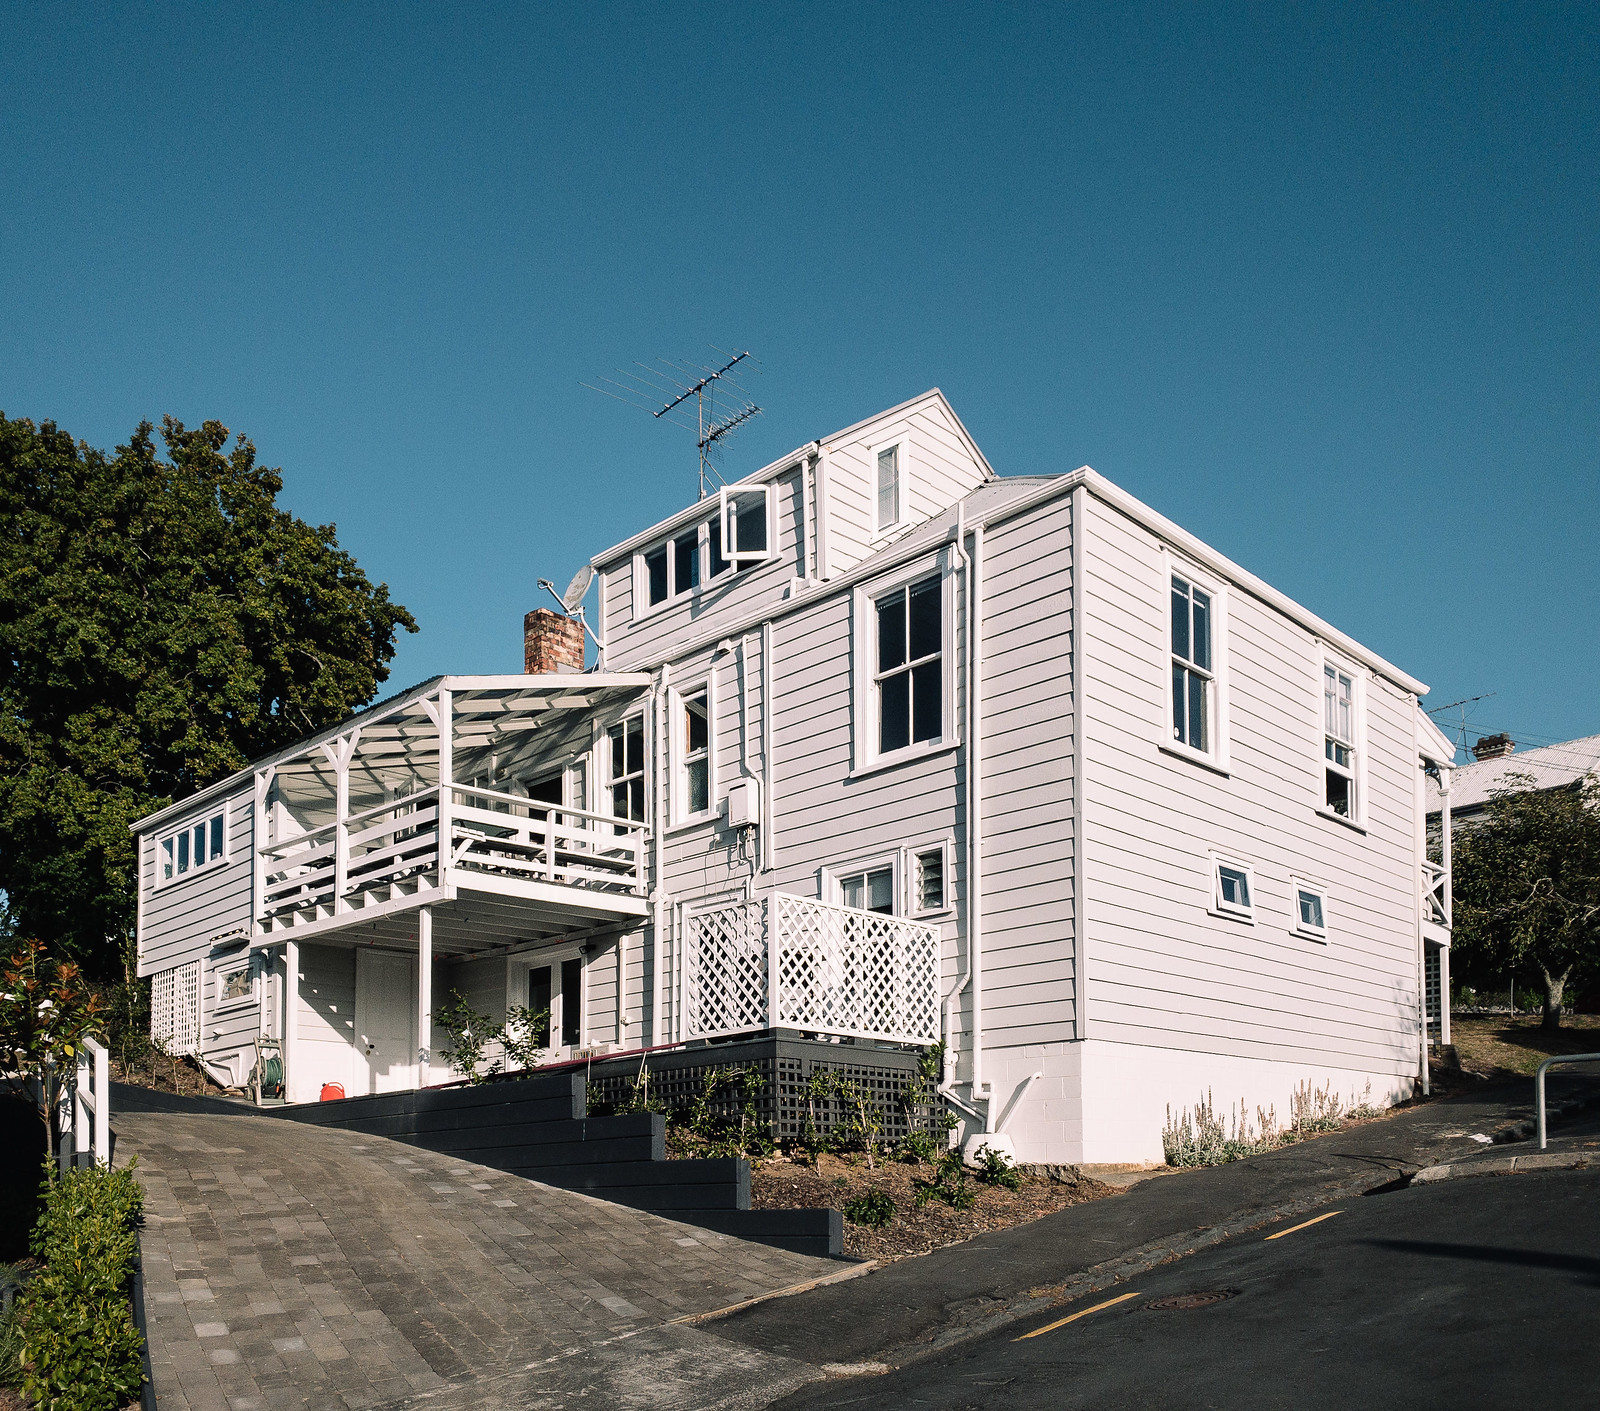
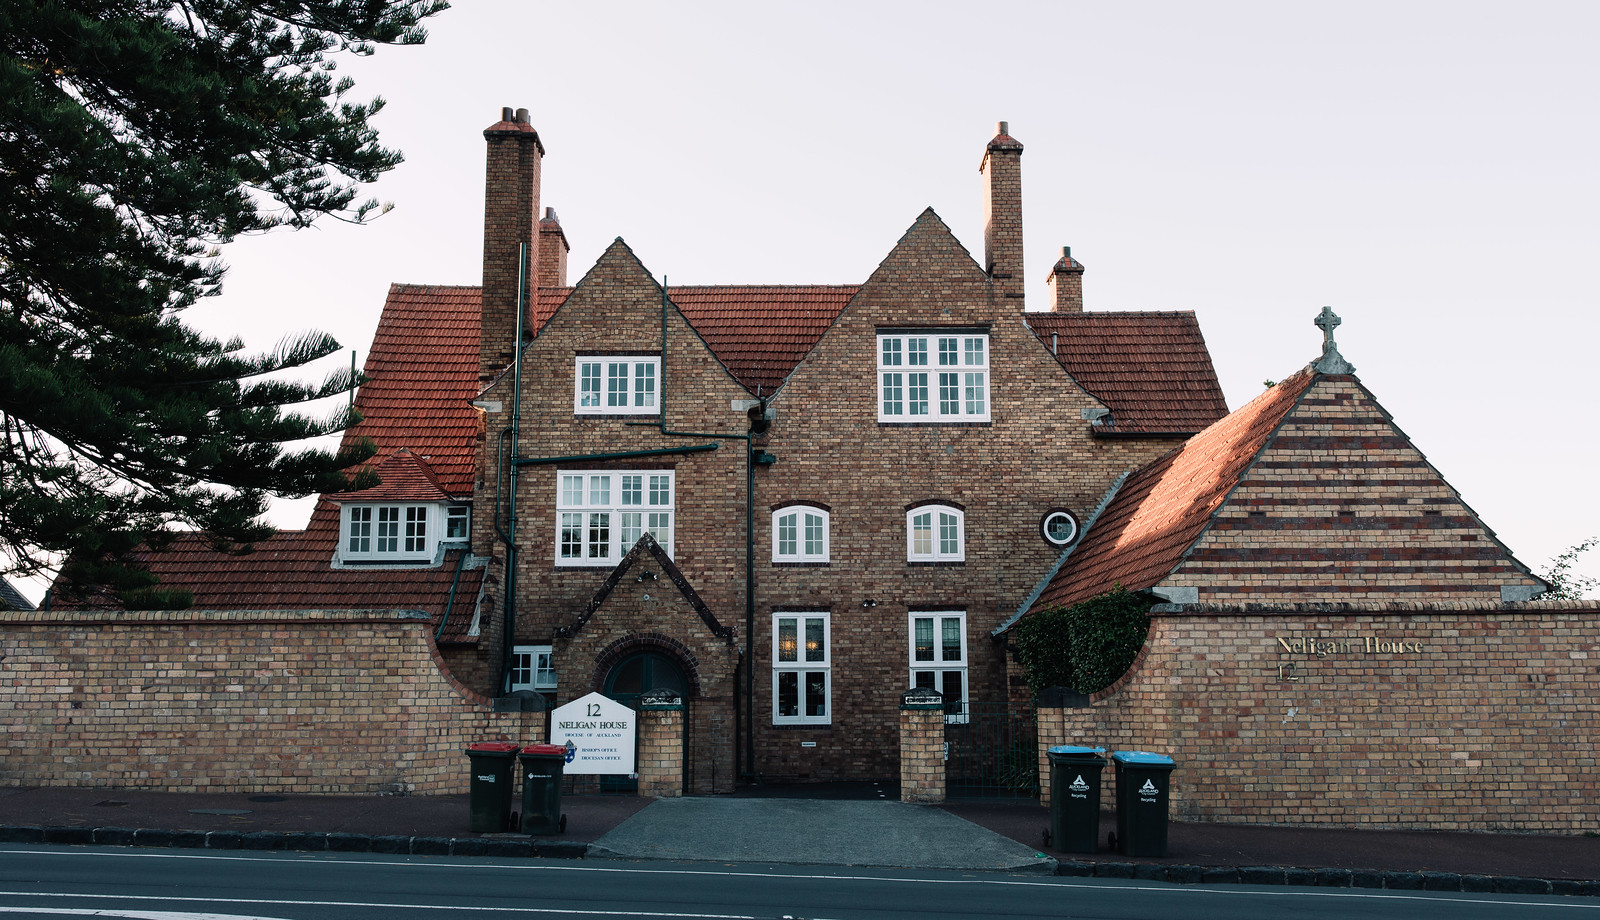
We hired a car and stayed in Parnell for the first two nights which was quite lovely (it’s also apparently one of the most expensive suburbs in New Zealand which I’d 100% believe), and the first partial day we were there just involved wandering around the neighbourhood taking some photos.

Untitled
Untitled
Holy Trinity Cathedral
Untitled
33 St Stephens Avenure

The second day we drove out to Piha to see the black sand beach which was extremely cool. I couldn’t capture it in the photos but when you look at the sand against the sun it really sparkles thanks to its volcanic origins!

Untitled
Watching
Untitled

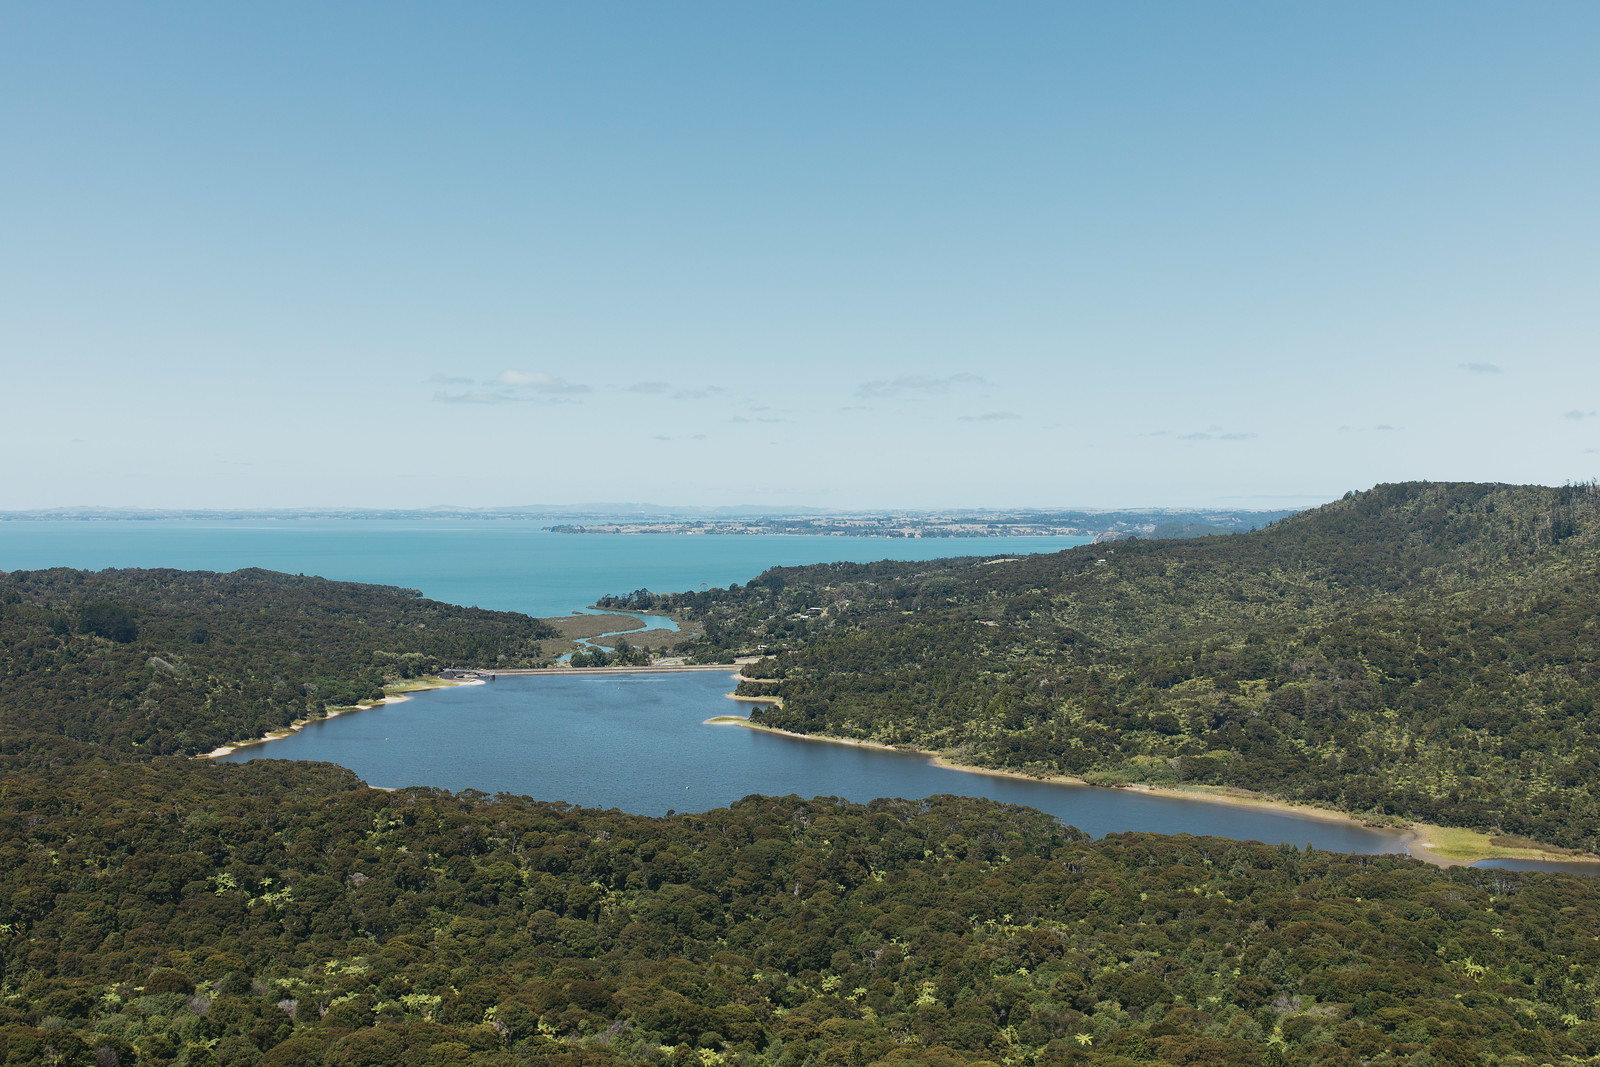
We also went to the Arataki Visitor Centre and tromped through the forest on a walking track. It was very neat but the only photos were a vista from the centre and the big totem pole there as well, because the forest itself wasn’t particularly photogenic. 😛

View from the Vistor Centre
Arataki Vistor Centre entrance

After that we walked from our AirBnB to the CBD, and quickly decided that that was a large mistake due to the sheer amount of construction going on and blocked-off streets. It made Sydney’s construction look positively pedestrian!

There’s a pizza chain in New Zealand called Sal’s that claims to do genuine New York-style pizza, so we walked to the closest one for dinner and gave it a go, and oh my god. Kristina said it’s about 95% of the quality of the actual New York-style pizza she had when she lived in New Jersey. She’d been talking about how good it was for years, and I now finally understand it!
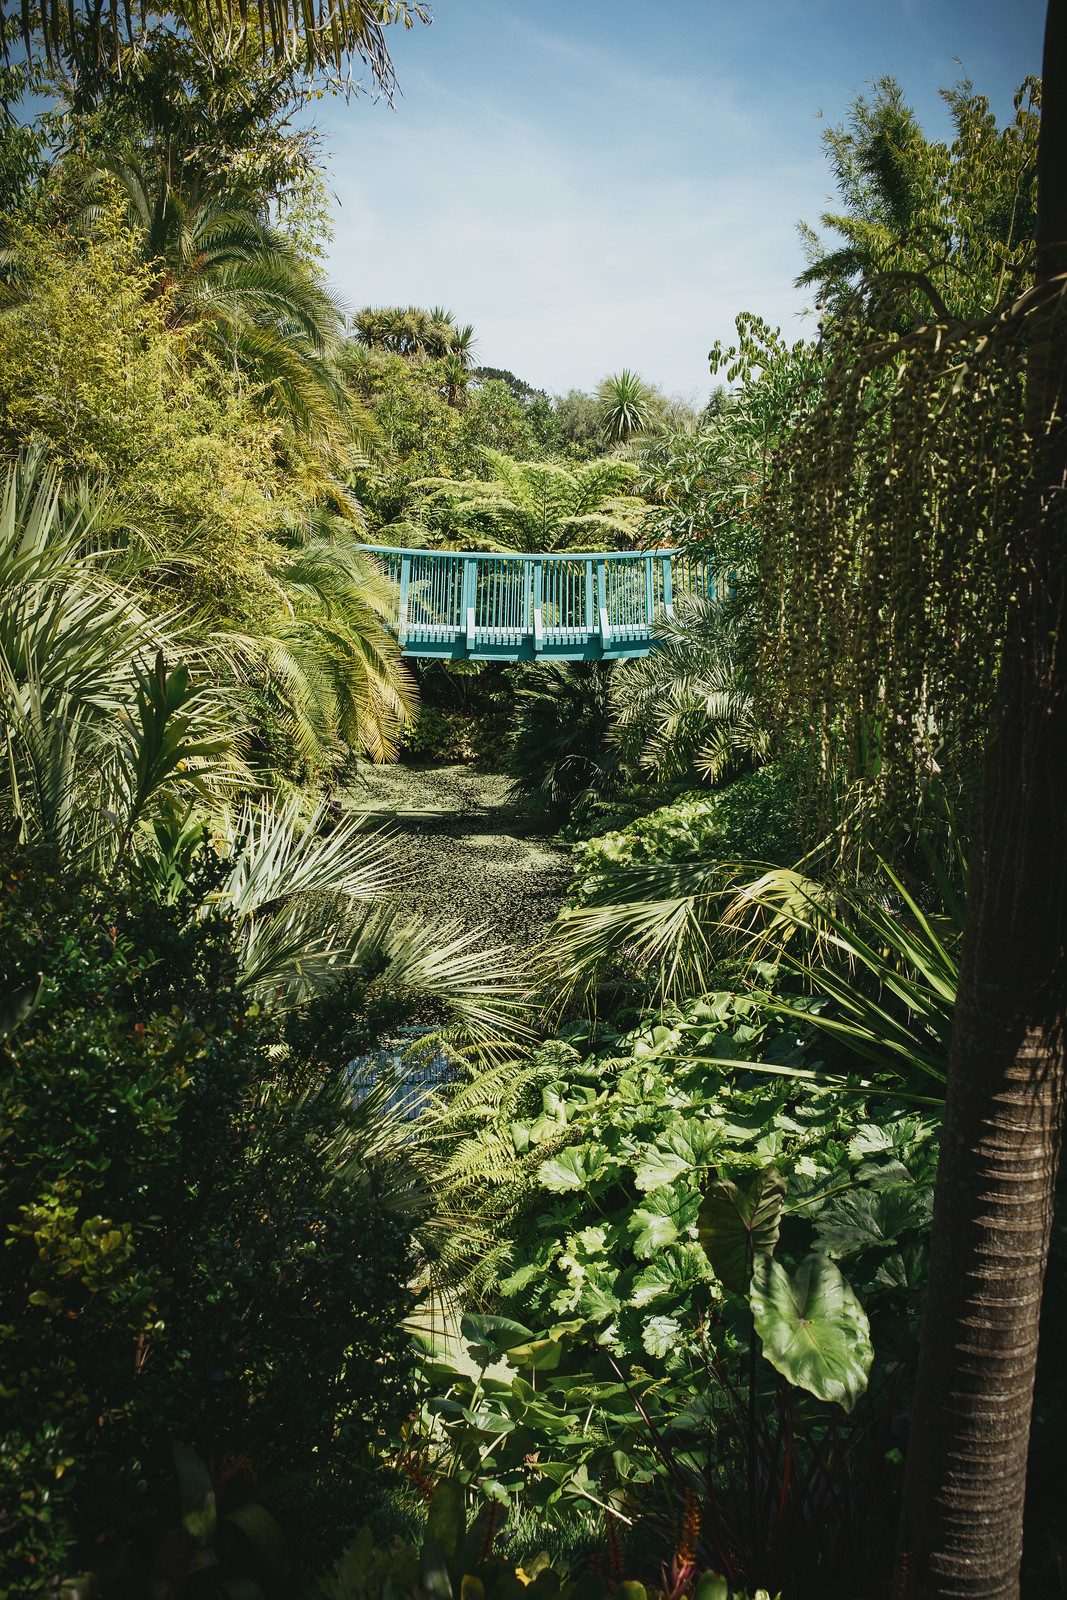
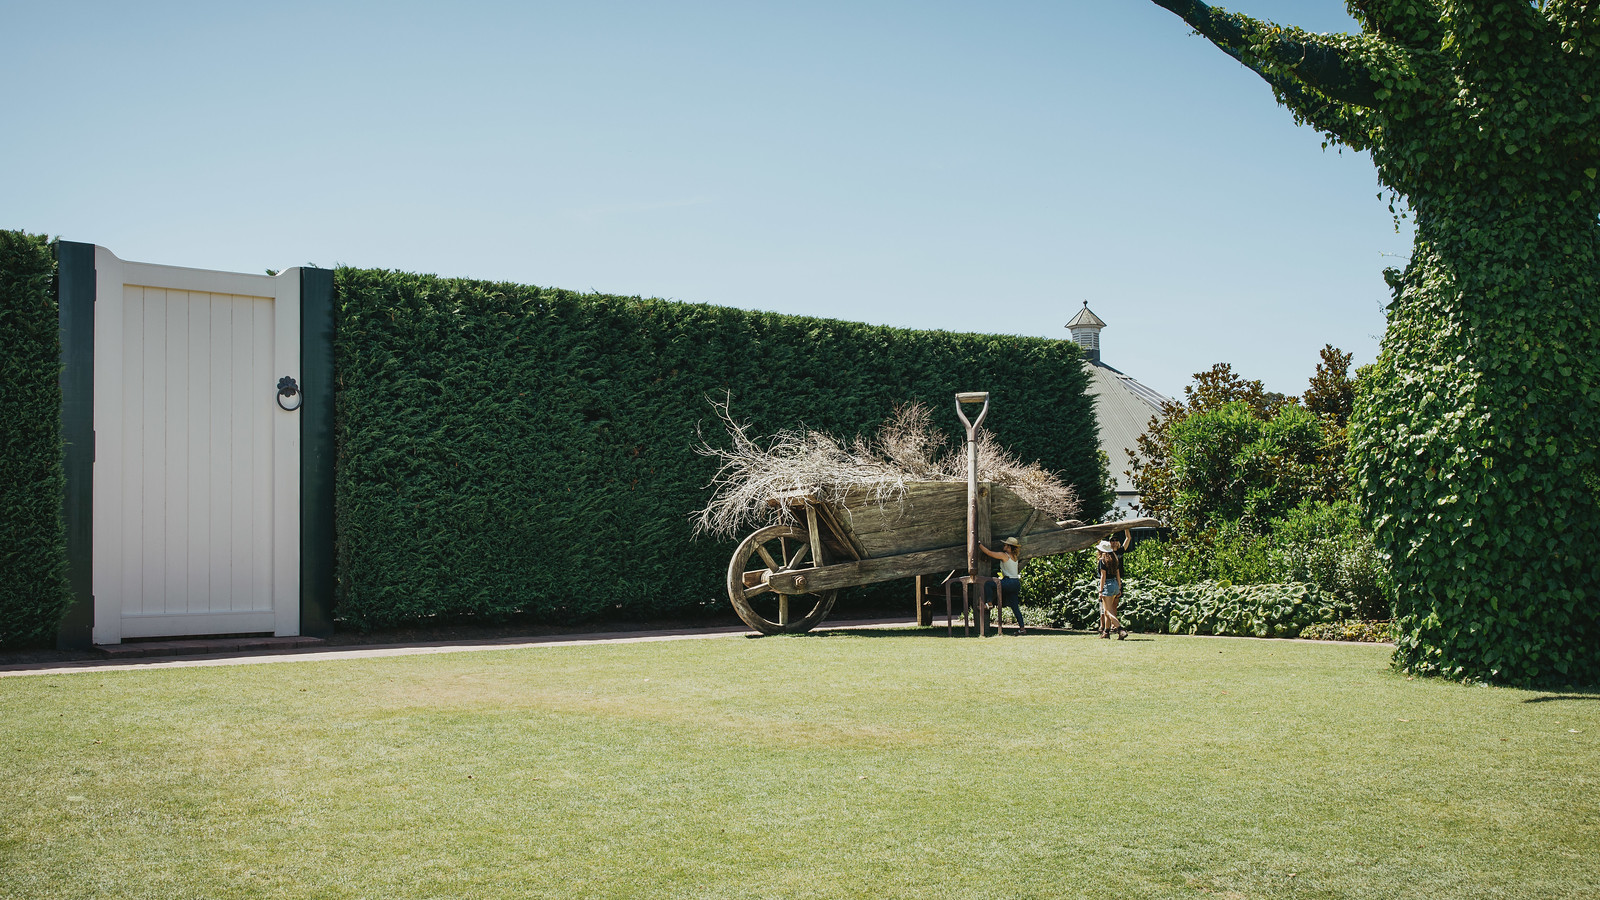
Day 3 we drove to Rotorua, which is about three and a half hours drive, so we broke up the trip by stopping in at Hamilton and visiting Hamilton Gardens which were absolutely fantastic. It’s divided up into a bunch of incredibly well-designed and well-maintained gardens from throughout history — plus some whimsical ones — and I can’t recommend it highly enough.

Indian Char Bagh Garden
Italian Renaissance Garden
Japanese Garden of Contemplation
English Flower Garden
Chinese Scholar’s Garden
Tropical Garden
Tropical Garden
Surrealist Garden
Surrealist Garden
Tudor Garden
Tudor Garden

After that we continued on through to Rotorua itself and went for a lovely walk through Whakarewarewa Forest which is a forest full of massive redwood trees, then visited some work colleagues of Kristina’s — and Colin, their miniature wire-haired dachshund — who live in Rotorua and went out for a delicious dinner at Macs Steakhouse on Rotorua’s “Eat Street”.

Looking up at the redwoods
Whakarewarewa Forest
Colin the miniature wire-haired dachshund
Eat Street in Rotorua

Unfortunately the B&B we were staying at (“Sandi’s B&B”) wasn’t good… turns out it was on a major road that has large trucks going down it extremely loudly at all hours of the night, some enough that they’d actually vibrate the bed, and it had the world’s stupidest problem where there was a pear tree that was growing over the top of the cabin we were in and the fruit was ripe enough that the pears were randomly dropping onto the roof with an extremely loud THUD. Sandi made us a full breakfast in the morning which was delicious but it didn’t make up for the ruined sleep. 😴

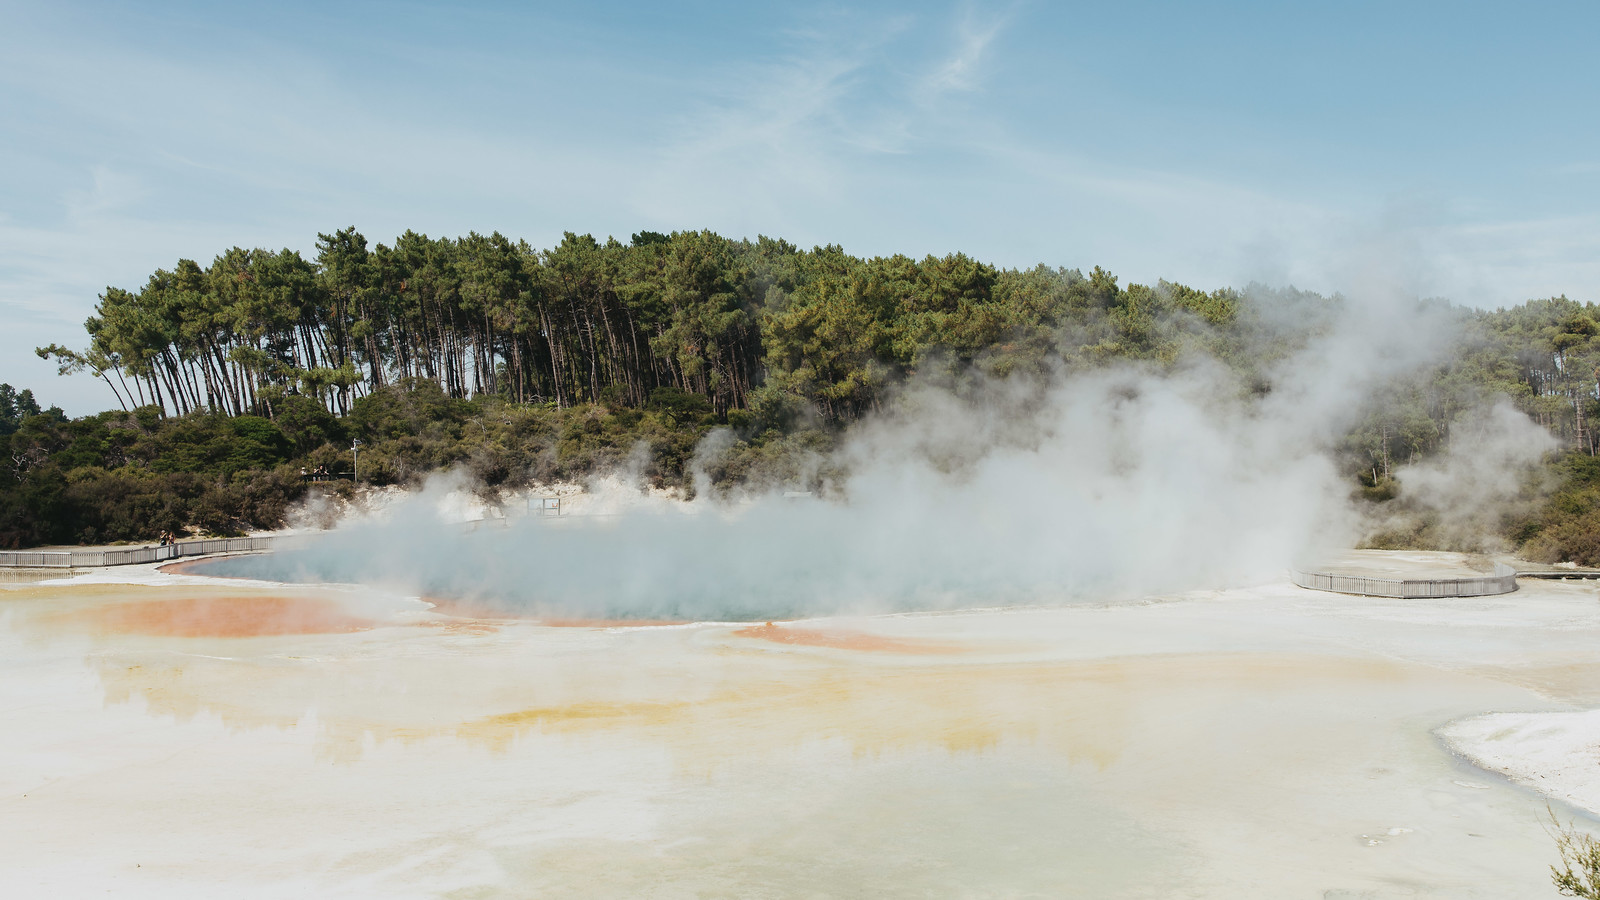
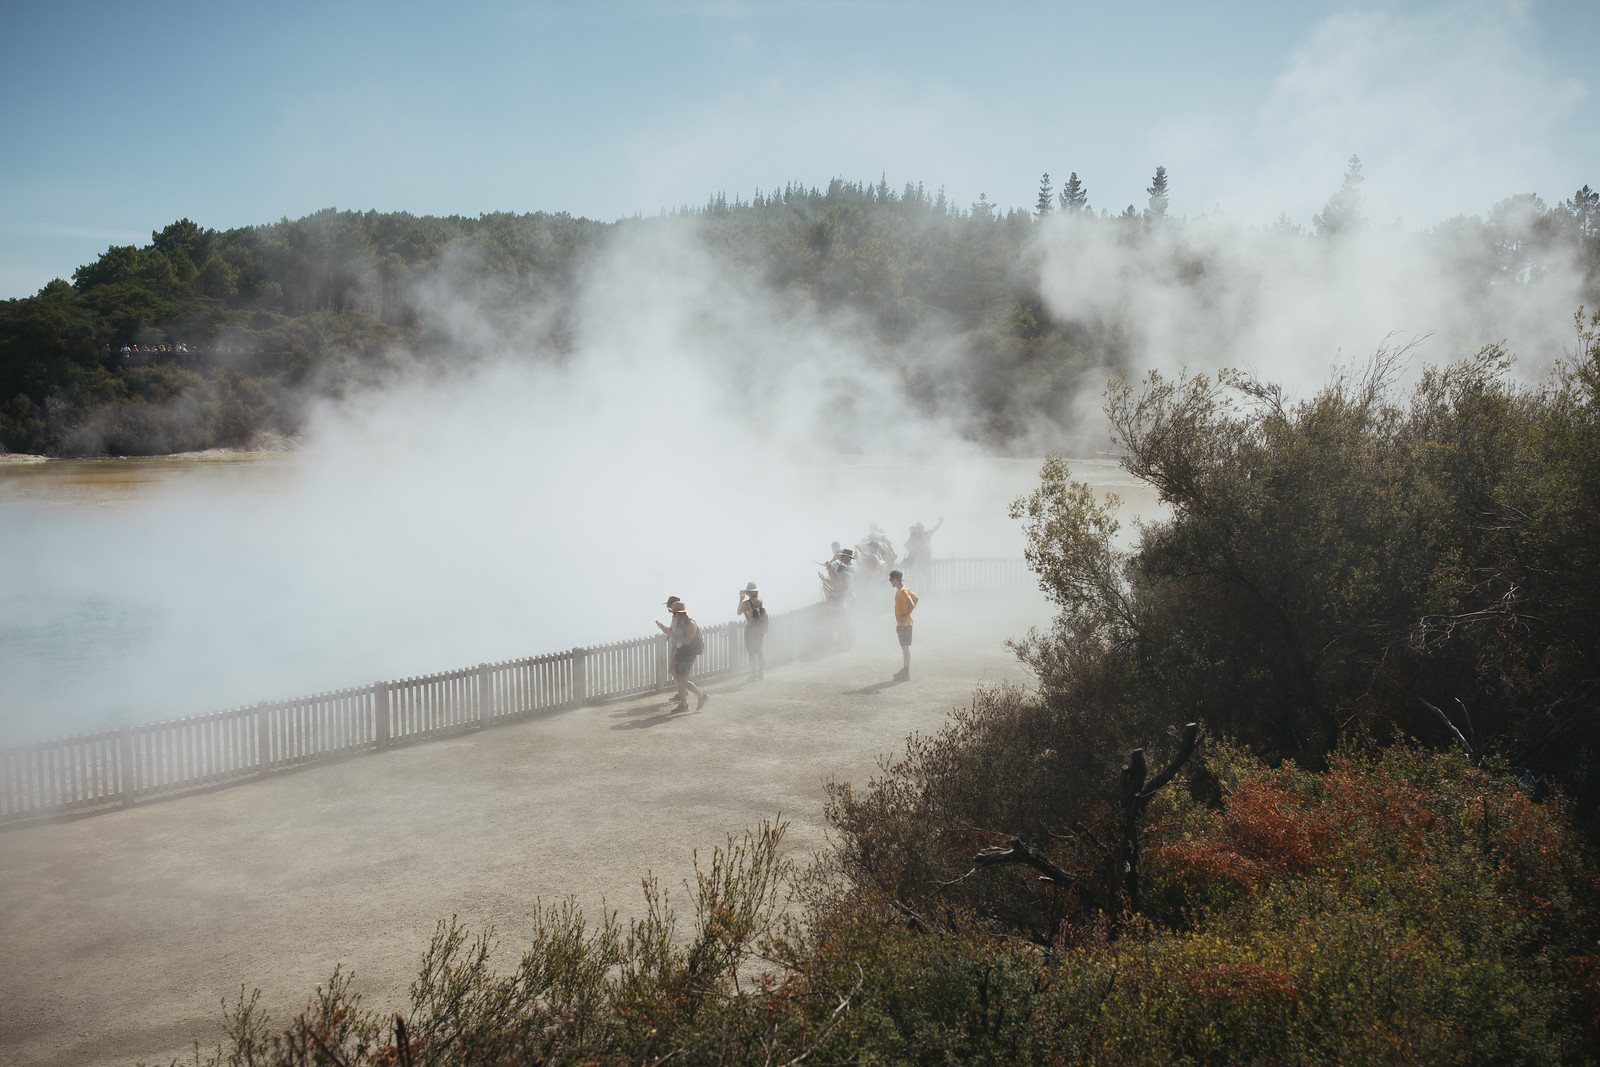
Rotorua is known for its geothermal springs so on day 4 we visited “Wai-O-Tapu Geothermal Wonderland” and it was very impressive. The sulphur smell was something else, especially since it came it with steam so it was both humid and smelly!

Untitled
Champagne Pool
Untitled
Untitled
Lake Ngakoro

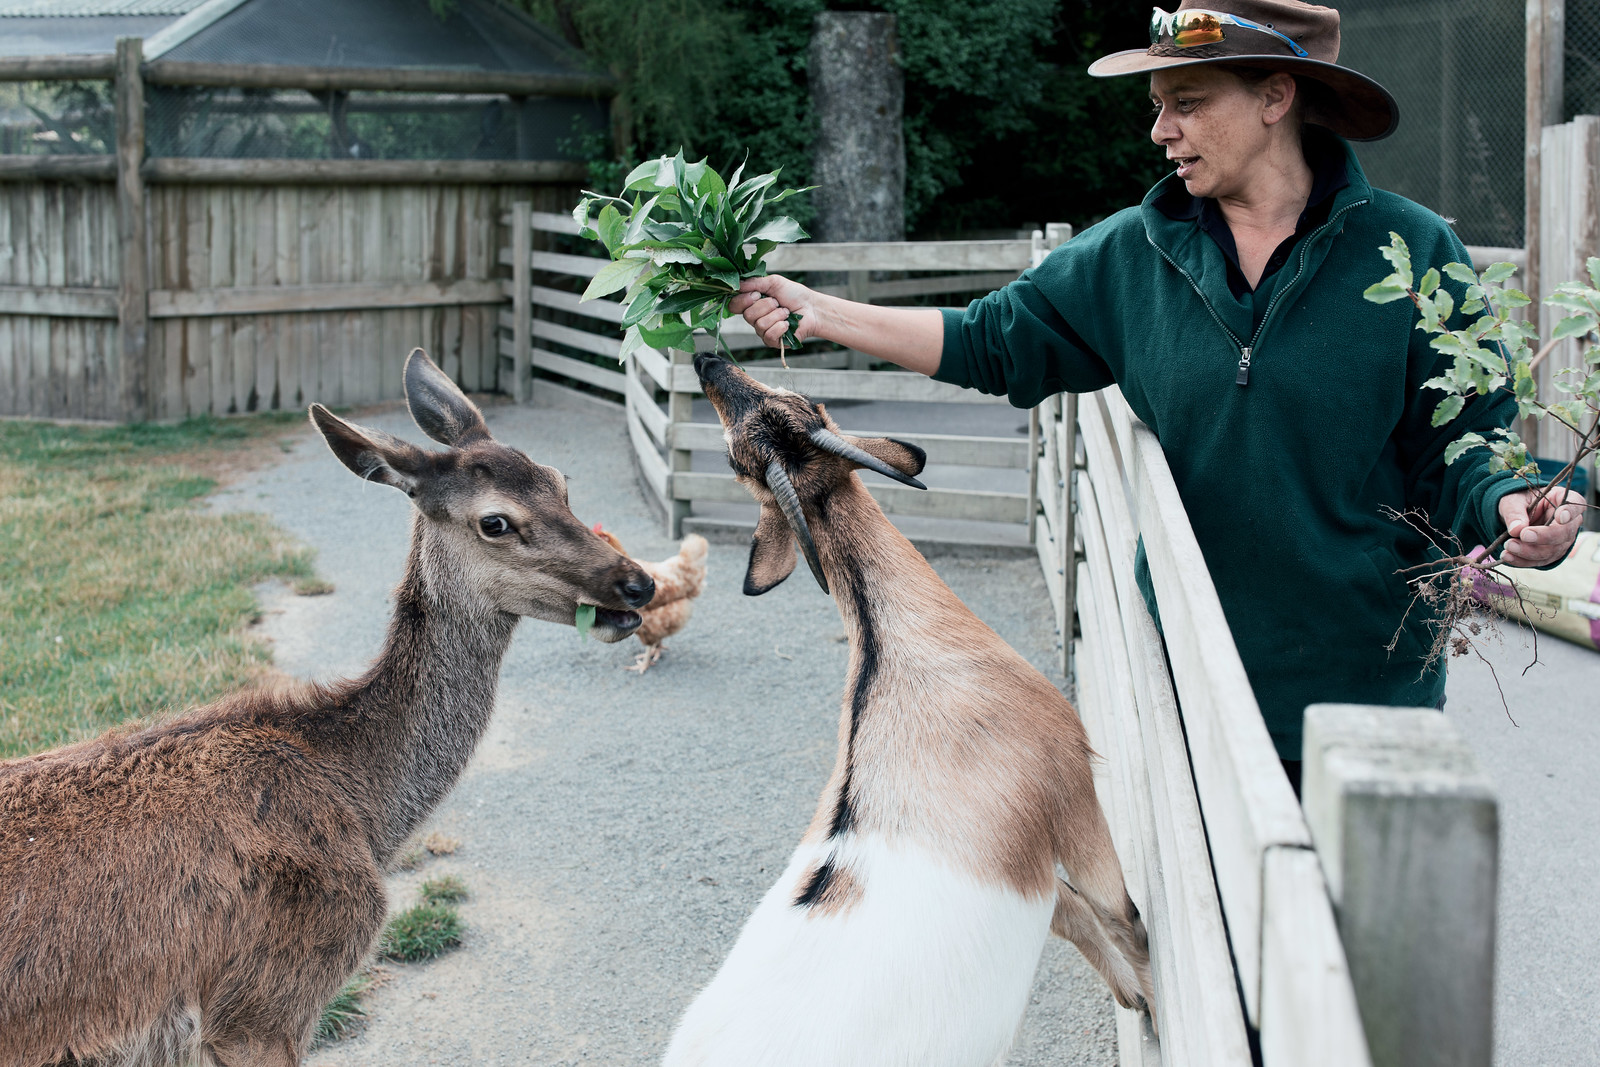
Our last full day we started with visiting a wildlife park called Paradise Valley Springs, after having another shitty night from trucks and pears thudding on the roof. We were there first thing in the morning so nobody else was around which was pretty sweet, but the farm animal section didn’t have very many animals in it and it seemed like they’d have liked some more company. We figured that it probably seems a lot more social when there are other people there.

Kea
Untitled
Feeding
Angora goat

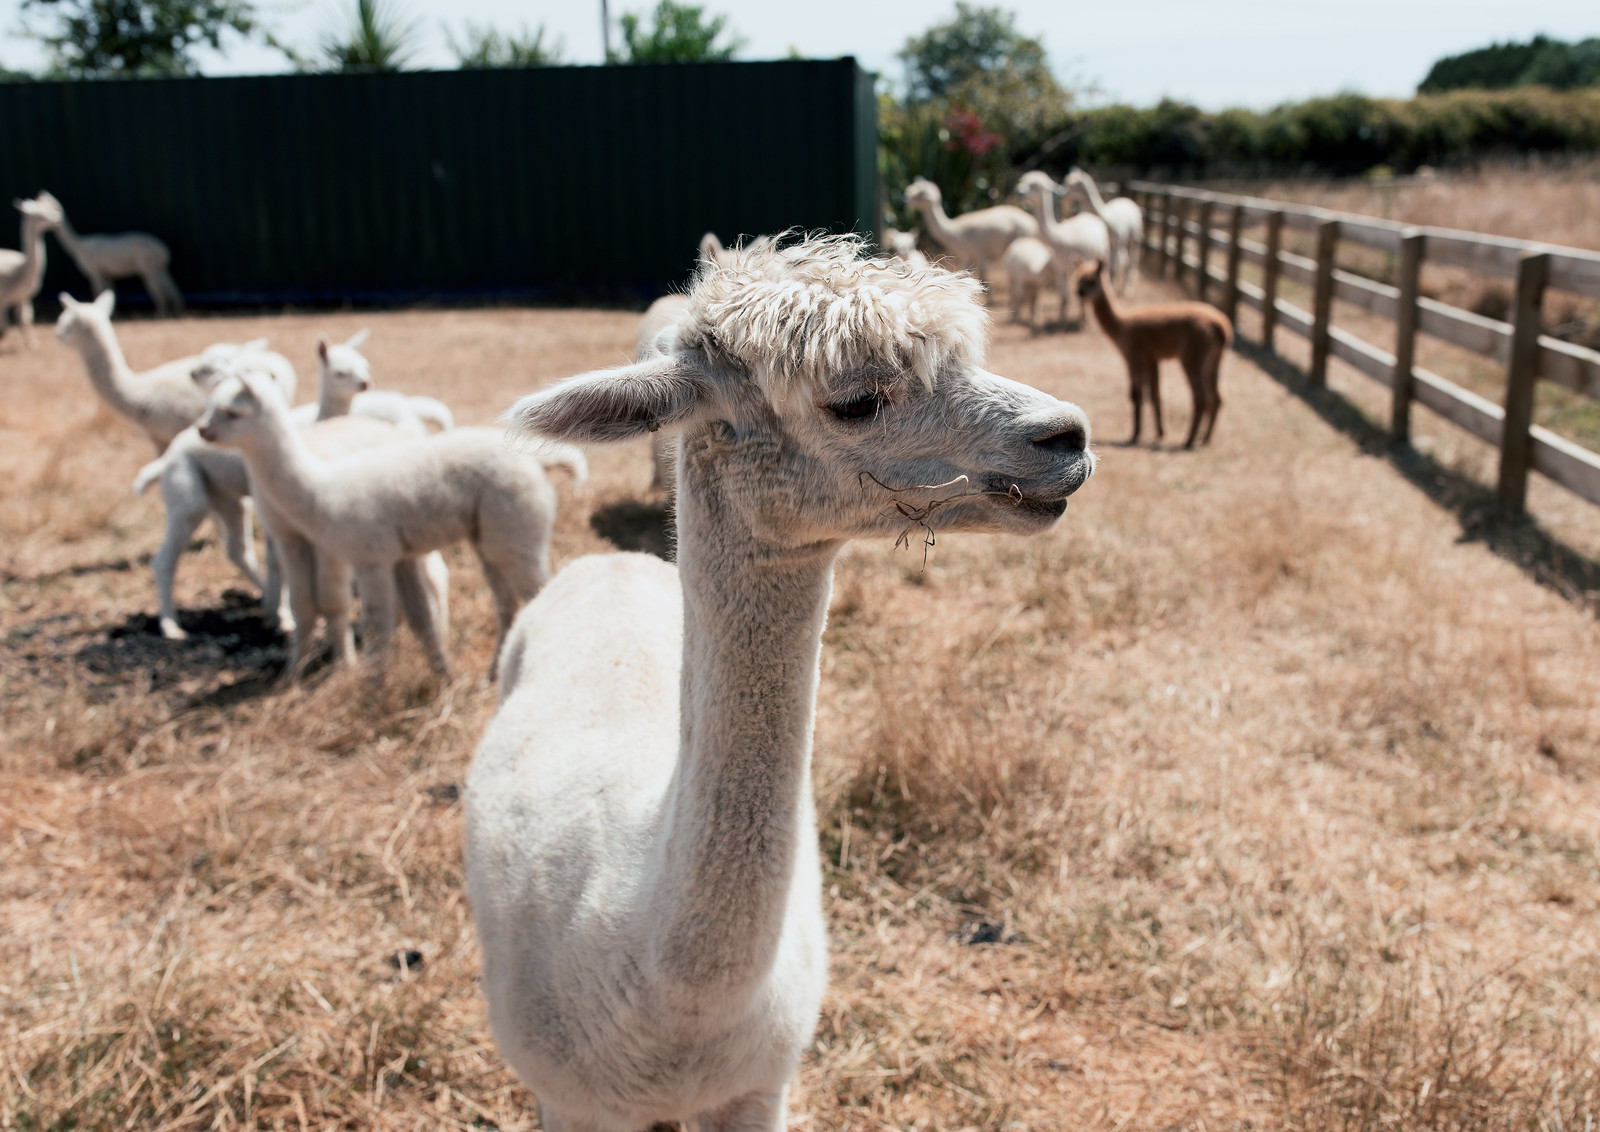
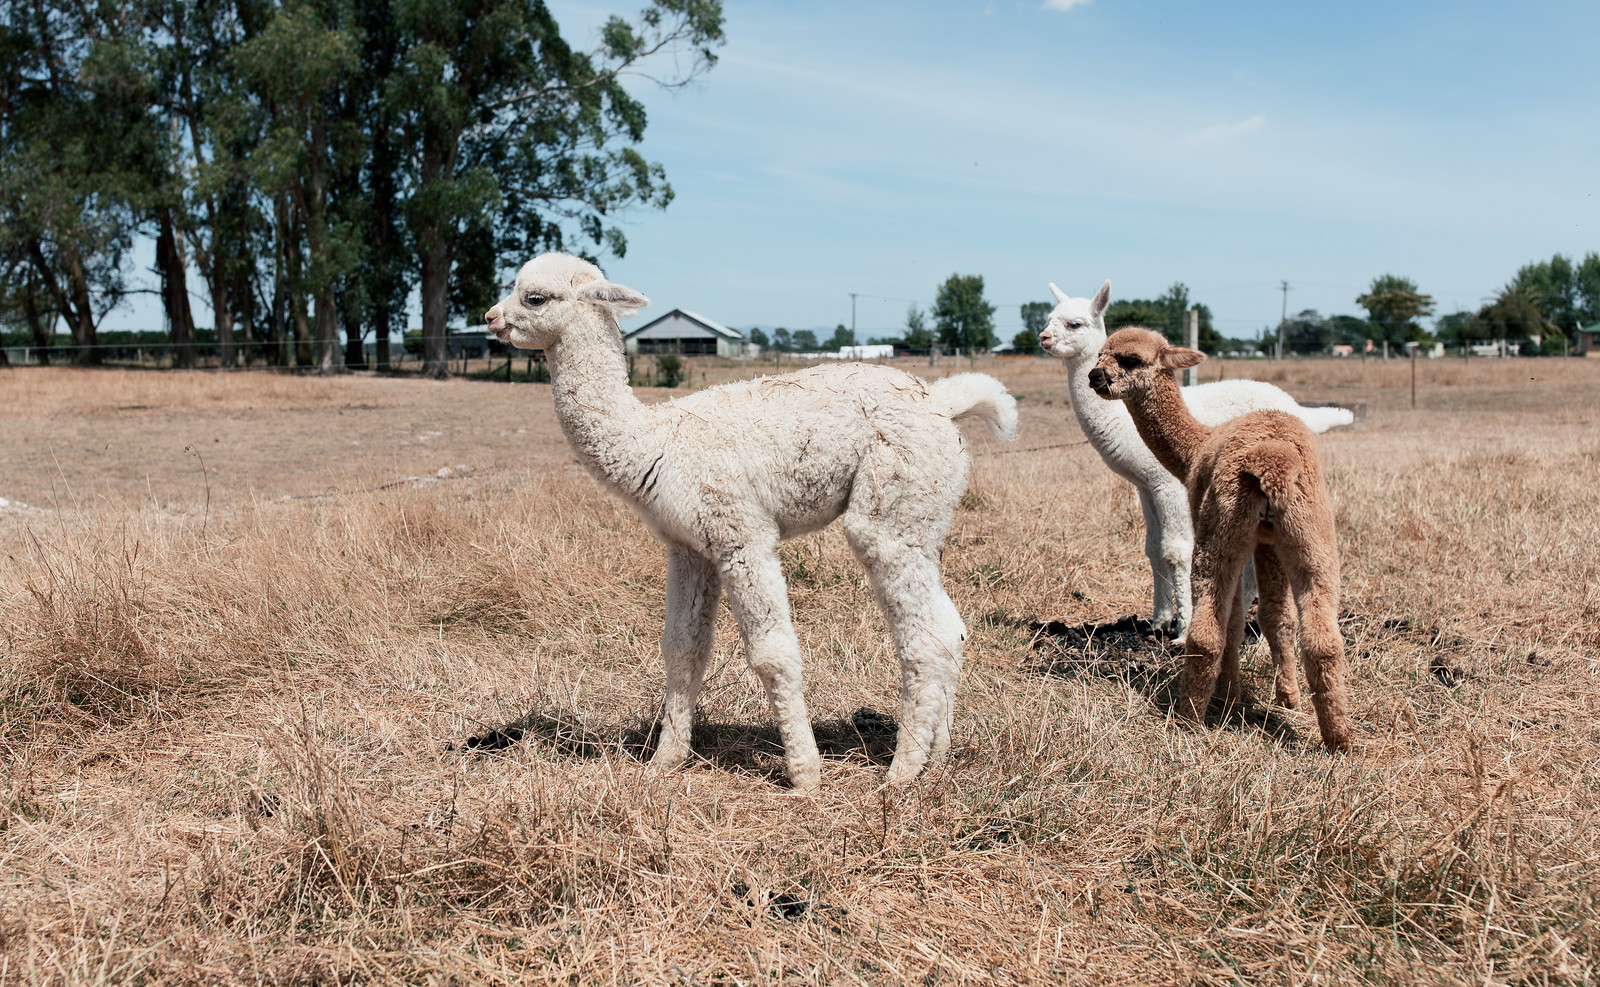
The absolute best part of the day, however, was the visit to the Cornerstone Alpaca farm that broke up the drive from Rotorua back to Auckland! They had a whole presentation before we went out to see the alpacas, which was quite interesting, and the tour consisted just of Kristina and me. They’re so soft, and very pushy about getting food, haha.

Untitled
Untitled
Untitled
Untitled
Untitled

After that, our final night was spent in a hotel in Newmarket. We wandered around and took some photos which you can see in the album above. We made a second stop at Sal’s for dinner, and afterwards were poking around the cable TV channels in the hotel to see what was on, ended up watching the first game of the T20 England versus South Africa cricket match, and Kristina ended up quite enjoying it! I was explaining the rules as we went along and she’s pretty well got the hang of it now, to the point that we’ve at least temporarily subscribed to Foxtel Now to be able to watch more T20 games, hahah.

Our flight back to Sydney on the sixth day didn’t leave until 4pm so we went to the Auckland Museum to kill time after we checked out from the hotel, and it was actually really neat. The whole ground floor is a massive Maori and Pacific Islander exhibit with all sorts of cultural artefacts and details of their history, and on the second floor was a fascinating exhibit on volcanoes.

Next time we go back to New Zealand I reckon we’ll probably be hitting up the South Island (Te Waipounamu) again, but it was definitely a good trip — sans the terrible sleep in the middle at least, anyway.

Installing OpenWRT on a Netgear D7800 (Nighthawk X4S) router

I had blogged back in October of last year about setting up DNS over HTTPS, and it’s been very reliable, except for the parts where I’ve had to run Software Update on the Mac mini to pick up security update, and while it’s restarting all of our DNS resolution stops working! I’d come across OpenWRT a while back, which is an open-source and very extensible firmware for a whole variety of different routers, but I did a bunch of searching and hadn’t come across any reports of people fully-successfully using it on our specific router, the Netgear D7800 (also known as the Nighthawk X4S), just people having various problems. One of the reasons I was interested in OpenWRT because it’s Linux-based and extensible and I would be able to move the DHCP and DNS functionality off the Mac mini back onto the router where it belongs, and in theory bring the encrypted-DNS over as well.

I finally bit the bullet and decided to give installing it a go today, and it was surprisingly easy. I figured I’d document it here for posterity and in the hopes that it’ll help someone else out in the same position as I was.

Important note: The DSL/VDSL modem in the X4S is not supported under OpenWRT!

Installation

  1. Download the firmware file from the “Firmware OpenWrt Install URL” (not the Upgrade URL) on the D7800’s entry on OpenWRT.org.
  2. Make sure you have a TFTP client, macOS comes with the built-in tftp command line tool. This is used to transfer the firmware image to the router.
  3. Unplug everything from the router except power and the ethernet cable for the machine you’ll be using to install OpenWRT from (this can’t be done wirelessly).
  4. Set your machine to have a static IP address in the range of 192.168.1.something. The router will be .1.
  5. Reset the router back to factory settings by holding the reset button on the back of it in until the light starts flashing.
  6. Once it’s fully started up, turn it off entirely, hold the reset button in again and while still holding the button in, turn the router back on.
  7. Keep the reset button held in until the power light starts flashing white.

Now the OpenWRT firmware file needs to be transferred to the router via TFTP. Run tftp -e 192.168.1.1 (-e turns on binary mode), then put <path to the firmware file>. It’ll transfer the file and then install it and reboot, this will take several minutes.

Once it’s up and running, the OpenWRT interface will be accessible at http://192.168.1.1, with a username of root and no password. Set a password then follow the quick-start guide to turn on and secure the wifi radios — they’re off by default.

Additional dnsmasq configuration and DNS-over-TLS

I mentioned in my DNS-over-HTTPS post that I’d also set up dnsmasq to do local machine name resolution, this is very trivially set up in OpenWRT under Network > DHCP and DNS and putting in the MAC address and desired IP and machine name under the Static Leases section, then hitting Save & Apply.

The other part I wanted to replicate was having my DNS queries encrypted. In OpenWRT this isn’t easily possible with DNS-over-HTTPS, but is when using DNS-over-TLS, which gets you to the same end-state. It requires installing Stubby, a DNS stub resolver, that will forward DNS queries on to Cloudflare’s DNS.

  1. On the router, go to System > Software, install stubby.
  2. Go to System > Startup, ensure Stubby is listed as Enabled so it starts at boot.
  3. Go to Network > DHCP and DNS, under “DNS Forwardings” enter 127.0.0.1#5453 so dnsmasq will forward DNS queries on to stubby, which in turns reaches out to Cloudflare; Cloudflare’s DNS servers are configured by default. Stubby’s configuration can be viewed at /etc/config/stubby.
  4. Under the “Resolv and Hosts Files” tab, tick the “Ignore resolve file” box.
  5. Click Save & Apply.

Many thanks to Craig Andrews for his blog post on this subject!

Quality of Service (QoS)

The last thing I wanted to set up was QoS, which allows for prioritisation of traffic when your link is saturated. This was pretty straightforward as well, and just involved installing the luci-app-sqm package and following the official OpenWRT page to configure it!

Ongoing findings

I’ll update this section as I come across other little tweaks and changes I’ve needed to make.

Plex local access

We use Plex on the Xbox One as our media player (the Plex Media Software runs on the Mac mini), and I found that after installing OpenWRT on the router, the Plex client on the Xbox couldn’t find the server anymore despite being on the same LAN. I found a fix on Plex’s forums, which is to go to Network > DHCP and DNS, and add the domain plex.direct to the “Domain whitelist” field for the Rebind Protection setting.

Xbox Live and Plex Remote Access (January 2020)

Xbox Live is quite picky about its NAT settings, and requires UPnP to be enabled or you can end up with issues with voice chat or gameplay in multiplayer, and similarly Plex’s Remote Access requires UPnP as well. This isn’t provided by default with OpenWRT but can be installed with the luci-app-upnp and the configuration shows up under Services > UPnP in the top navbar. It doesn’t start by default, so tick the “Start UPnP and NAT-PMP service” and “Enable UPnP” boxes, then click Save & Apply.

Upgrading to a new major release (February 2020)

When I originally wrote this post I was running OpenWRT 18.06, and now that 19.07 has come out I figured I’d upgrade, and it was surprisingly straightforward!

  1. Connect to the router via ethernet, make sure your network interface is set to use DHCP.
  2. Log into the OpenWRT interface and go to System > Backup/Flash Firmware and generate a backup of the configuration files.
  3. Go to the device page on openwrt.org and download the “Firmware OpenWrt Upgrade” image (not the “Firmware OpenWrt Install” one).
  4. Go back to System > Backup/Flash Firmware, choose “Flash image” and select your newly-downloaded image.
  5. In the next screen, make sure “Keep settings and retain the current configuration” is not ticked and continue.
  6. Wait for the router light to stop flashing, then renew your DHCP lease (assuming you’d set it up to be something other than 192.168.1.x like I did).
  7. Log back into the router at http://192.168.1.1 and re-set your root password.
  8. Go back to System > Backup/Flash Firmware and restore the backup of the settings you made (then renew your DHCP lease again if you’d changed the default range).

I had a couple of conflicts with files in /etc/config between my configuration and the new default file, so I SSHed in and manually checked through them to see how they differed and updated them as necessary. After that it was just a case of re-installing the luci-app-sqm, luci-app-upnp, and stubby packages, and I was back in business!

A painting table upgrade

I’ve posted previously about my mobile painting table setup (one, two) but one downside it’s always had is the table light I was using. It was nice and bright, but fairly harsh — at certain angles it’s very easy to be working in your own shadow — and because it was a halogen bulb it would get really hot, which in summer is decidedly unpleasant, even when inside with the air conditioning going.

I’d wanted to take advantage of LED strip lights for a while now to construct some sort of lighting system over the top of the table, and I decided that the Christmas break would be a good time to do it. We went to Bunnings today, and a bit of wood-cutting, drilling, screwing, and attaching later, I’m very pleased with the result!

The lights are Arlec attachable LEDs, they come in a 3-metre-long strip with adhesive tape on the back of them, and you can even cut them at specific points and use the included joiner cable to join the two pieces together. Unfortunately the connection is very finicky, and I wasn’t able to properly attach the ends of the joiner cable to the wood as I’d wanted because at the angle I need the other half of the light strip cuts out. 🙁 Hence the dodgy cable tie that you can just see at the left of the photo above. As long as I don’t jostle or move it it works fine though.

It casts a really nice even light, and while I think it might actually be a little bit dimmer than the old light, the lack of harsh shadows more than makes up for it — and if I decide in future that it’s too dim, I can just get some more LED lights and hook them up!

Coding my own personal version of Facebook’s Memories feature

I deleted my Facebook account way back somewhere around 2009, but the one thing that Kristina shows me that I think is a neat idea is the “memories” feature, where it shows posts from previous years on that day in particular. I realised I could very much code something up myself to accomplish the same thing, given I have Media posts going back to 2009.

And so I did! By default it’ll show all posts that were made on this exact same date in each previous year (if any), excluding today’s, and you can also pick an arbitrary date and view all posts on that date for each previous year as well.

I was originally going to have it send me an email each day, but I quickly realised I couldn’t be bothered dealing with HTML emails and so it ended up in its current state. It’s not perfect, I’m still wrestling with timezones — if you view the main Memories page before 11am Sydney time, you’ll get yesterday’s date because 11am Sydney time is currently when the day switches over to the new day when it’s UTC time. If I do specify a Sydney time in my code, the automated tests fail on Bitbucket Cloud because they’re all running in UTC. I’m sure it’s fixable, I just haven’t had the brain capacity to sit down and work it out. 😛 Between this and my tag browser, it’s been pretty fun seeing old posts I’d forgotten about.

Update 21st December: I found these two posts about timezones in Postgres, and between them and firing up two Docker containers in UTC time for testing — one for Postgres and one for my code — I managed to get it fully working! 🎉